Getting Started with Gatsby: Build Your First Static Site

Thinking about investing in the Jamstack ecosystem? If your answer is yes, then Gatsby — one of the most popular, powerful Jamstack static site generators around — could be just what you’re looking for. Here’s our guide to getting started with Gatsby.
JAM stands for JavaScript, APIs, and Markup. In other words, while the dynamic parts of a site or app during the request/response cycle are taken care of by JavaScript in the client, all server-side processes take place using APIs accessed over HTTPS by JavaScript, and templated markup is prebuilt at deploy time, often using a static site generator. That’s the Jamstack. It’s performant, inexpensive to scale and offers better security and a smooth developer experience.
Why Use a Static Site
The static site model doesn’t fit all kinds of projects, but when it does it has a number of advantages. Here are a few of them.
Speed
The time it takes a website to load in the browser as the request is made for the first time is an important factor for user experience. Users get impatient very quickly, and things can only get worse on slow connections. A lack of database calls and the content being pre-generated make static sites really fast-loading.
A static site is made of static files which can be easily served all over the world using content delivery networks (CDNs). This makes it possible to leverage the data center that’s closer to where the request is being made.
Simplified Hosting
Hosting for static sites can be set up in a snap. Because there’s no database or server-side code, special languages or frameworks to support, all the hosting has to do is to serve static files.
Better Security
Without server-side code or a database, there isn’t anything for hackers to hack. There’s no hassle keeping the server up to date with security fixes and patches. All this means a lot more peace of mind when it comes to the security of your website.
Better Developer Experience
Setting up your static website with a hosting company like Netlify or Vercel is straightforward and, with continuous deployment, you just push your changes to your code repo of choice and they’re immediately reflected in the live version.
What Is Gatsby?
Gatsby is one of the most popular tools for building websites today. It’s more than a static site generator. In fact, it is a “React-based, open-source framework for creating websites and apps.” As Gatsby is built on top of React, all the React goodness is at your fingertips, which enables you to take advantage of this powerful library to build interactive components right into your static website. Gatsby is also built with GraphQL, so you can query data and display it on your website any way you want.
Installing Gatsby and Creating Your Project
Gatsby is put together using webpack, but you don’t need to worry about complicated set-up maneuvers; Gatsby CLI will take care of everything for you.
For this tutorial, I’ll assume you have Node.js installed locally. If this isn’t the case, then head over to the Node home page and download the correct binaries for your system. Alternatively, you might consider using a version manager to install Node. We have a tutorial on using a version manager here.
Node comes bundled with npm, the Node package manager, which we’re going to use to install some of the libraries we’ll be using. You can learn more about using npm here.
You can check that both are installed correctly by issuing the following commands from the command line:
node -v
> 12.18.4

npm -v
> 6.14.8
The first thing you need to do is install the Gatsby CLI. This is an npm package that lets you create a Gatsby site in a few seconds. In your terminal, write:
npm install -g gatsby-cli
With the Gasby CLI installed on your machine, you can go ahead and create your website. I’ll call it sitepoint-demo, but you’re free to call it whatever you like. In your terminal, type:
gatsby new sitepoint-demo
Once Gatsby CLI has installed all the necessary files and configured them appropriately, you’ll have a fully functioning Gatsby website ready for you to customize and build upon. To access it, move into the sitepoint-demo folder:
cd sitepoint-demo
and start the local server:
gatsby develop
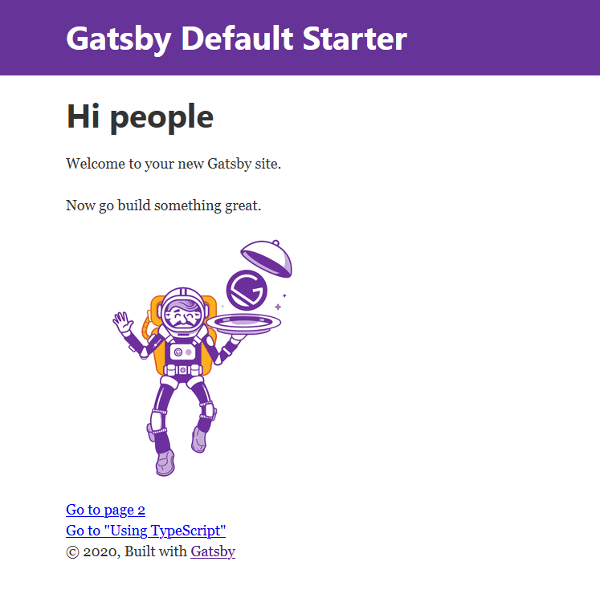
Finally, open a window on http://localhost:8000 where you’ll find your shiny Gatsby site looking something like this:
To quickly get a website up and running, Gatsby takes advantage of several official starter boilerplates as well as starters offered by the strong community around it. The site you’ve just created uses Gatsby default starter, but you can find plenty more on the Gatsby website.
If you’d like to use a different starter from the default one, you need to specify its URL in the command line, following this pattern:
gatsby new [SITE_DIRECTORY_NAME] [URL_OF_STARTER_GITHUB_REPO]
For instance, let’s say you’d like a Material Design look and feel for your site. The quickest way to create it is to use Gatsby Material Starter by typing the following command in your terminal:
gatsby new sitepoint-demo https://github.com/Vagr9K/gatsby-material-starter
Great! Now let’s take a look at the files inside your brand new Gatsby project.
A Tour Inside Your Gatsby Site
A good place to start is the /src/ directory. Here’s what you’ll find.
pages Directory
The /src/pages/ directory contains your site’s pages. Each page is a React component. For instance, your site’s home-page code is located in /pages/index.js and looks like this:
import React from "react"
import { Link } from "gatsby"
import Layout from "../components/layout"
import Image from "../components/image"
import SEO from "../components/seo"

const IndexPage = () => (
<Layout>
  <SEO title="Home" />
  <h1>Hi people</h1>
  <p>Welcome to your new Gatsby site.</p>
  <p>Now go build something great.</p>
  <div style={{ maxWidth: `300px`, marginBottom: `1.45rem` }}>
    <Image />
  </div>
  <Link to="/page-2/">Go to page 2</Link>
  <Link to="/using-typescript/">Go to "Using TypeScript"</Link>
</Layout>
)

export default IndexPage
That’s the typical code for a React component.
Components let you split the UI into independent, reusable pieces, and think about each piece in isolation. … Conceptually, components are like JavaScript functions. They accept arbitrary inputs (called “props”) and return React elements describing what should appear on the screen. — React docs.
components Directory
The /src/components/ directory is where you find general components for your website. The default starter comes with the following components: Header (header.js), Image (image.js), Layout (layout.js), and SEO (seo.js). You’re free to customize these components and add your own to the same directory.
Now you’re ready to start making changes to your new site and customize it to your taste.
How to Make Changes to Your Gatsby Site
Let’s have a go at modifying the message displayed on the home page. Open pages/index.js in your code editor and replace the two paragraphs below the <h1> tag with this paragraph:
<p>Welcome to my SitePoint Demo Site!</p>
Of course, you can add any text you want between the <p> tags.
As soon as you hit Save, your changes are displayed in the browser thanks to Gatsby’s hot reloading development environment. This means that when you develop a Gatsby site, pages are being watched in the background so that when you save your work, changes will be immediately visible without needing a page refresh or a browser restart.
Gatsby makes it easy to add new pages. For instance, let’s add an About page by creating a new file, about.js, inside the /pages/ directory and enter this content:
import React from "react"

const AboutPage = () => <h1>About Me</h1>

export default AboutPage
The code above is a React functional component which displays some text.
Save your work and navigate to http://localhost:8000/about and you should see the About Me <h1> title on your screen.
You can quickly link to your new About page from the home page using the Gatsby Link component. To see how it works, open index.js in your code editor and locate this bit of code just before the </Layout> closing tag:
<Link to="/page-2/">Go to page 2</Link>
Next, replace the value of the to property with /about/ and the Go to page 2 text with About:
<Link to="/about/">About</Link>
Save your work and you should see your new link on the screen. Click on the About link and instantly you’re on the About page.
Gatsby uses the Link component for internal links. For external links, you should use the good old <a> tag, like you would on a regular vanilla HTML website.
Now, let’s experiment with your Gatsby site’s look and feel by changing a few styles.
Styling Your Gatsby Site
Gatsby offers a number of options for applying style rules to your website.
Global Stylesheet
A familiar choice is to use a global .css file which contains rules that apply to the entire website. To get started, add a /styles/ directory inside the /src/ directory and add a global.css file to it: /src/styles/global.css . You’re free to choose any name you like both for the directory and the style-sheet file. Inside global.css, add the following CSS declaration, which is going to be applied to the entire website:
body {
  background-color: yellow;
}
Now, save your work. Oops, nothing happened! Not yet, anyway. To make it work you need to take an extra step. Open gatsby-browser.js in your code editor and import the stylesheet you’ve just created:
import "./src/styles/global.css"
Head back to your browser and you should see that the background color of your website has turned into a bright yellow. Not ideal as a color choice, but it works!
Global Styles with a Shared Layout Component
Although adding a global stylesheet and importing it into gatsby-browser.js works just fine, the recommended way of adding global styles to your Gatsby website is by using a shared layout component. The Gatsby Default Starter comes with this component and its related style sheet out of the box.
To see how it works, let’s delete the above import statement from gatsby-browser.js and save the file. You should see your website’s background revert to white. Then, open layout.js and layout.css in your code editor (you’ll find both files inside the components/ directory).
At the top of layout.js, notice the import statement, which makes the CSS rules contained in layout.css available to the shared Layout component and therefore to the entire website:
import "./layout.css"
In layout.css, locate the CSS declaration for the body element. It should be around line 8. This is what it looks like:
body {
  margin: 0;
  -webkit-font-smoothing: antialiased;
  -moz-osx-font-smoothing: grayscale;
  color: hsla(0, 0%, 0%, 0.8);
  font-family: georgia, serif;
  font-weight: normal;
  word-wrap: break-word;
  font-kerning: normal;
  -moz-font-feature-settings: "kern", "liga", "clig", "calt";
  -ms-font-feature-settings: "kern", "liga", "clig", "calt";
  -webkit-font-feature-settings: "kern", "liga", "clig", "calt";
  font-feature-settings: "kern", "liga", "clig", "calt";
}
Now add a rule for the background color, something like this:
background-color: yellow;
Save your work, and you should see your website’s background color turn yellow once again.
Component-scoped Styles: CSS Modules
A CSS Module is a CSS file in which all class names and animation names are scoped locally by default.
With CSS modules, your styles get applied only to a specific component, which helps to keep components self-contained and therefore easy to maintain and reuse.
CSS Modules comes bundled with Gatsby out of the box and the docs recommend this way of adding styles to Gatsby components and React components in general.
Follow these steps to add a fancy paragraph component to your About page.
Create the Fancy Paragraph Component
Inside the /components/ directory of your Gatsby Default Starter-based project, create a file and call it fancy-paragraph.js.
Open fancy-paragraph.js in your code editor and enter the following code:
import React from "react"
import fancyParagraphStyles from "./fancy-paragraph.module.css"

const FancyParagraph = (props) => <p className={fancyParagraphStyles.fancy}>{props.paragraphText}</p>

export default FancyParagraph
This is a simple React functional component — nothing new except for the statement that imports the fancy-paragraph CSS module, which we haven’t created yet.
The component uses the styles contained in the fancy-paragraph module as a value inside the className property. As you can see, that value looks very much like a regular JavaScript object that uses .fancy, which is the name of the class, as the fancyParagraphStyles object’s property. You’ll write the styles for this class in your CSS module.
Create the Fancy Paragraph CSS Module
Inside /components/, create another file and call it fancy-paragraph.module.css. Open this file and style the .fancy class any way your fancy takes you. It’s just regular CSS. This is what mine looks like:
.fancy {
  font-size: 1.5rem;
  text-align: center;
  line-height: 1.2;
  padding: 0.5rem;
  color: #fff;
  background-color: rebeccapurple;
  font-weight: 800;
  font-style: italic;
  text-transform: uppercase;
}
Now, you’re ready to use your FancyParagraph component with your fancy styles anywhere on your Gatsby site.
Let’s add a fancy paragraph to your About page.
Add the Fancy Paragraph Component to the About Page
Start by adding these two import statements to your About page, just below the already existing React import:
import Layout from "../components/layout"
import FancyParagraph from "../components/fancy-paragraph"
The snippet above makes the Gatsby Layout component, which you’re going to use in your About page, and the Fancy Paragraph component you’ve just created available to your About page.
Next, modify your AboutPage functional component to look like this:
const AboutPage = () => (
<Layout>
 <h1>About Me</h1>
 <FancyParagraph paragraphText="Styled with CSS Modules." />
</Layout>
)
Your new component works just like any other React component. Simply slap it on the page, in the exact location you want it to appear, and you’re done. This particular component leverages React props to make the paragraph text more dynamic.
Save your work and navigate to the About page, where you should see your fancy paragraph in all its glory. Mine looks like this:
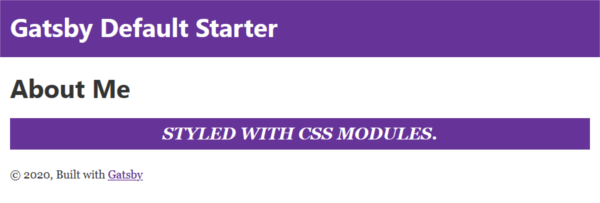
Mission accomplished!
Component-scoped Styles: Inline Styles
Inline CSS styles in the form of a JS object are an additional styling option that you can use.
Your Gatsby Default Starter-based project shows this technique in action. For instance, open index.js in your editor and locate this code inside the IndexPage component:
<div style={{ maxWidth: `300px`, marginBottom: `1.45rem` }}>
  <Image />
</div>
Notice how CSS styles are applied to the <div> that contains the Image component: styles take the form of a JS object where CSS property names are the keys and CSS values are their corresponding values.
Also, notice how compound CSS property names remove the dash (-) symbol and use the camelCase convention instead — for example, marginBottom, not the CSS margin-bottom.
Adding Content to Your Gatsby Site
Building with Gatsby comes with the added benefit of being able to grab data from virtually anywhere. As a consequence, you’re not limited to building static sites, which usually rely on Markdown, and your team can easily manage content using the back end of their choice.
A plethora of dedicated plugins enable Gatsby to pull data from multiple sources — for example, the file system, APIs, WordPress, etc. — and combine the data in one data layer that can be fed to your website.
For simple websites, it’s also possible to bypass Gatsby’s data layer and populate your site without using GraphQL or any of the source plugins. This approach, also known as the unstructured data approach, allows you fetch the data and use it in the createPage action inside the createPages API. Although fetching data from an API is familiar enough to JavaScript developers and therefore could be more attractive than using GraphQL, the downside is that doing away with the Gatsby data layer also means doing away with a lot of the benefits that it provides — such as performance, hot reloading during development, fast image optimization, and much more.
Check out this GitHub repo if you want to know more about the unstructured data approach.
Manually Entering GraphQL Queries into a Gatsby Page
If you have one or two pages with very little content that hardly changes, you can even hard-code the text straight into a Gatsby page, the way we did in the demo above.
If you need to pull simple data like the site title and description, you can enter a GraphQL query straight into a page. To do this, it helps to become familiar with GraphiQL, a GraphQL IDE (integrated development environment) for creating GraphQL queries that you can access on http://localhost:8000/___graphql.
Let’s say you want to display your site title on a page. First, make sure the title is already inside gatsby-config.js. Mine looks something like this; you can enter any title you prefer or leave the default one:
module.exports = {
  siteMetadata: {
    title: `SitePoint Demo Gatsby Site`,
    ...
  },
  ...
Next, build the GraphQL query with the help of GraphiQL. Finally, make the following changes to the starter’s page 2 page (src/pages/page-2.js), which should now look like this:
const SecondPage = ({data}) => (
  <Layout>
    <SEO title="Page two" />
    <h1>Welcome to {data.site.siteMetadata.title}</h1>
    <p>I have used a GraphQL query</p>
    <Link to="/">Go back to the homepage</Link>
  </Layout>
)

export const query = graphql`
  query testQuery {
    site {
      siteMetadata {
        title
      }
    }
  }
`
export default SecondPage
Note that we are passing a data prop to the component, which contains the results of the GraphQL query.
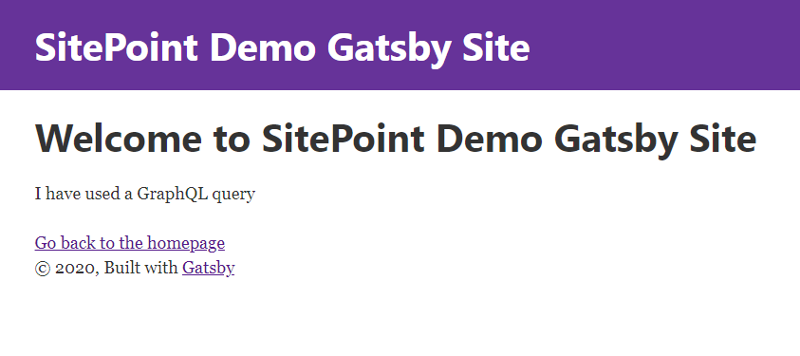
Restart your server, and you’ll then be able to see the site title displayed on page 2 (http://localhost:8000/page-2/).
However, this method only makes sense if the person who manages the content is familiar with coding. Furthermore, if you one day decide to change the text, you’ll have to go and search for the pages in your project’s directory and manually replace the content.
You can read all the details about this approach on the Gatsby docs.
Pulling Data from the File system
You can use the gatsby-source-filesystem plugin to source data into your Gatsby application from your local filesystem. This approach might be familiar to people who have worked with such static site generators as Jekyll, or Hugo.
Gatsby default starter has this plugin already installed, as you can easily verify by opening gatsby-config.js in your code editor:
plugins: [
    `gatsby-plugin-react-helmet`,
    {
      resolve: `gatsby-source-filesystem`,
      options: {
        name: `images`,
        path: `${__dirname}/src/images`,
      },
    }, ...
After sourcing the data, you’ll need a transformer plugin to help you turn the file nodes into various data types that you can consume in your site — for example, gatsby-transformer-json for JSON data, gatsby-transformer-remark for Markdown files, and so on.
Find all the details in this section of the Gatsby docs.
If you opt for Markdown files as your data source for your Gatsby site, you’ll have the option of embedding JSX reusable components into the text using gatsby-plugin-mdx, a Gatsby plugin that adds MDX support to your site. Here are the benefits:
This is useful in content-driven sites where you want the ability to introduce components like charts or alerts without having to configure a plugin. It emphasizes composition over configuration and really shines with interactive blog posts, documenting design systems, or long form articles with immersive or dynamic interactions. — Gatsby docs.
Headless CMS
CMS stands for content management system. A traditional CMS offers both back-end and front-end functionality. A headless or decoupled CMS confines itself to the back end only, thereby leaving all front-end concerns to the developers’ preferences. This arrangement is ideal for a site generator like Gatsby, since it allows the content team members to still use their favorite admin interface while the developers take full advantage of the benefits of using Gatsby, React, and GraphQL.
Popular CMS platforms like WordPress, Drupal, Contentful, Sanity, and many more, offer headless support and the Gatsby ecosystem makes available the appropriate plugins and guides to help you with the integration.
Check out this article from the Gatsby docs to learn more about pulling data from your CMS of choice.
Deploying Your Gatsby Site
There are companies that make it super quick and convenient to host static websites. Among the most popular are:
Deploying Your Gatsby Website to Netlify
Let’s use Netlify to launch your brand new Gatsby website. Netlify provides “an all-in-one workflow that combines global deployment, continuous integration, and automatic HTTPS.”
It works great for hosting static websites.
First, you need to create a production build of your Gatsby project. To do so, enter the following command in your terminal:
gatsby build
Now you have a folder named public containing all the static files your website needs to run in the browser.
The next step consists of getting your Gatsby project into a repository like GitHub. Netlify supports GitHub, GitLab, or Bitbucket: each time you push changes to your code, Netlify runs a build with your chosen tool and deploys the results to its fast-loading CDN.
To get started, just log in to Netlify, select New site from Git, choose your repository, enter your build command and the name of your public folder, then click Deploy site.
You can review the deployment process in detail in this article on the Gatsby docs website.
Congratulations, your Gatsby website is live!
A Bit More on the Build Process
Running the build command before deployment creates a production version of your Gatsby-powered website with all the required optimizations needed for high performance and a great user experience. The static HTML pages that Gatsby creates during this process, in turn, get rehydrated into a React application. This means that, as Gatsby pages run into a web browser, JavaScript code is downloaded, thereby enabling DOM manipulation etc. In other words, your site becomes a full-blown React app.
You can read the details on the Gatsby docs.
The Gatsby Cloud
In 2019, Kyle Mathews, founder of Gatsby, announced the launch of Gatsby Cloud. In his words, Gatsby Cloud is
a commercial platform of stable, trusted tools that enable web creators to build better websites. Gatsby Cloud enhances our content mesh platform with interoperable, out-of-the-box solutions to launch websites faster, and drive business success. — Announcing Gatsby Cloud
In other words, Gatsby Cloud is a cloud-based infrastructure that offers tons of benefits as you create, update and deploy your Gatsby website. Features include:
- Cloud Quickstart, which enables non-technical users to create projects in minutes using a CMS, some dummy content, and a Gatsby starter.
- Real-time Preview, which is great for previewing changes in real time and in context, thereby facilitating communication and collaboration among team members working on your website.
- CMS Integrations, which is quick and painless, leveraging plugins available for hundreds of content management systems and APIs.
- Incremental Builds, a Gatsby Cloud feature introduced in April 2020. When data changes in your CMS of choice, Incremental Builds will rebuild only what’s required, with significant performance gains as a consequence.
And there’s lots more …
Gatsby Plugins
Many of Gatsby’s superpowers derive from plugins. Gatsby plugins are Node.js packages that you can install in your project using npm. The Gatsby ecosystem offers a ton of plugins that let you do pretty much anything. I’ve already touched on the role of plugins for grabbing data from multiple sources and making it ready to be consumed by a Gatsby website, but there are also plugins for adding prepackaged functionality with themes, integrating third-party services like Google Analytics, automatically creating pages from React components, handling SCSS/Sass files, and so many more.
If JavaScript is your bread and butter, you can also try your hand at creating your own plugins. Check out the Gatsby plugin authoring page for more details.
Next Steps and Resources
To really master Gatsby, head over to its website and check out the official tutorial and the docs. I think they’re top notch.
Also, to get the most out of Gatsby, I recommend you get fluent with manipulating data using GraphQL. Take advantage of the awesome tutorials on the GraphQL website.
Finally, make sure you take a look at our Jamstack Foundations collections, where you’ll find our guides on the Jamstack, and Jamstack tools like Gatsby, curated to best help you learn.