Setting up WordPress on Amazon EC2

The general consensus of opinion, is that self hosting a WordPress blog is the best way forward for blogging success. It provides the most flexibility and control over your writing platform. The problem is, what happens if you don’t want to spend time setting up a hosted domain? What if you are not sure how?
That might be the time to consider a hosted solution in the cloud. Hosting WordPress in the cloud means that all the server/database requirements are looked after for you. All you have to do is start creating your content. Well, nearly. There will be a small amount of setting up to do.
In this article I’m going to show you how to set up a WordPress blog using the popular Amazon EC2 cloud, with a little help from BitNami.
The Amazon What?
Here is what it says about EC2 on the Amazon Web Services web site:
“Amazon Elastic Compute Cloud (Amazon EC2) is a web service that provides resizable compute capacity in the cloud. It is designed to make web-scale computing easier for developers.”
Yes, and with some help from BitNami, you don’t even need to be a developer:
“BitNami provides free, ready to run environments for your favourite open source web applications and frameworks, including Drupal, Joomla!, WordPress, PHP, Rails, Django and many more.”
So what that means is, we can get ourselves an Amazon Web Services account, and then use that to host a Bitnami WordPress installation. Then you’ll be writing in the cloud in no time.
So first, get an Amazon Web Services Account – it’s free
Point your browser at http://aws.amazon.com and click the “Sign Up” button. You can run a micro server for 1 year free at the moment, so be sure and choose the “I am a new user” option. Don’t confuse this Amazon account with your Amazon retail account. The AWS system is completely different.
You will then go through a typical sign up form, and you will be prompted to enter credit card information. However, you will not be charged for the first year if you run a single micro server.
The final part of the account sign up involves Amazon’s automated service phoning you on the number you provided in the contact details section. It will ask you to either type, or say the pin number that will appear in your browser window. I found typing it didn’t work, whereas speaking it worked immediately.
You will then receive an email welcoming you to the service. It will contain links to the AWS portal where you can find the access keys you will need to use the service. We’ll get back to those shortly. First, you need an account with the BitNami cloud.
Get a BitNami cloud account
Amazon EC2 in the raw is not for the faint-hearted. There is quite a lot to learn about: how to deploy to it, and config it. Enter BitNami. By deploying to your Amazon cloud via BitNami, all the technical pain is dealt with.
You get:
- A properly configured server, with the operating system, and required software installed.
- The application(s) you want to run installed just by clicking a button.
- Any database requirements installed and configured for you.
- Automatic backups
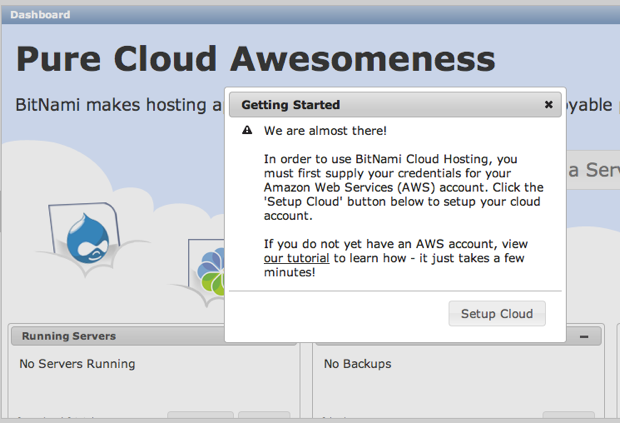
Point your browser to http://bitnami.org/cloud and sign up for an account (free). The sign up process is just like any other sign up process until you get to near the end:
Following the link to add your AWS credentials provides you with another simple form:

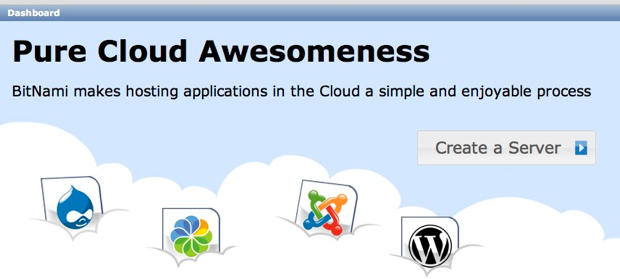
Once you have entered the required information you will be sent into the dashboard. The dashboard is where you do all of your setting up and configuring. We can now hit the big Create Server button:
Now we get to the important screen. The server configuration screen is where you choose all the settings that you require:
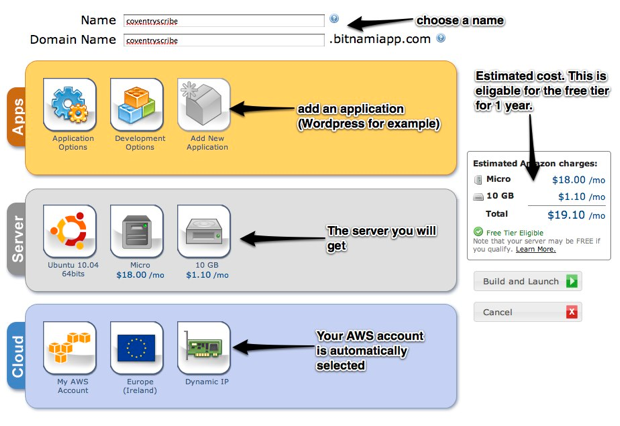
Choose an application
The first option is to choose an application:
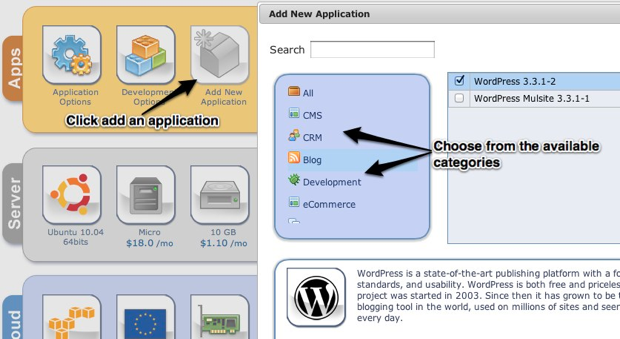
Since we are focusing on WordPress, that’s the application we’ll choose.
Set the configuration options
You can now click on the application options button to set the WordPress credentials you want to use:
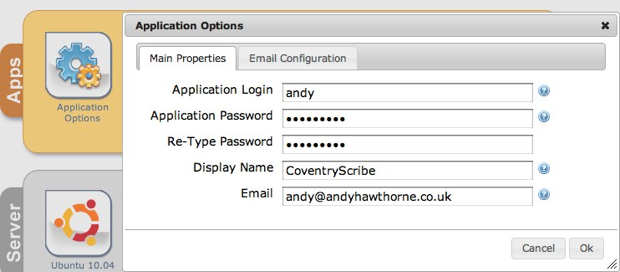
You should also add email credentials via the Email Configuration tab. This is so that you can receive emails from your WordPress site.
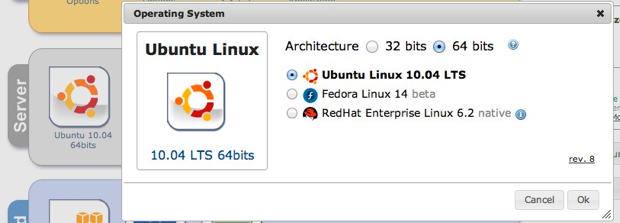
Choice of operating system
If Ubuntu is not your thing, you can choose a different Linux OS too:
Build and Launch
Now you can hit the build and launch button, and go and have a cup of tea. Bitnami will now create your server and set it running for you. You even get a nice email from them once your server is up and running.
Access your server
Click on view in the running servers section of your dashboard, and your new web site will open in a new browser tab:
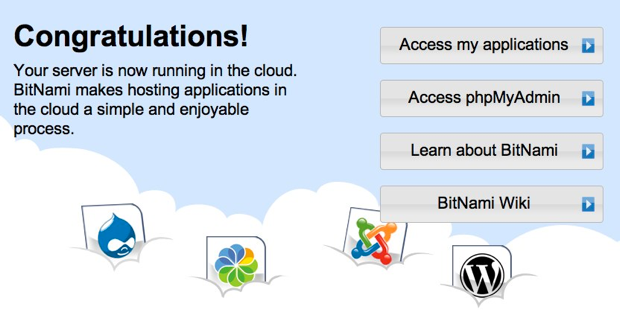
Click Access my applications and you will be presented with the installed applications page:

Click the Access link, and there, in all its glory, will be your WordPress installation. Add ‘wp-admin’ to the url in the address bar, and you can access the normal WordPress administration panel.
Shell Access
If you wish to access your server via SSH, you can, after you have completed a couple of import tasks:
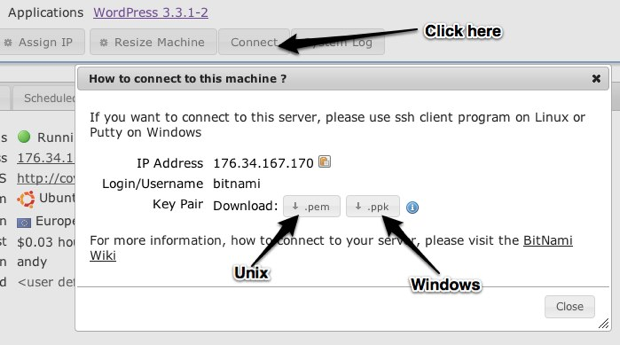
1. Get your key pair
Download your key pair from the manage server section of your Bitnami web admin area:
2. Set permissions
You will need to set the permissions on the file you have downloaded, so in the console/terminal do:
chmod 666 bitnami-hosting.pemThant will ensure that only you have read/write access.
If you are on Windows, follow the advice in the Bitnami wiki.
Make sure you put the .pem file somewhere easy to remember!
3. Connect over ssh
In the console/terminal you can then connect with:
ssh -i bitnami-hosting.pem bitnami@your-chosen-site-name.bitnami.comYou will then have shell access to your server. Though, there is no particular reason that you need to do this as most of the common server management tasks can be carried out from the web admin area in your Bitnami account. But if you like to dabble in the more technical side of things, you have shell access to achieve that.
Finally…
It is probably wise to take a breath and think through want we have here. A full WordPress installation hosted on Amazon EC2. Not only that, but it needed no real technical server knowledge to get up and running. It certainly isn’t the cheapest way to run a WordPress installation once the free year is up, but it has to be one of the most painless ways to get a fully configured Linux server up and running, and on a cloud hosting service too.