Create Rich, Detailed 3D Typography With Photoshop CS6

Photoshop has always been a great tool for creating cutting-edge imagery. You can merge images together, create digital artwork, matte paintings, correct images, or create just about any type of artwork from scratch. 3D was integrated in the previous version of Photoshop, but in Photoshop CS6, the 3D menus have been completely overhauled. Creating things like 3D typography are even easier, and you have much more control than ever before.
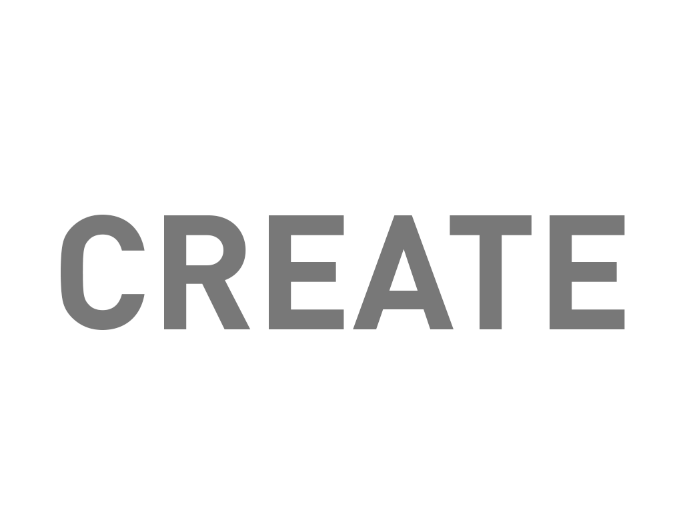
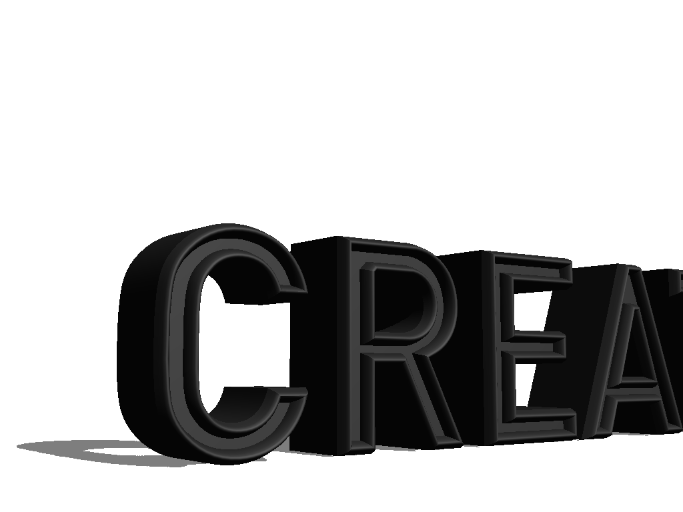
To start building 3D typography, select a typeface with fairly large stroke widths. Typically, sans serif typefaces work best, and if a bold weight is available, that is even better. I chose DINPro and typed the word “Create.” When creating your text for 3D purposes, it is best that the color is roughly 50% grey instead of black or white, because a neutral makes it easier to create light and shadows. If you create it using black, then the 3D version will be black as well, making the shadows and highlights harder to see and control.
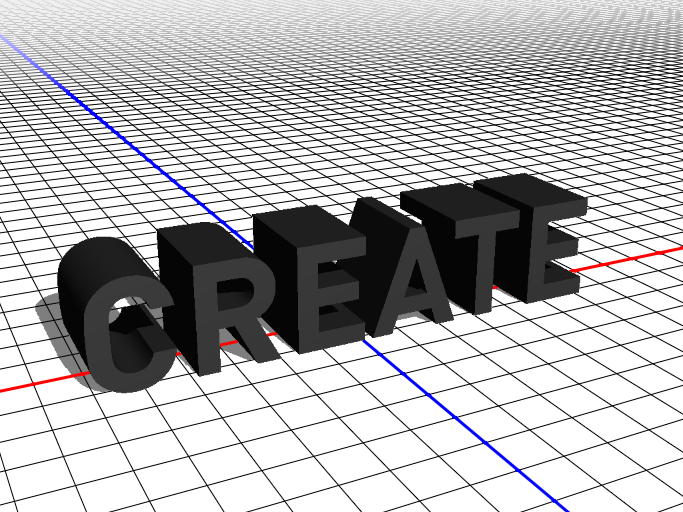
To turn a flat layer into a 3D layer, simply go to “3D” > “New 3D Extrusion From Selected Layer.” Below is a shot of the default view when you first enter 3D mode. The window in the top-left corner gives you a bird’s eye view of your 3D text.

The default tool will allow you to pan around the text within a 3D workspace. This will allow you to adjust the angle of the overall design. If you hold the Option/Alt Key, you will be able to rotate your 3D object clockwise or counter-clockwise. You can see in the example below that I rotated the text so that is is set at a slight angle.
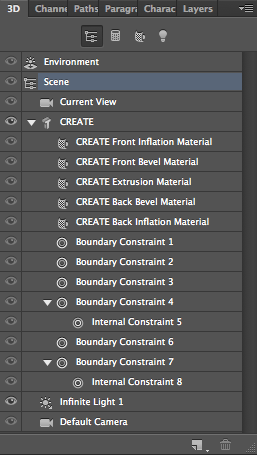
Below is a shot of the 3D Panel, where you will plug in all of the settings that will create your 3D text. The different parts in the panel below control the inflation material, which is the material that makes up the sides of the 3D object. The bevel material is what makes up the beveled edges if you have them on your object. At the bottom, you can see the lighting and the camera positioning as well.

Still referring to the image above, the four icons at the top of the panel break down the different parts into sections. The first icon shows all scene elements, the second one shows all of the bevel and extrusion, the third one shows all of the materials (such as textures), and the fourth icon shows all of the lights.
If you double-click the CREATE layer with the “T” symbol next to it, a set of options and controls will come up in the properties panel. The extrusion depth slider determines how deep our 3D shape will be. Notice that you can also alter the color of the text in the bottom right swatch option.
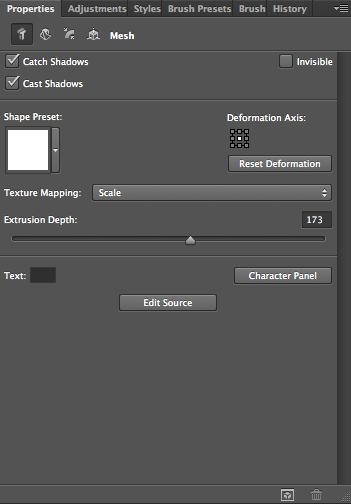
The Shape Preset option will allow you to determine how you want the text to be shaped overall. presets include a rounded front face, an overall twisted shape, concave, curly-q, and many more.

You can control the way that your text tapers or bends within the deform section (the second icon). You can determine the extrusion depth here as well, and the first two options — twist and taper — do just what they say; they twist your text and taper it from either front to back or back to front. “Bend” folds the text in on itself vertically and horizontally. “Shear” will actually shear, or angle the extrusion.
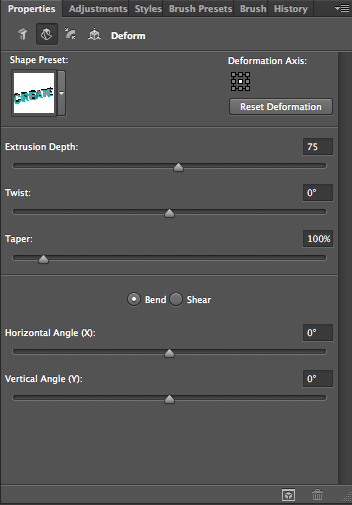
Below, I set the horizontal angle for the bend options to 90°, giving the example below.

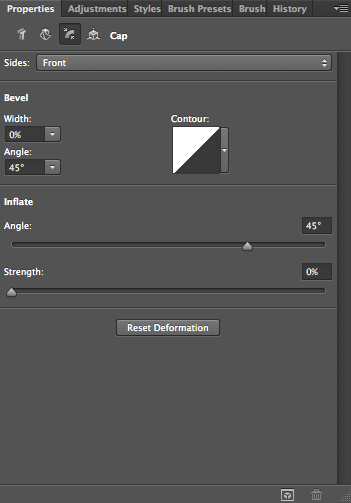
The third option — “Cap” — will determine how each letter is capped on the front and back. You can add a sophisticated level of detail within the bevel settings here. You can control the contour of the bevel, the width, and how strong or rigid the bevel is. This is where you can create custom bevels and rounded edges for your 3D typography.
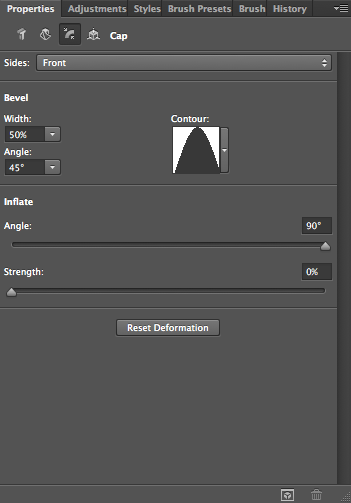
By setting the width to 50% and the contour to a cone, I was able to quickly create a distinct bevel on the outer edge.
If we go back to the main panel, you will see a different menu representing each side’s material. This breaks each part down into manageable pieces, so you can have a different material for each side of your object. You can even control the material that makes up a bevel on your object if you have one. Double-click the Front Bevel Material and in the properties panel; you will have several options.
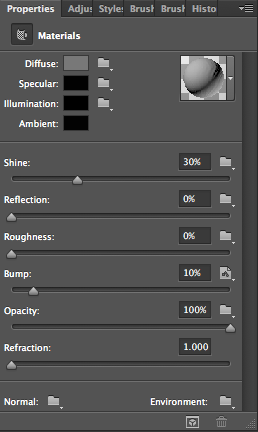
In the panel above, you see all of the different options to create your texture and control how it reacts to its surroundings. The top four options have a major effect on the overall appearance of your 3D text. Diffuse determines the overall color of the surface that you have selected. Specular determines the color of highlights found on your object. Illumination determines the light that “illuminates” your object. Ambient controls the ambient lighting in the environment.
The different sliders determines the physical properties of the surface itself. Shine give the surface a glossy appearance, while reflection controls how much of the surrounding area’s colors are reflected in the currently selected surface. Roughness and bump give the surface a textured and uneven appearance, and opacity determines how transparent (or opaque) the surface is, just like a layer or brush’s opacity. Refraction determines how much light is refracted, such as the refraction you would see in a glass object. The preview orb in the top right offers a preview of the texture that is active. Here, you can choose from a number of presets, or you can create your own.
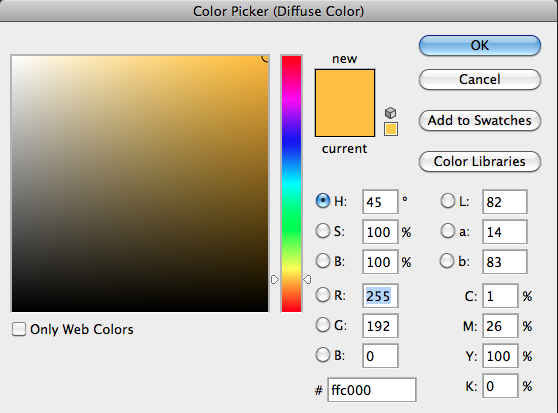
Click the color picker next to the Diffuse option and choose an orange-gold color. Set the Shine and Reflection to 100%, the roughness and bump to 0%, the opacity to 100% and the refraction setting to 2.0.

In the 3D Panel, double-click the CREATE extrusion material, and within the properties panel, set the diffuse color swatch to a sky blue color. Leave the others at their default values, bump Shine, Reflection, and Refraction all the way up, and lower bump and roughness to 0. For opacity, set it to around 30%, giving it the appearance of glass.


Use the same settings for the Front Inflation Material, and the Rear Inflation Material. This will give the appearance of glass, with a gold bevel on the front edge. If you want to create or use a different color, feel free to do so.

Double-click the menu item at the bottom of the 3D Panel called Infinite Light. In the properties panel, different options will come up where you can select different lighting options, such as colored lights, and you can change the light source from an infinite light to a point of light (similar to a laser), or you can change it to a spotlight. You can click and drag your mouse on the canvas to rotate and position the light source.


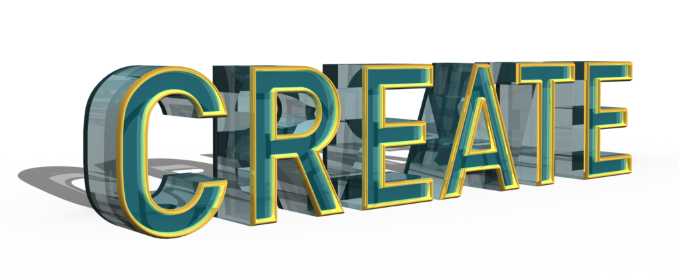
The bottom left icon in the properties panel renders the 3D scene. Click this icon to see the full effect of your 3D settings. It may take some time to fully render, but it is good to see how it looks with all of the detail. Below is an example of what our 3D text will look like fully rendered. Notice the glass and the level of detail, with the reflections, and shadows.
Conclusion
Photoshop CS6’s 3D interface has had a complete overhaul. With the new configuration, it is quicker than ever to create, manipulate, and render 3D objects with a sophisticated level of detail and control. The interface is more user-friendly and intuitive, so you can focus more on creating your 3D scene and less on trying to find your way around the software itself.