Quick Tip: Getting Started with Headless Chrome in Node.js

Oftentimes in our line of work we need to be able to replicate a user journey repeatedly to make sure that our pages are offering a consistent experience as we make changes to our site. Critical to being able to accomplish this consistently and conveniently are libraries that allow us to script these types of tests, so that we can run assertions against them and maintain documentation around the results. Enter headless browsers: command line tools that provide you with the ability to script a user’s interactions across your site programmatically and capture the results to use in tests.
Many of us have been using PhantomJS, CasperJS, and other tools for years to do just this. But, as often is with love, our hearts can be bequeathed to another. As of Chrome 59 (60 for Windows users), Chrome ships with its own headless browser. And, although it doesn’t currently offer support for Selenium, it uses Chromium and the Blink engine, i.e. it is simulating an actual user experience in Chrome.
As ever, the code for this article can be found on our GitHub repo.
Run Headless Chrome From the Command Line
Running Headless Chrome from the command line is relatively easy. On a Mac, you can set an alias for Chrome and run using the —headless command line parameter
alias chrome="/Applications/Google\ Chrome.app/Contents/MacOS/Google\ Chrome”
chrome --headless --disable-gpu --remote-debugging-port=9090 https://www.sitepoint.com/
On Linux, it’s even easier:
google-chrome --headless --disable-gpu --remote-debugging-port=9090 https://www.sitepoint.com/
--headless: Runs without a UI or display server dependencies--disable-gpu: Disables GPU hardware acceleration. This is temporarily needed for now.--remote-debugging-port: Enables remote debug over HTTP on the specified port.
You can also interact with the page you are requesting, for example to print document.body.innerHTML to stdout you can do:
google-chrome --headless --disable-gpu --dump-dom http://endless.horse/
If you’re curious what else is possible, a full list of parameters can be found here.
Running Headless Chrome in Node.js
The focus of this article however, is not the command line, rather running Headless Chrome in Node.js. To do this, we’re going to need the following modules:
- chrome-remote-interface: JavaScript API provides a simple abstraction of commands and notifications.
- chrome-launcher: this allows us to launch Chrome from within Node across multiple platforms.
Then we can set up our environment. This assumes you have Node and npm installed on your machine. If that is not the case, then check out our tutorial here.
mkdir headless
cd headless
npm init -y
npm install chrome-remote-interface --save
npm install chrome-launcher --save
After that, we want to instantiate a session with headless-chrome. Let’s start by creating an index.js file in our project folder:
const chromeLauncher = require('chrome-launcher');
const CDP = require('chrome-remote-interface');

(async function() {
  async function launchChrome() {
    return await chromeLauncher.launch({
      chromeFlags: [
        '--disable-gpu',
        '--headless'
      ]
    });
  }
  const chrome = await launchChrome();
  const protocol = await CDP({
    port: chrome.port
  });

  // ALL FOLLOWING CODE SNIPPETS HERE

})();
First, we are requiring our dependencies, then creating a self-invoking function which will instantiate the Chrome session. Note that the --disable-gpu flag is required at the time of this writing, but may not be required when you are reading this as it is only required as a workaround (as recommended by Google). We will be using async / await to ensure that our application waits for the headless browser to launch before executing the next series of steps.
Side Note: We are going to be working with functions that require actions to complete before moving on to subsequent steps. This allows time to render pages, execute interactions, etc before proceeding. Many of these steps are non-blocking so we need to rely on promises to pause execution. More on the async function can be found on Mozilla Developer Network, or here on SitePoint.
Next, we need to expose the domains that we require for our testing:
const {
  DOM,
  Page,
  Emulation,
  Runtime
} = protocol;
await Promise.all([Page.enable(), Runtime.enable(), DOM.enable()]);
Most important here is the Page object — we will be using this to access the content that is being rendered to the UI. This will also be where we specify where we are navigating to, what elements we are interacting with, and where we will be running our scripts.
Exploring the Page
Once we have our session initialized and our domains defined we can start navigating the site. We want to pick a starting point so we use the Page domain that we enabled above to navigate to:
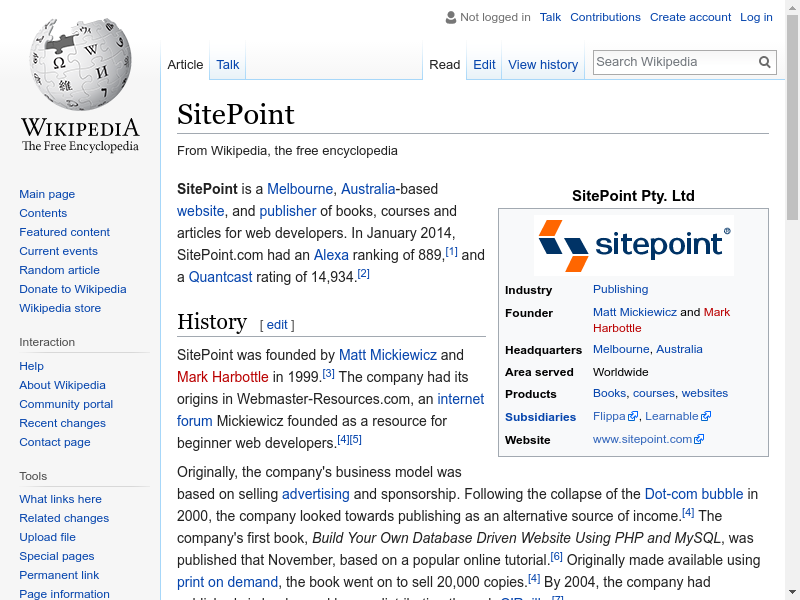
Page.navigate({
  url: 'https://en.wikipedia.org/wiki/SitePoint'
});
This will load the page. We can then define the steps we want to run our application using the loadEventFired method to execute code to replicate our user journey. In this example we are just going to grab the contents of the first paragraph:
Page.loadEventFired(async() => {
  const script1 = "document.querySelector('p').textContent"
  // Evaluate script1
  const result = await Runtime.evaluate({
    expression: script1
  });
  console.log(result.result.value);

  protocol.close();
  chrome.kill();
});
If you run the script using node index.js you should see something approaching the following output:
SitePoint is a Melbourne, Australia-based website, and publisher of books, courses and articles for web developers. In January 2014, SitePoint.com had an Alexa ranking of 889,[1] and a Quantcast rating of 14,934.[2]
Taking it Further — Grabbing a Screenshot
This is nice, but we can just as easily substitute any code into that script1 value to click links, fill out form fields, and run series of interactions using query selectors. Each step could be stored in a JSON configuration file and loaded into your Node script to execute sequentially. The results of these scripts can be validated using a testing platform such as Mocha, allowing you to cross-reference that the values being captured meet the UI / UX requirements.
Complementary to your test scripts you will likely want to capture screenshots of your pages as you navigate the site. Fortunately, the domain provided has a captureScreenshot function that does exactly this.
const chromeLauncher = require('chrome-launcher');
const CDP = require('chrome-remote-interface');
const file = require('fs');

(async function() {
  ...

  Page.loadEventFired(async() => {
    const script1 = "document.querySelector('p').textContent"
    // Evaluate script1
    const result = await Runtime.evaluate({
      expression: script1
    });
    console.log(result.result.value);

    const ss = await Page.captureScreenshot({format: 'png', fromSurface: true});
    file.writeFile('screenshot.png', ss.data, 'base64', function(err) {
      if (err) {
        console.log(err);
      }
    });

    protocol.close();
    chrome.kill();
  });
})();
The fromSurface flag is another flag that is required for cross platform support at the time of this writing and may not be required in future iterations.
Run the script using node index.js and you should see output similar to below:
Conclusion
If you are writing automated scripts you should start using Chrome’s headless browser now. Although it still isn’t fully integrated with tools like Selenium the benefit of simulating Chromes rendering engine should not be undervalued. This is the best way to recreate your users experience in a fully automated manner.
I’ll leave you with some further reading:
- API docs: https://chromedevtools.github.io/devtools-protocol/
- Getting Started with Headless Chrome: https://developers.google.com/web/updates/2017/04/headless-chrome
Let me know about your experiences with Headless Chrome in the comments below.


