Host, Publish and Manage Private npm Packages with Verdaccio

Host, Publish and Manage Private npm Packages with Verdaccio was peer reviewed by Panayiotis «pvgr» Velisarakos and Jurgen Van de Moere. Thanks to all of SitePoint’s peer reviewers for making SitePoint content the best it can be!

As I’m sure you know, the de facto JavaScript package manager is npm and its registry is the world’s biggest collection of code. But sometimes you need that extra privacy when developing an awesome new package. Be it because you’re working on a company project which is not meant to be shared with the public, your master/bachelor thesis project, or simply because you’re like me and feel sometimes ashamed of your first steps with a new topic.
Whatever the reason might be, there are several options to choose from. Perhaps the easiest is to sign up with one of npm’s commercial offers and you’re good to go. But this comes at a price which might not suit every purse.
Fortunately, there is a free alternative called Verdaccio, which might help you out.
Introducing Verdaccio
Verdaccio is an npm package which allows you to create a local npm registry, without any configuration. It’s a batteries included project, coming with its own database. It does so by acting as a local caching/proxy server.
This means whenever you try to install something from your custom repository that’s not present, it will ping the official npm registry and download the dependencies. Your custom repository maintains those inside a simple folder called storage. The next subsequent install will now use this locally cached copy. On top of that, some commands from the npm client, such as npm login/adduser/publish are replicated to support the creation of local private packages, which you can see in use a little bit later in this article.
If you’re thinking that’s nothing new, there is already Sinopia you are right. Verdaccio is simply a fork of Sinopia which maintains backward compatibility, yet tries to keep up with official npm changes. One such change, which is unavailable in Sinopia, is scoped packages, which you might have already seen when working with libraries like Angular 2 or TypeScript npm hosted types. You can easily recognize them by the leading @ sign:
# Installing an Angular2 dependency
npm install @angular/core

# Installing the official Node.js type definitions for TypeScript
npm install @types/node
Both Sinopia and Verdaccio work on Mac/Linux and Windows.
Getting Started with Verdaccio
Since Verdaccio is an npm package, all you need to do is run the following command to install it:
npm install -g verdaccio
A subsequent call with verdaccio will fire up the instance and get your private registry running.
By default, it will listen on the port 4873. We will talk later about how you can change those settings.
In this article we’re going through setting up the registry on your development machine. In a company environment, you’ll likely want to do that on a dedicated server so that all developers can have access to it.
Verdaccio is a Node.js application, which means you should take care about restarting it in the event of occasional crashes. I recommend using pm2. All you’d need is to run the following steps:
# Install pm2
npm install pm2 -g

# start Verdaccio using pm2
pm2 start PATH-TO-GLOBAL-VERDACCIO/verdaccio
# --> e.g for Windows: C:/Users/[USERNAME]/AppData/Roaming/npm/node_modules/verdaccio/bin/verdaccio
Also, if by the end of the article you come to the conclusion that Verdaccio is not the right tool for you, just stop the process and uninstall Verdaccio with:
npm uninstall -g verdaccio
Configuring the client
Now that the registry is up and running, you need to point your npm client at the new address. This is done by running the following command:
npm set registry http://localhost:4873/
If you’re just following the steps along this article and later want to revert to the original npm registry just run this command
npm set registry https://registry.npmjs.orgfor HTTPS-based access, ornpm set registry http://registry.npmjs.orgfor classic HTTP access.
Additionally, if you serve your registry via HTTPS you’ll need to set appropriate CA information.
# setting the value to null will use the list provided by the operating system
npm set ca null
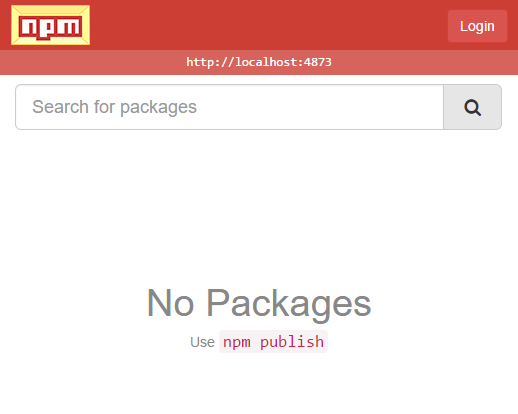
Now you’re able to access the registry browser by navigating to the address http://localhost:4873.
Configuring your custom registry
When the server is started, a new configuration file called config.yaml is automatically created. By default, it will be created in your users folder. On Windows, this might look like the following:
C:\Users\[USERNAME]\.config\verdaccio\config.yaml
One important setting is to configure the default port Verdaccio listens on. You can change this by adding the following lines at the end of the config file.
listen:
 - http://localhost:[YOURPORT]
Another setting of interest might be the use of a proxy, especially in corporate environments. Those are setup with the following entries:
http_proxy: http://something.local/
https_proxy: https://something.local/
no_proxy: localhost,127.0.0.1
Just remember to restart Verdaccio by killing the current process, or halting your pm2 process and starting it again after changing any configs.
Registering a user
Last but not least, we need to configure a user which is going to publish packages to your registry. We can do so with the default adduser command, pointing to our custom registry.
npm adduser --registry http://localhost:4873
After that just follow the prompts on the command line.
Remember to use the same port you’ve previously configured
The user will be used to authenticate against the Verdaccio instance. Next to the above-mentioned file config.yaml, you will find a newly created htpasswd which is used to store your login and credentials.
Your First Private npm Package
Now, we’re ready to create our first private package. We’re going to create a simple hello-world package and look at the process of publishing it.
Creating the package
First, create a new folder somewhere called hello-world. Now, we need to start a new package, which we do with the command npm init. You will be asked a bunch of questions but for now, most of them can be accepted with the defaults. Just give it a description, keep the entry point at index.js, and add your name as author. The result is a file named package.json describing your package.
A good practice is to prefix your package names so that you immediately can tell whether you’re working with a private local or an official npm source.
The next part is to create the actual package. Therefore we create a file index.js. This simple example will just export a HelloWorld function:
// content of index.js
function HelloWorld() {
  return "Hello World";
}

module.exports = HelloWorld;
Publishing the package
All that is left now is to publish your package. To do so we first need to login to our registry with npm login. You will be prompted for the username and password you previously setup.
When this is done, in the root of hello-world just run npm publish and the magic is done.
If you visit the registry browser now again in a browser, over at http://localhost:4873/, you’ll see that the list contains the fresh new package.

An Example Consumer App
Now that we have our private package published, let’s create a simple demo app to consume it.
In a new folder, demo, we are again creating a new node app using npm init. Again, accept all the recommendations and perhaps just add a description and author information.
After that, create an index.js which will act as our app’s root.
Installing your private package
In order to install private packages, you essentially have to do the same thing you’d do with the standard npm process.
npm install --save hello-world
This will install the package in your node_modules folder and update the dependencies section of your package.json.
We are now ready to use the package. Open up index.js and add the following code:
const helloWorld = require("hello-world");

console.log(helloWorld());
When you now run the app with node index.js you should see Hello World as output on your command line.
Congratulations, you’ve just published and used your own private package!
Requesting a public package
The same applies for public packages. You just go ahead and run npm install package-name and everything will be installed as usual in the node_modules folder.
What Verdaccio does behind the scenes is to look into its storage folder and check whether the requested package exists. If not, it will try to forward the request to the official npm registry, download and store it, and reply your request. The next time you issue an npm install for the same package it will now serve exactly that.
So, even if it happens that the official registry is down or unreachable for whatever reason, you still can access your own cached version. Verdaccio will always just download exactly what was requested. If you issue some updates, those will be downloaded as needed.
Note that the registry browser is not supposed to show public packages. If you really need to show them, you can edit the file
.sinopia-db.jsonand manually add the package names to thelistarray. Do not forget to restart Verdaccio afterward.
Conclusion
So, now you’re able to host your own private registry and benefit from cached public packages. On top of that, you can now also publish private packages, without having to talk to the cloud. Once the installation is done all the relevant npm client commands are the same as usual.
And in the crazy situation that some of your packages are broken or corrupted, remember it’s just a folder storage which hosts your packages, so navigate over there and delete the faulty packages. The next install will likely fix up your issues.
I hope you enjoyed this article and am looking forward to hearing from you in the comments!


