Introduction to the Beacon API

The Beacon API makes it easy for web developers to send small amounts of data, such as analytics or diagnostics data, back to the server asynchronously while the current page is unloading. In this article, we’ll look at some of the problems the Beacon API solves, and show you how to use the API.
Without the Beacon API, sending data back to your server when the user navigates away from a page can be trickier than it seems. You don’t want to delay the next page from loading, as this would harm the user’s experience of your site. Yet you don’t want to loose valuable information that could help improve your site: sending the data too early might mean you loose valuable information that you could have captured if you’d waited a fraction longer.
A typical solution to that sends analytics data to the server as the document unloads might look something like this:
window.addEventListener('unload', function(event) {
  var xhr = new XMLHttpRequest(),
    data = captureAnalyticsData(event);

  xhr.open('post', '/log', false);
  xhr.send(data);
});

function captureAnalyticsData(event) {
  return 'sample data';
}
An unload event handler, that submits data via an Ajax request. When the page unload event fires, the data is captured via the captureAnalyticsData function, and sent to the server via an Ajax request. Note the third parameter to xhr.open is false, indicating the Ajax request is synchronous. Browsers typically ignore asynchronous requests made during an unload handler, so any such Ajax request has to be synchronous. As it’s synchronous, the browser has to wait for the request to complete before it can unload the document and display the next page. This extra waiting around can lead to the perception of poor performance.
Other techniques used instead of a synchronous Ajax request include setting the src of an Image object in the unload handler. The browser will wait for the Image to load before unloading the document, during which time data can be submitted to the server. However, this still has the same problem: the unloading of the current document will be delayed while the request, this time for the Image, completes, which can lead to the perception of poor performance.
The Beacon API was created to help solve these issues. It defines an interface that lets developers send small amounts of data to the web server asynchronously. It consists of just one method, sendBeacon, that is attached to the navigator object. sendBeacon takes two parameters, the URL you want to submit data to and the data to be submitted:
window.addEventListener('unload', function(event) {
  var data = captureAnalyticsData(event);
  navigator.sendBeacon('/log', data);
});
Data is submitted via a HTTP POST request, and can be sent as an ArrayBufferView, a Blob, a DOMString, or a FormData object. The browser queues the request, and sends it “at the earliest available opportunity, but MAY prioritize the transmission of data lower compared to other network traffic.” (as per the W3C spec). sendBeacon returns true if the data was successfully submitted to the server, or false otherwise.
Support for navigator.sendBeacon is decent across the major desktop browsers. You’ll find it supported in the current versions of Chrome, Firefox, and Opera, but not in the latest versions of IE and Safari. As you can’t guarantee it’s availability though, you’re best bet is to use feature detection and fallback to one of the old methods of submitting data on page unload:
window.addEventListener('unload', function(event) {
  var xhr,
      data = captureAnalyticsData(event);

  if (navigator.sendBeacon) {
    navigator.sendBeacon('/log', data);
  } else {
    xhr = new XMLHttpRequest();
    xhr.open('post', '/log', false);
    xhr.send(data);
  }
});
I’ve created a little sample app that you can use to see the Beacon API in action. You’ll need to have Node.js installed to run the server. To run the sample:
- Download and unzip the zip file into a folder of your choice e.g.
beaconapi - Open your terminal and change directory into the folder you created in Step 1 e.g.
cd /path/to/beaconapi - Still in the terminal, type in
npm installand press<Enter> - Now type in
DEBUG=beaconapi_demo ./bin/wwwand press<Enter> - Open a browser that supports the Beacon API and point it to http://localhost:3000
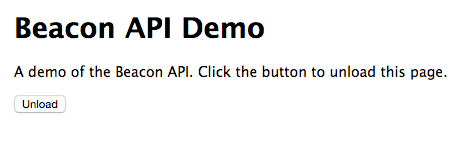
You should see a page that looks like this:
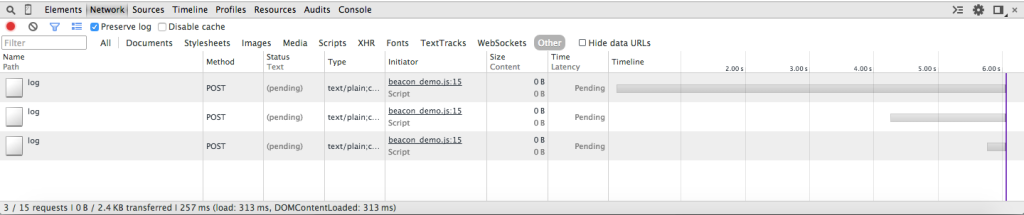
In this example, we’re using Chrome. Open the Dev Tools, switch to the Network tab, and tick the Preserve Log checkbox. Filter the results so you just see the Other requests. Now, when you click the Unload button, you should see the requests to /log logged in the dev tools.
Conclusion
This article has introduced the Beacon API. It is a very small API, but fills a specific niche. Hopefully you are able to put it to good use.


