Extracting Website Data and Creating APIs with WrapAPI

Today, almost all services we use have some sort of API. Some web applications are even built from API points alone, being passed to some kind of front-end view. If you’re a consumer of a service that provides an API, you’ll sometimes need more features or find limits to what the API can offer. In this article, we’ll cover a service that’s useful both for API consumers and creators.
I always go with the saying that, if there’s a web interface, you can build your own API over it. WrapAPI tries to make this process easier. If you’re familiar with the process of web scraping/crawling (or extracting data from websites), you’ll see the magic of WrapAPI.
WrapAPI offers a service that allows you to easily extract information from websites and create APIs from the data. It provides an easy, interactive way of selecting what information you want to get. With just a few clicks, you can have your API online.
To follow along with this tutorial, I recommend you head over to wrapapi.com and create an account.
How To Get Around WrapAPI
On the WrapAPI site, you’ll see that you can start to build your project right away — although, unless you create an account, your work won’t be saved.
Once you’ve signed up, click the Try building an API button.
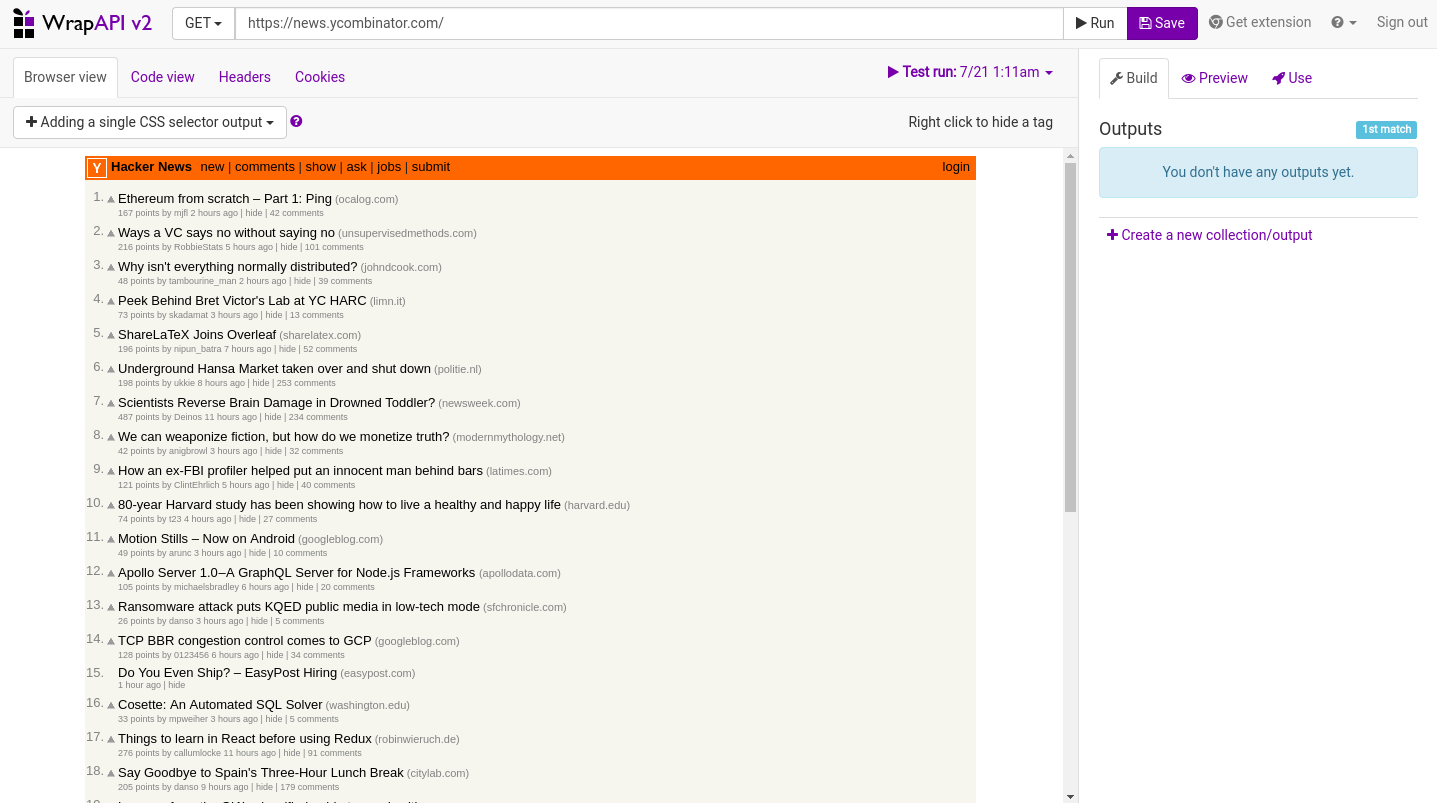
You’ll be presented by a browser-like interface. On top of the site we’re presented with a URL bar. As an example, WrapAPI uses Hacker News (https://news.ycombinator.com/). If you click the URL to change it to something else, you’ll see more options related to the request you want to make. We’ll use the default options, and only change the URL to https://www.sitepoint.com/javascript/. We’re covering only the GET method, as we only want to get data in this example.
Below the URL bar there are four buttons that give you different information regarding the site you’re viewing. Browser view displays the site as you would visit it from your browser. Code view displays the source code of the site. Headers shows the response you get from the server. This is useful if you want to see what response you get from the server: it gives you information like the HTTP status codes (200, 404, 400 etc.), content types, web servers and so on. You can also view the request’s Cookies directly from the builder.
Getting the Data
By now you should be able to see SitePoint inside the Browser View frame.

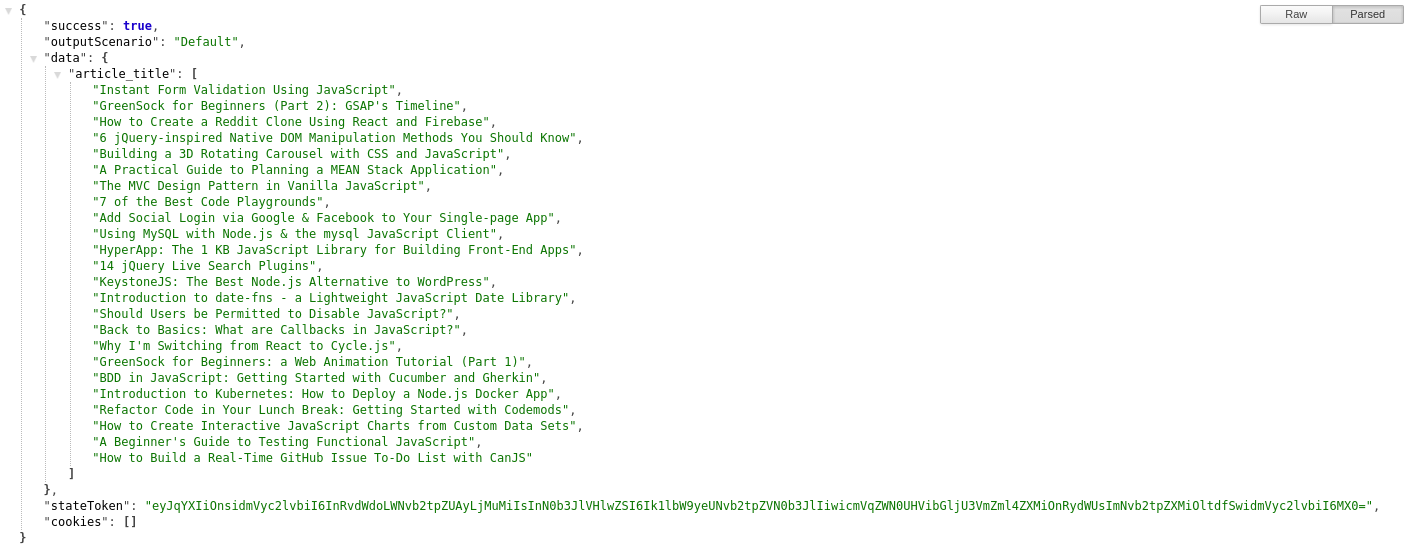
Let’s create a very simple API that shows us the latest post titles of the JavaScript channel. If you hover over the titles, images or any other element in the site, you’ll notice a selection color covering it. Let’s scroll down a bit, to the LATEST articles part. Hover over the title from one of the articles and click on that title. You’ll notice that it doesn’t switch to that particular link we clicked. We see that every title in this section is highlighted. WrapAPI guessed that these are all the titles we want. Sometimes it can also select parts of the sites we don’t want. That’s usually the case when the CSS class selectors are not well-defined or used by other elements in the site.
Besides CSS selectors, WrapAPI supports regular expressions, JSON selectors, headers, cookies, form outputs, and a bunch more options. You can use them all together and extract exactly what you’re aiming for. In this example, we’ll only use CSS selectors.
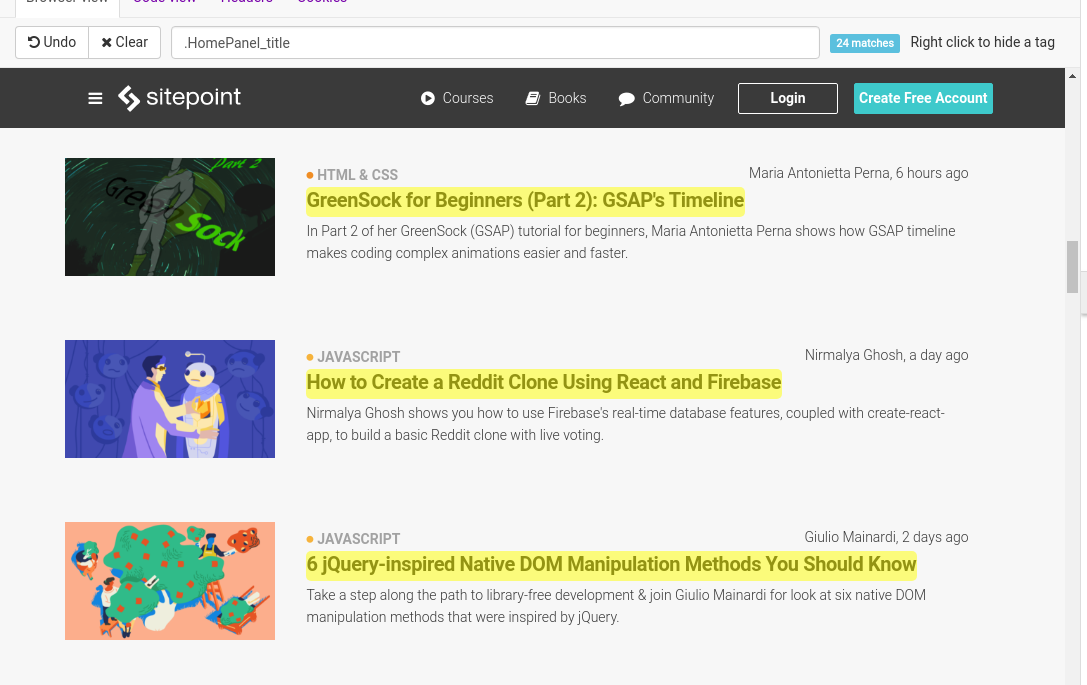
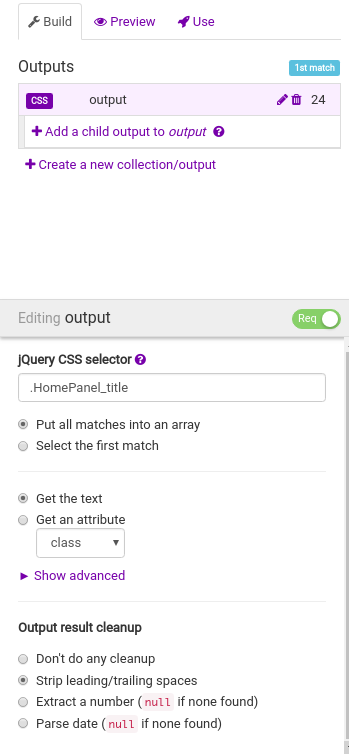
In the right part of the interface, you’ll see three tabs. Let’s take a look at the current Build tab. Outputs will show us the selectors (in our case CSS selectors), and you’ll get more details on what you would like to select. We’re interested only in extracting the title, which is text. There are more options on cleaning the result output, but we won’t get into these details. If you’d like to create another selector, to select description, author, date, etc., just click the Create a new collection/output. Naming your selectors is also important, as this will make it easier if you use multiple selectors in the site. By clicking the pencil icon, you can edit your selectors.
The Preview tab will show a representation of our data in JSON, and you probably get the idea of what the API will look like. If you’re happy with the results, you can click the Save button to save a version of the API.
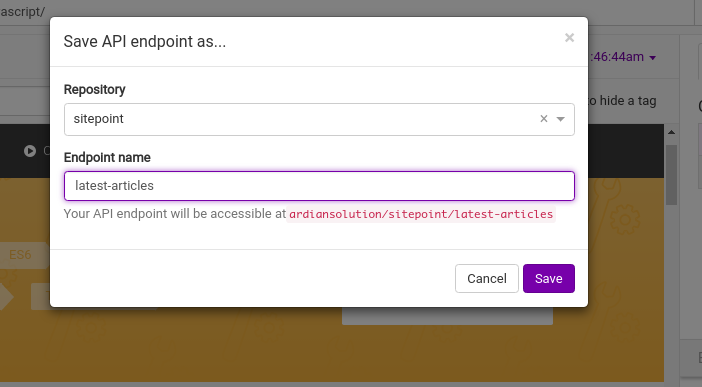
You’ll need to enter the repository and the endpoint name of the API. It helps you manage and organize your APIs. That will also be part of your API’s name in the end. After entering the information, you’ll return to the builder. Our API is saved, but now we need to test and publish it.
Tips:
- If the site has pagination (previous/next pages), you can use the query string options. (More on that here.)
- Name your selectors correctly, as they’ll be part of the JSON output.
The WrapAPI Chrome extension
The WrapAPI chrome extension is another means for creating APIs. It lets you capture requests you’ve made with Chrome. Useful for sites that use JavaScript (Ajax) to call data, it’s also great for sites that are behind logins. You can install it from the Chrome web store.
This time, let’s use Hacker News. Visit the site you want to get data from, and then follow these steps:
-
Open the Chrome DevTools, and navigate to WrapAPI tab on the very right tab.
-
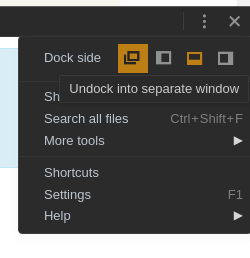
Undock it into a separate window.
-
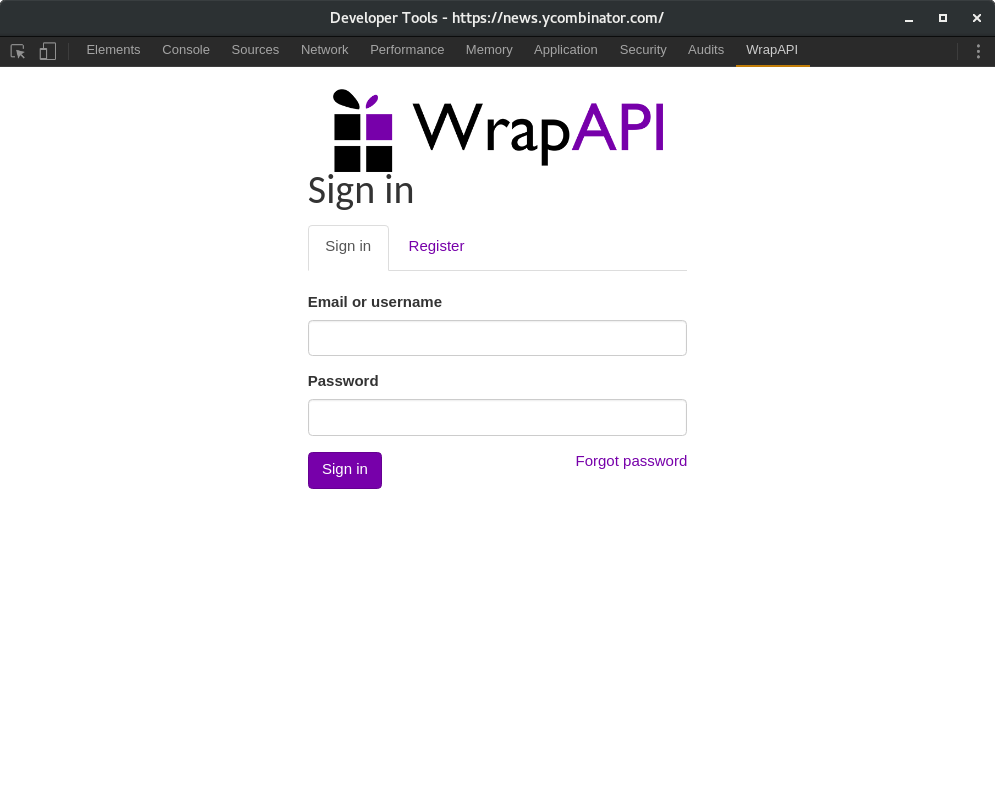
Log in with your WrapAPI credentials.
-
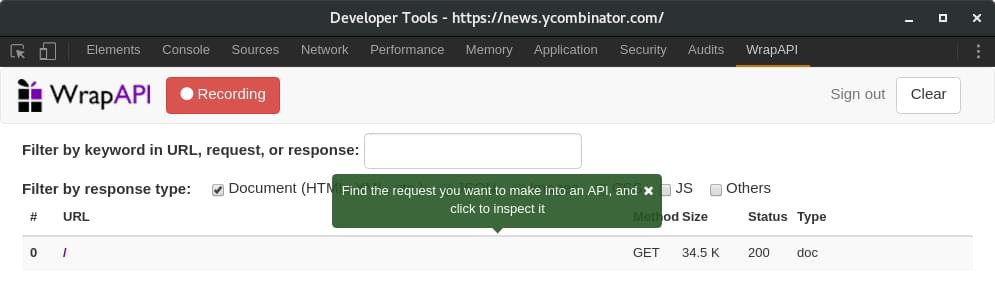
Whenever you’re ready, press the Start capturing requests button.
-
Refresh the main tab you where using.
-
Select the request you want to make into an API (using
GET). -
Click on Save to API endpoint and save it into a repository.
-
Finally, click the link: Click here to use it to define this API endpoint’s inputs and outputs…
-
You’ll be redirected to the builder, in order to extract the data. The benefit of using this method is that you can bypass login pages and use your already assigned cookies.
Publishing the API
Before publishing our API, we have to freeze it. Selecting a release number such as 0.0.1 works fine. Note that any changes you make to the API, you’ll have to freeze it as a new version, by also increasing the version number. Provide a simple description of what your API is about, or if it’s an update, what changes it contains. Finally, press Publish.
The last step before publishing is to generate a key. Click Generate an API key.
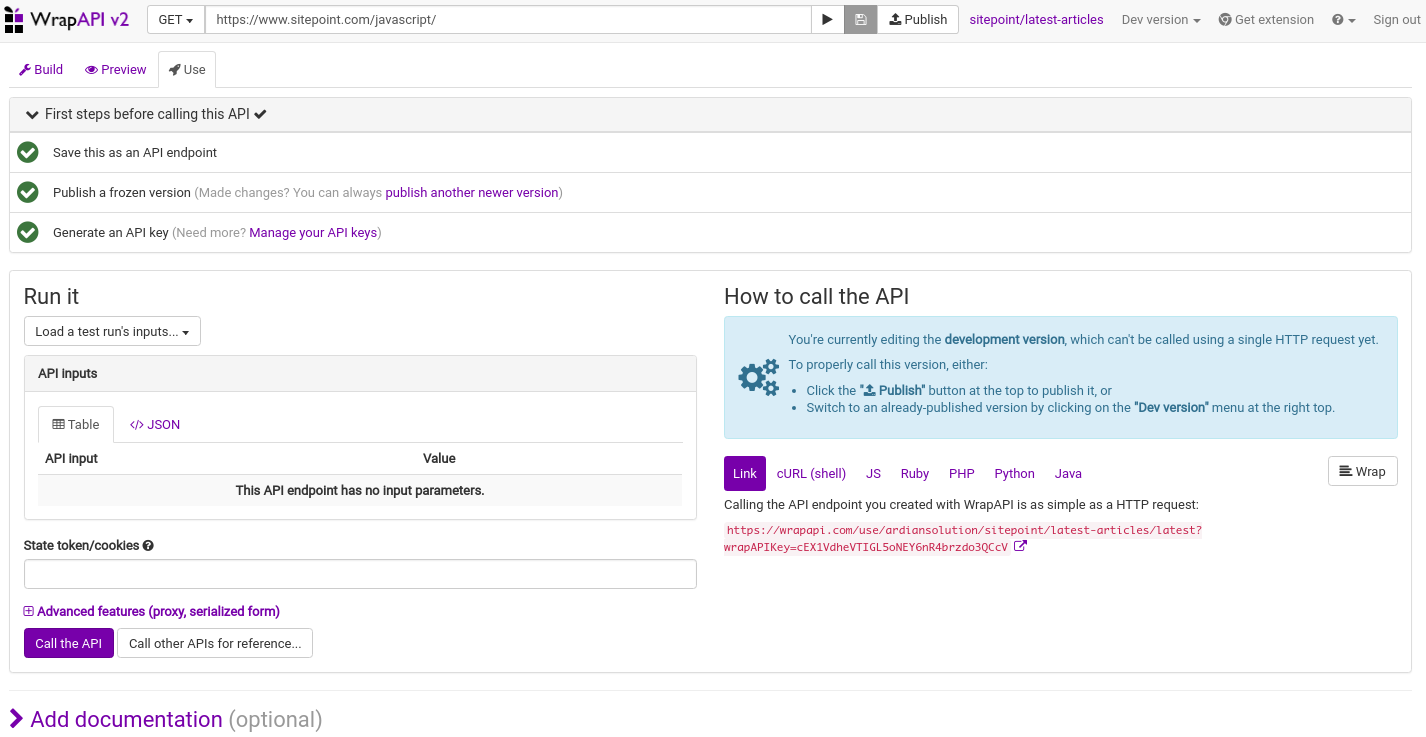
All green? that must mean we’ve successfully completed the steps required to publish our API, and that’s almost right. The last step is to click the Publish button at the top, after the URL bar. You can already see the different programming languages you can use to test the API. I’ll use my browser with an extension for presenting JSON in a better way.
And here is our final API:
Conclusion
Within a minute, we were able to create an API from a simple web interface.
There are some things you should consider. Scraping/Extracting data from websites can sometimes have legal implications regarding the content found on the website. If you happen to use a website as a service for your API, consider asking for permission to use that content, especially when distributing it as an API.
WrapAPI provides some really great and easy-to-use features, but they don’t come without a price. The free and community accounts come without any cost, but you can only create public APIs, and there’s a limit of 30,000 API calls per month. There are a couple of pricing plans. You can always create your own APIs and scrapers, but if you lack the skills, or don’t have time, then maybe WrapAPI is something you might want to try.


