Creating Three Way Data Binding with Firebase and Angular

As you may know, FireBase acts as a realtime backend for your apps. Well, we all know how awesome this is. But you know what’s more awesome? It’s AngularJS+FireBase. FireBase has an officially released binding called AngularFire that brings all the fun and joy of FireBase to AngularJS. As AngularJS developers we love data binding so much that we even dream about it! With AngularFire we can create some seriously awesome stuff by taking advantage of a three way data binding as opposed to the traditional two way data binding in AngularJS. This tutorial will give you an overview of three way binding while creating a simple realtime app using AngularFire. This article assumes that the reader is already aware of FireBase and has done some prior development in AngularJS.
What’s Three Way Data Binding
In AngularJS our scope model and view stay in sync thanks to the two way data binding. But if you introduce AngularFire, and thereby use FireBase as a backend, you empower yourself with a three way binding feature. You can basically bind your model data to a FireBase location so that whenever your models change, those changes are automatically pushed to FireBase. Similarly, whenever the data at the particular FireBase location changes, your local scope model is also updated. And, since our view and scope model are already in sync, this creates a three way data binding. The obvious benefit is that it lets you create cool realtime apps where the data changes frequently and those modifications are broadcast to all the connected users. All this happens without any significant effort. If you are building a chat application, a multiplayer game app, or a broadcast system you can leverage this feature.
Getting Started
To demonstrate the concept of three way binding, let’s create a sample application. Our application will be a realtime broadcast system where users can broadcast what they are typing in realtime. For each user there will be two options:
- Start a broadcast
- View a broadcast
To start a broadcast the user needs to provide a name for the broadcast. Once the users type a name and click start, they can begin the broadcast. To view a broadcast, they need to choose a broadcast from a dropdown menu.
Basic Architecture
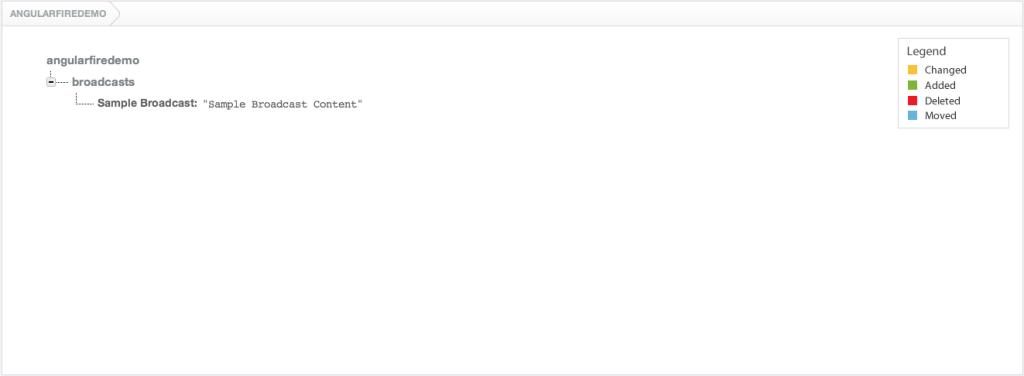
To start we need to find out how to store our broadcast data. First, login to FireBase and create a new FireBase storage. I created a FireBase called angularfiredemo, and hence we will be using the URL https://angularfiredemo.firebaseio.com to store data. Note that each FireBase location is represented by a URL, and we can have multiple broadcasts to handle the many users that will be using our system. Let’s store all our broadcasts under the location https://angularfiredemo.firebaseio.com/broadcasts. Each broadcast has two parts: the name and the content, represented by key/value pairs. A sample broadcast data is stored as shown in the following image.
To view a broadcast, users will need to choose a particular broadcast name represented by the key in our FireBase. The next step for us is to build an AngularJS app around these key points.
Those of you who are interested in the end product can checkout a demo at Plunker. To have a realtime experience, open two instances of your browser side by side. In the first instance, give your broadcast a name, start it, and then begin writing. In the second instance, choose the broadcast you just started from the dropdown menu. Now you can see the broadcast in realtime.
Building the App
To get started we need the following scripts:
AngularJS: The main AngularJS script.FireBase: The script for enabling FireBase support.AngularFire: FireBase binding for AngularJS.Angular Route: For routing support in AngularJS.Angular Sanitize: To sanitize incoming data from FireBase.
To quickly design a layout we will use Bootstrap CSS.
Step 1
The first step is creating our main app module which is done like this:
angular.module('firebaseDemo', ['firebase', 'ngSanitize', 'ngRoute']);
angular.module('firebaseDemo').constant('FIREBASE_URL','https://angularfiredemo.firebaseio.com/broadcasts');
Our main module depends on three other modules: firebase,ngSanitize, and ngRoute. All of the AngularFire functionality is encapsulated in its own module, firebase. ngSanitize and ngRoute are used for sanitizing the data and routing support respectively. We have also defined a constant, FIREBASE_URL, which reprsents the location that stores all the broadcasts.
Step 2
Now, let’s create a factory that retrieves the broadcasts from FireBase.
angular.module('firebaseDemo').factory('broadcastFactory', function($firebase,FIREBASE_URL) {
  return {
    getBroadcast: function(key) {
      return $firebase(new Firebase(FIREBASE_URL + '/' + key));
    },
    getAllBroadcasts: function() {
      return $firebase(new Firebase(FIREBASE_URL));
    }
  };
});
Our factory broadcastFactory declares a dependency on FIREBASE_URL, which represents the location of our broadcasts. Our factory also depends on an AngularFire service called $firebase. It accepts a FireBase object and returns a special object which is kept in sync with the remote FireBase location. It has functions like $add(), $set(), $child(), etc. to work with data. Whenever an update is made to this local object, the change is pushed to the remote FireBase location.
The factory has two functions:
getBroadcast(key): This returns a single object that represents a broadcast. This object has a property called$valuewhich represents the content for the broadcast. We use this object to create a three way binding so that whatever the user types is constantly in sync with the remote FireBase location.getBroadcasts(): This function returns an object that has all the broadcasts as its properties. We present this data to the users so that they can choose a broadcast to view.
Step 3
The next step is creating our main view in index.html:
<!DOCTYPE html>
<html ng-app="firebaseDemo">
  <head>
    <meta charset="utf-8" />
    <title>AngularFire Demo</title>
    <link rel="stylesheet" href="style.css" />
    <link rel="stylesheet" href="//netdna.bootstrapcdn.com/bootstrap/3.1.1/css/bootstrap.min.css" />
    <script src="https://ajax.googleapis.com/ajax/libs/angularjs/1.2.16/angular.min.js" data-semver="1.2.16"></script>
    <script src="https://code.angularjs.org/1.2.16/angular-sanitize.js" data-semver="1.2.16"></script>
    <script src="https://code.angularjs.org/1.2.16/angular-route.js" data-semver="1.2.16"></script>
    <script src="https://cdn.firebase.com/js/client/1.0.6/firebase.js"></script>
    <script src="https://cdn.firebase.com/libs/angularfire/0.7.1/angularfire.min.js"></script>
    <script src="app.js"></script>
  </head>
  <body>
    <div class="container"> <br/>
      <div class="row">
        <div class="col-xs-5 col-xs-offset-1 text-right">
          <a class="btn btn-lg btn-primary" href="/write">Write Something</a>
        </div>
        <div class="col-xs-5 text-left">
          <a class="btn btn-lg btn-success" href="/view">View a Broadcast</a>
        </div>
      </div>
      <div ng-view></div>
    </div>
  </body>
</html>
The main view has two links:
Write Something: Loads a new AngularJS route that lets users to start a broadcast.View a Broadcast: Loads an AngularJS route that allows users to view a broadcast.
You can also see the ng-view directive where different routes will be loaded. All our AngularJS code is present in app.js.
Note: Any serious AngularJS app should consider modularizing the code either by layers or features. For this simple app I have put all the AngularJS components like controllers and directives in a single file, app.js. But this is certainly not the way to go for large scale AngularJS apps.
Step 4
Next, create two different views: one for broadcasting and another for viewing. We will also configure the routes by using $routeProvider. The following code is taken from views/write.html.
<hr/>
<div class="row">
  <div class="col-xs-4 col-xs-offset-3">
    <input type="text" class="form-control input-lg" ng-model="broadcastName" placeholder="Type your broadcast name here" />
  </div>
  <div class="col-xs-5">
    <button class="btn btn-lg btn-success" ng-click="startBroadcast()" ng-disabled='isButtonEnabled()'>Start</button>
  </div>
</div>
<h1 class="text-center">Write Something. . .</h1>
<div class="row">
  <div class="col-xs-8 col-xs-offset-2">
    <div id="editor" demo-editor model="broadcast" class="well">
    </div>
  </div>
</div>
Don’t worry about <div id="editor" demo-editor></div>. The demoEditor is a custom directive which will be shown next.
The corresponding controller associated with this view is:
angular.module('firebaseDemo').controller('BroadcastController', function($scope, broadcastFactory) {
  $scope.isEditable = false;
  $scope.broadcastName = '';
  $scope.isButtonEnabled = function() {
    return ($scope.broadcastName === 'undefined') || ($scope.broadcastName.length < 1);
  };
  $scope.startBroadcast = function() {
    $scope.isEditable = true;
    $scope.broadcastFromFireBase = broadcastFactory.getBroadcast($scope.broadcastName);
    $scope.broadcastFromFireBase.$set('');
    $scope.broadcastFromFireBase.$bind($scope, 'broadcast');
  };
});
Our controller has two dependencies, $scope and broadcastFactory. The isEditable scope model is used to indicate whether our editor is active. When a user clicks the Start button in our view, the editor becomes active and accepts inputs. Our view also contains a text field that is bound to the scope model, broadcastName. Before starting the broadcast we ask our users to give a name to the broadcast. The broadcast content will be stored against this key in our FireBase.
The isButtonEnabled() function is used to track if the broadcast name is empty. If so, then we disable the Start button. This function is used with the ng-disabled directive attached to the Start button.
The startBroadcast() function is used to initiate a broadcast. This function gets called when the Start button is clicked thanks to the ng-click directive. Inside this function, we set isEditable model to true, activating our editor. Next, we call the broadcastFactory.getBroadcast() function, passing broadcastName as a key. Then, we set an empty string at this location using $set(). This acts as the initial broadcast content. Note that this operation creates a new child under https://angularfiredemo.firebaseio.com/broadcasts. The name of this child is the same as the value of $scope.broadcastName. So, the location where our new broadcast will be stored is https://angularfiredemo.firebaseio.com/broadcasts/<broadcastName>. Note that the initial content of this location will be an empty string.
In the end we will perform the most crucial operation, which creates a three way binding. The operation $scope.broadcastFromFireBase.$bind($scope, 'broadcast'); does this. Because of this, the remote FireBase location stays in sync with our local scope model, broadcast. This local model is also bound to our editor. As a result whenever the user types something into the editor, the broadcast model is updated. And, due to three way binding, the remote FireBase content is also updated with this new broadcast content.
Now, let’s move to our next view, which exists in views/view.html.
<h1 class="text-center">Live Broadcast</h1>
<div class="row">
  <div class="col-xs-4 col-xs-offset-4">
    <select ng-model="broadcastToView" ng-change="broadcastSelected()" class="form-control" ng-options="k as k for (k, v) in broadcasts">
      <option value="">{{dropdownMessage}}</option>
    </select>
  </div>
</div>
<div class="row">
  <div class="col-xs-8 col-xs-offset-2">
    <div id="editor" class="well" ng-bind-html="broadcast.$value">
    </div>
  </div>
</div>
The corresponding controller code is shown below.
angular.module('firebaseDemo').controller('BroadcastViewerController', function($scope, broadcastFactory) {
  $scope.dropdownMessage = 'Retrieving Broadcasts...';
  $scope.broadcasts = broadcastFactory.getAllBroadcasts();
  $scope.broadcastSelected = function() {
    $scope.broadcast = broadcastFactory.getBroadcast($scope.broadcastToView);
  }
  $scope.broadcasts.$on('loaded', function() {
    $scope.dropdownMessage = 'Select a broadcast';
  });
});
When the route loads, we get all the broadcasts by calling broadcastFactory.getAllBroadcasts(). Remember, this is a single object that contains all the children as properties. The property names are the broadcast names, while their values represent the broadcast content. These broadcast names are shown to the users in a dropdown so that they can choose a broadcast to view.
When the dropdown value changes due to a selection, the function broadcastSelected() is called. This function uses broadcastFactory.getBroadcast() to obtain the particular broadcast object. This object has a property called $value which represents the actual content. Finally, we bind this value to our div through ng-bind-html so that the user can see the broadcast in realtime. ng-bind-html is used because the FireBase location may also have HTML content. Because of this directive we included the ngSanitize module (to sanitize the data), without which the directive will throw an exception.
Also note that when the view is loaded, the FireBase data will not sync immediately. $scope.broadcasts will have the actual value after few seconds. So, until the data is synced from server, it’s good to show that we are retrieving the dropdown data. That’s why I have the model $scope.dropdownMessage which is used as the first <option> in the dropdown. When the data is actually synced from the server a loaded event is triggered, and we change the dropdownMessage value to Select a broadcast.
Step 5
We also have a custom directive, demoEditor, which converts a div into an editable div so that users can type into it. I know we could have gone with a simple textarea, but what if you wanted to give the users ability to write HTML? Maybe some kind of WYSIWYG editor? In that case we need a div, where users can type. Here is our directive definition:
angular.module('firebaseDemo').directive('demoEditor', function(broadcastFactory) {
  return {
    restrict: 'AE',
    link: function(scope, elem, attrs) {
      scope.$watch('isEditable', function(newValue) {
        elem.attr('contenteditable', newValue);
      });
      elem.on('keyup keydown', function() {
        scope.$apply(function() {
          scope[attrs.model] = elem.html().trim();
        });
      });
    }
  };
});
The directive is pretty simple. The editor div is initially non-editable, and becomes editable when the user clicks Start. As this is a div element, you can not attach ng-model to sync its content to a model. So, we attach a keyup keydown listener to keep the scope model in sync with this div content. The scope model name (which we want to keep updated) is passed to the directive as an attribute. In case you missed it, the directive is used in the view like this:
<div id="editor" demo-editor model="broadcast" class="well"></div>The model attribute specifies the scope model to keep in sync. Also note that this directive does not create a new scope. It uses the parent scope.
Step 6
Let’s configure the routes and enjoy the cool three way binding in action!
angular.module('firebaseDemo').config(function($routeProvider, $locationProvider) {
  $routeProvider.when('/write', {
    controller: 'BroadcastController',
    templateUrl: '/views/write.html'
  }).when('/view', {
    controller: 'BroadcastViewerController',
    templateUrl: '/views/view.html'
  }).otherwise({
    redirectTo: '/write'
  });
  $locationProvider.html5Mode(true);
});
Conclusion
I hope you enjoyed experimenting with AngularJS and FireBase. AngularJS, when combined with FireBase, can be used to create awesome apps that sync in realtime. I encourage you to go through the AngularFire documentation to know more about the API methods. Have a nice realtime!!
The complete source code can be downloaded from GitHub.


