A Beginners Guide to Populating and Using TableViews in iOS

Using a table has always been a popular method to display and layout data, from spreadsheets to web pages, and now of course, Mobile apps.
In this tutorial I will show you how to use and populate iOS’s TableViews with data.
Getting Started
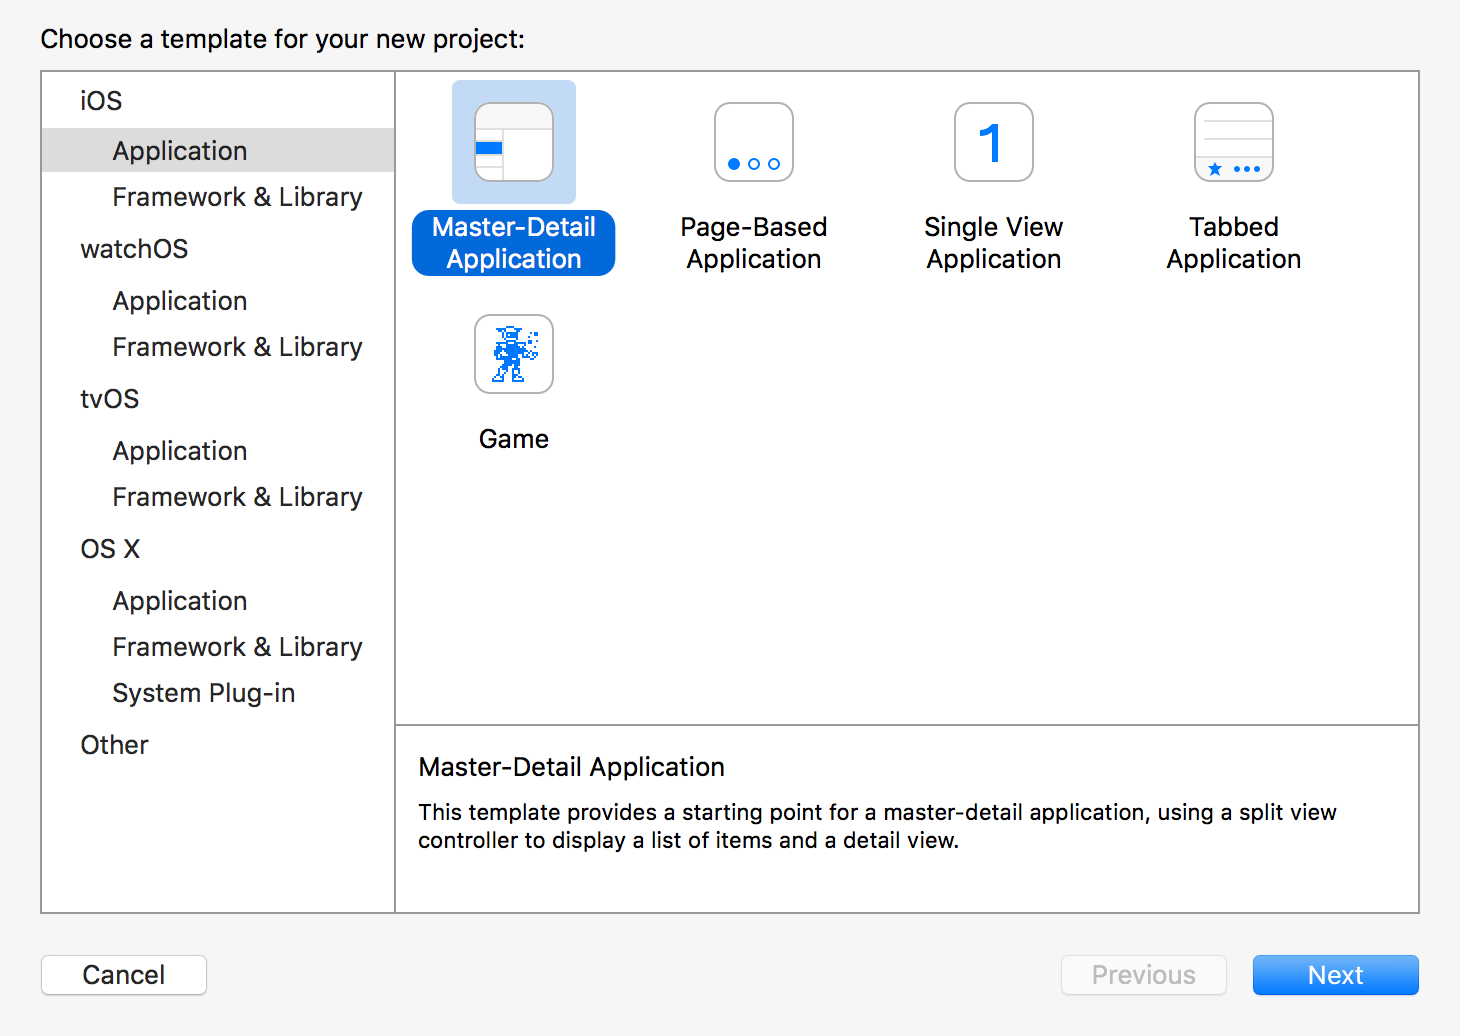
First create a new Xcode project, choosing the Master-Detail Application template.
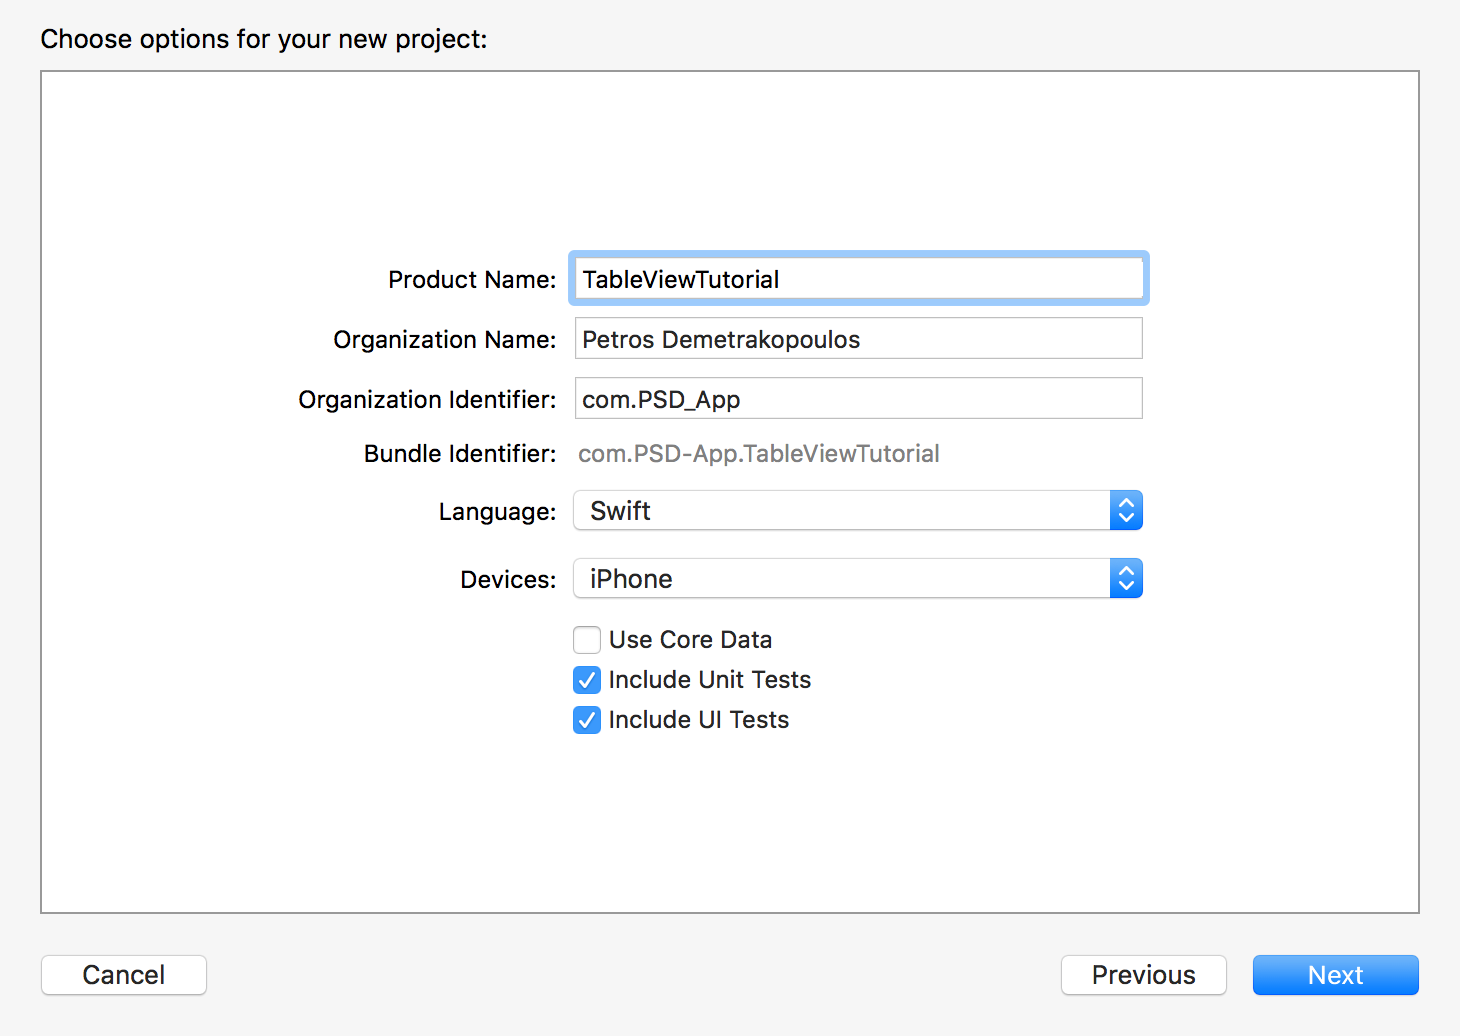
Click Next and add a name for the project. Set the project options as shown in the screenshot below and click Next.
If you run the project, you will see a table view with a + button on the right side of the top bar. This adds the current date and time in a new row of the table each time the user taps it. If you tap on one of the rows, a detail view will show a label with the date of the selected row.
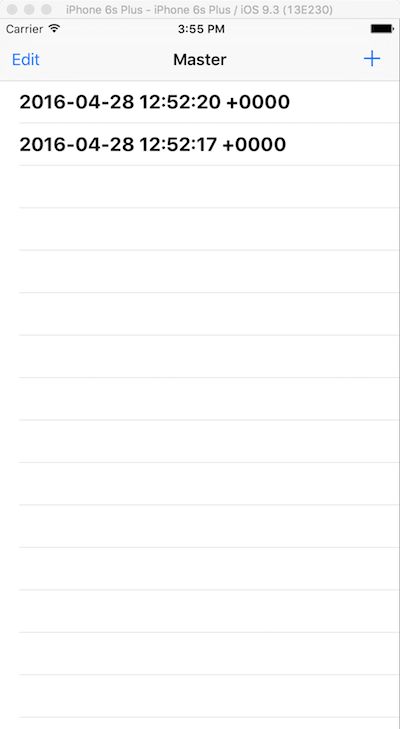
Table Set Up
Open the MasterViewController.swift file from Project Navigator. It’s an instance of the UITableViewController class and controls the functionality and data of the table view.
The viewDidLoad function sets the + button and a split view controller. The split view controller will only work on iPads.
The numberOfSectionsInTableView function returns the number of sections in the table. If you do not add any categorization, it will return 1.
The tableView(tableView: UITableView, numberOfRowsInSection section: Int) -> Int function returns the number of rows the table has in each section. In a table view, data is in an array structure wand presented in the table view. In this case the objects array.
The tableView(tableView: UITableView, cellForRowAtIndexPath indexPath: NSIndexPath) -> UITableViewCell function creates each cell in the table, setting text and other attributes. The indexPath.row value provides the integer value of the index.
The tableView(tableView: UITableView, canEditRowAtIndexPath indexPath: NSIndexPath) -> Bool function returns a value defining wether the cell is editable or not.
The tableView(tableView: UITableView, commitEditingStyle editingStyle: UITableViewCellEditingStyle, forRowAtIndexPath indexPath: NSIndexPath) function changes the style of a cell and includes boilerplate code for delete and insert styles.
Interacting with the Table
Until this point you have learned how to setup a tableview and which functions it needs to work.
The class also contains this function:
func insertNewObject(sender: AnyObject) {
  objects.insert(NSDate(), atIndex: 0)
  let indexPath = NSIndexPath(forRow: 0, inSection: 0)
  self.tableView.insertRowsAtIndexPaths([indexPath], withRowAnimation: .Automatic)
}
This function runs when the user taps the + button and adds the current date object to the objects array and thus the first row of the tableview.
The Detail View
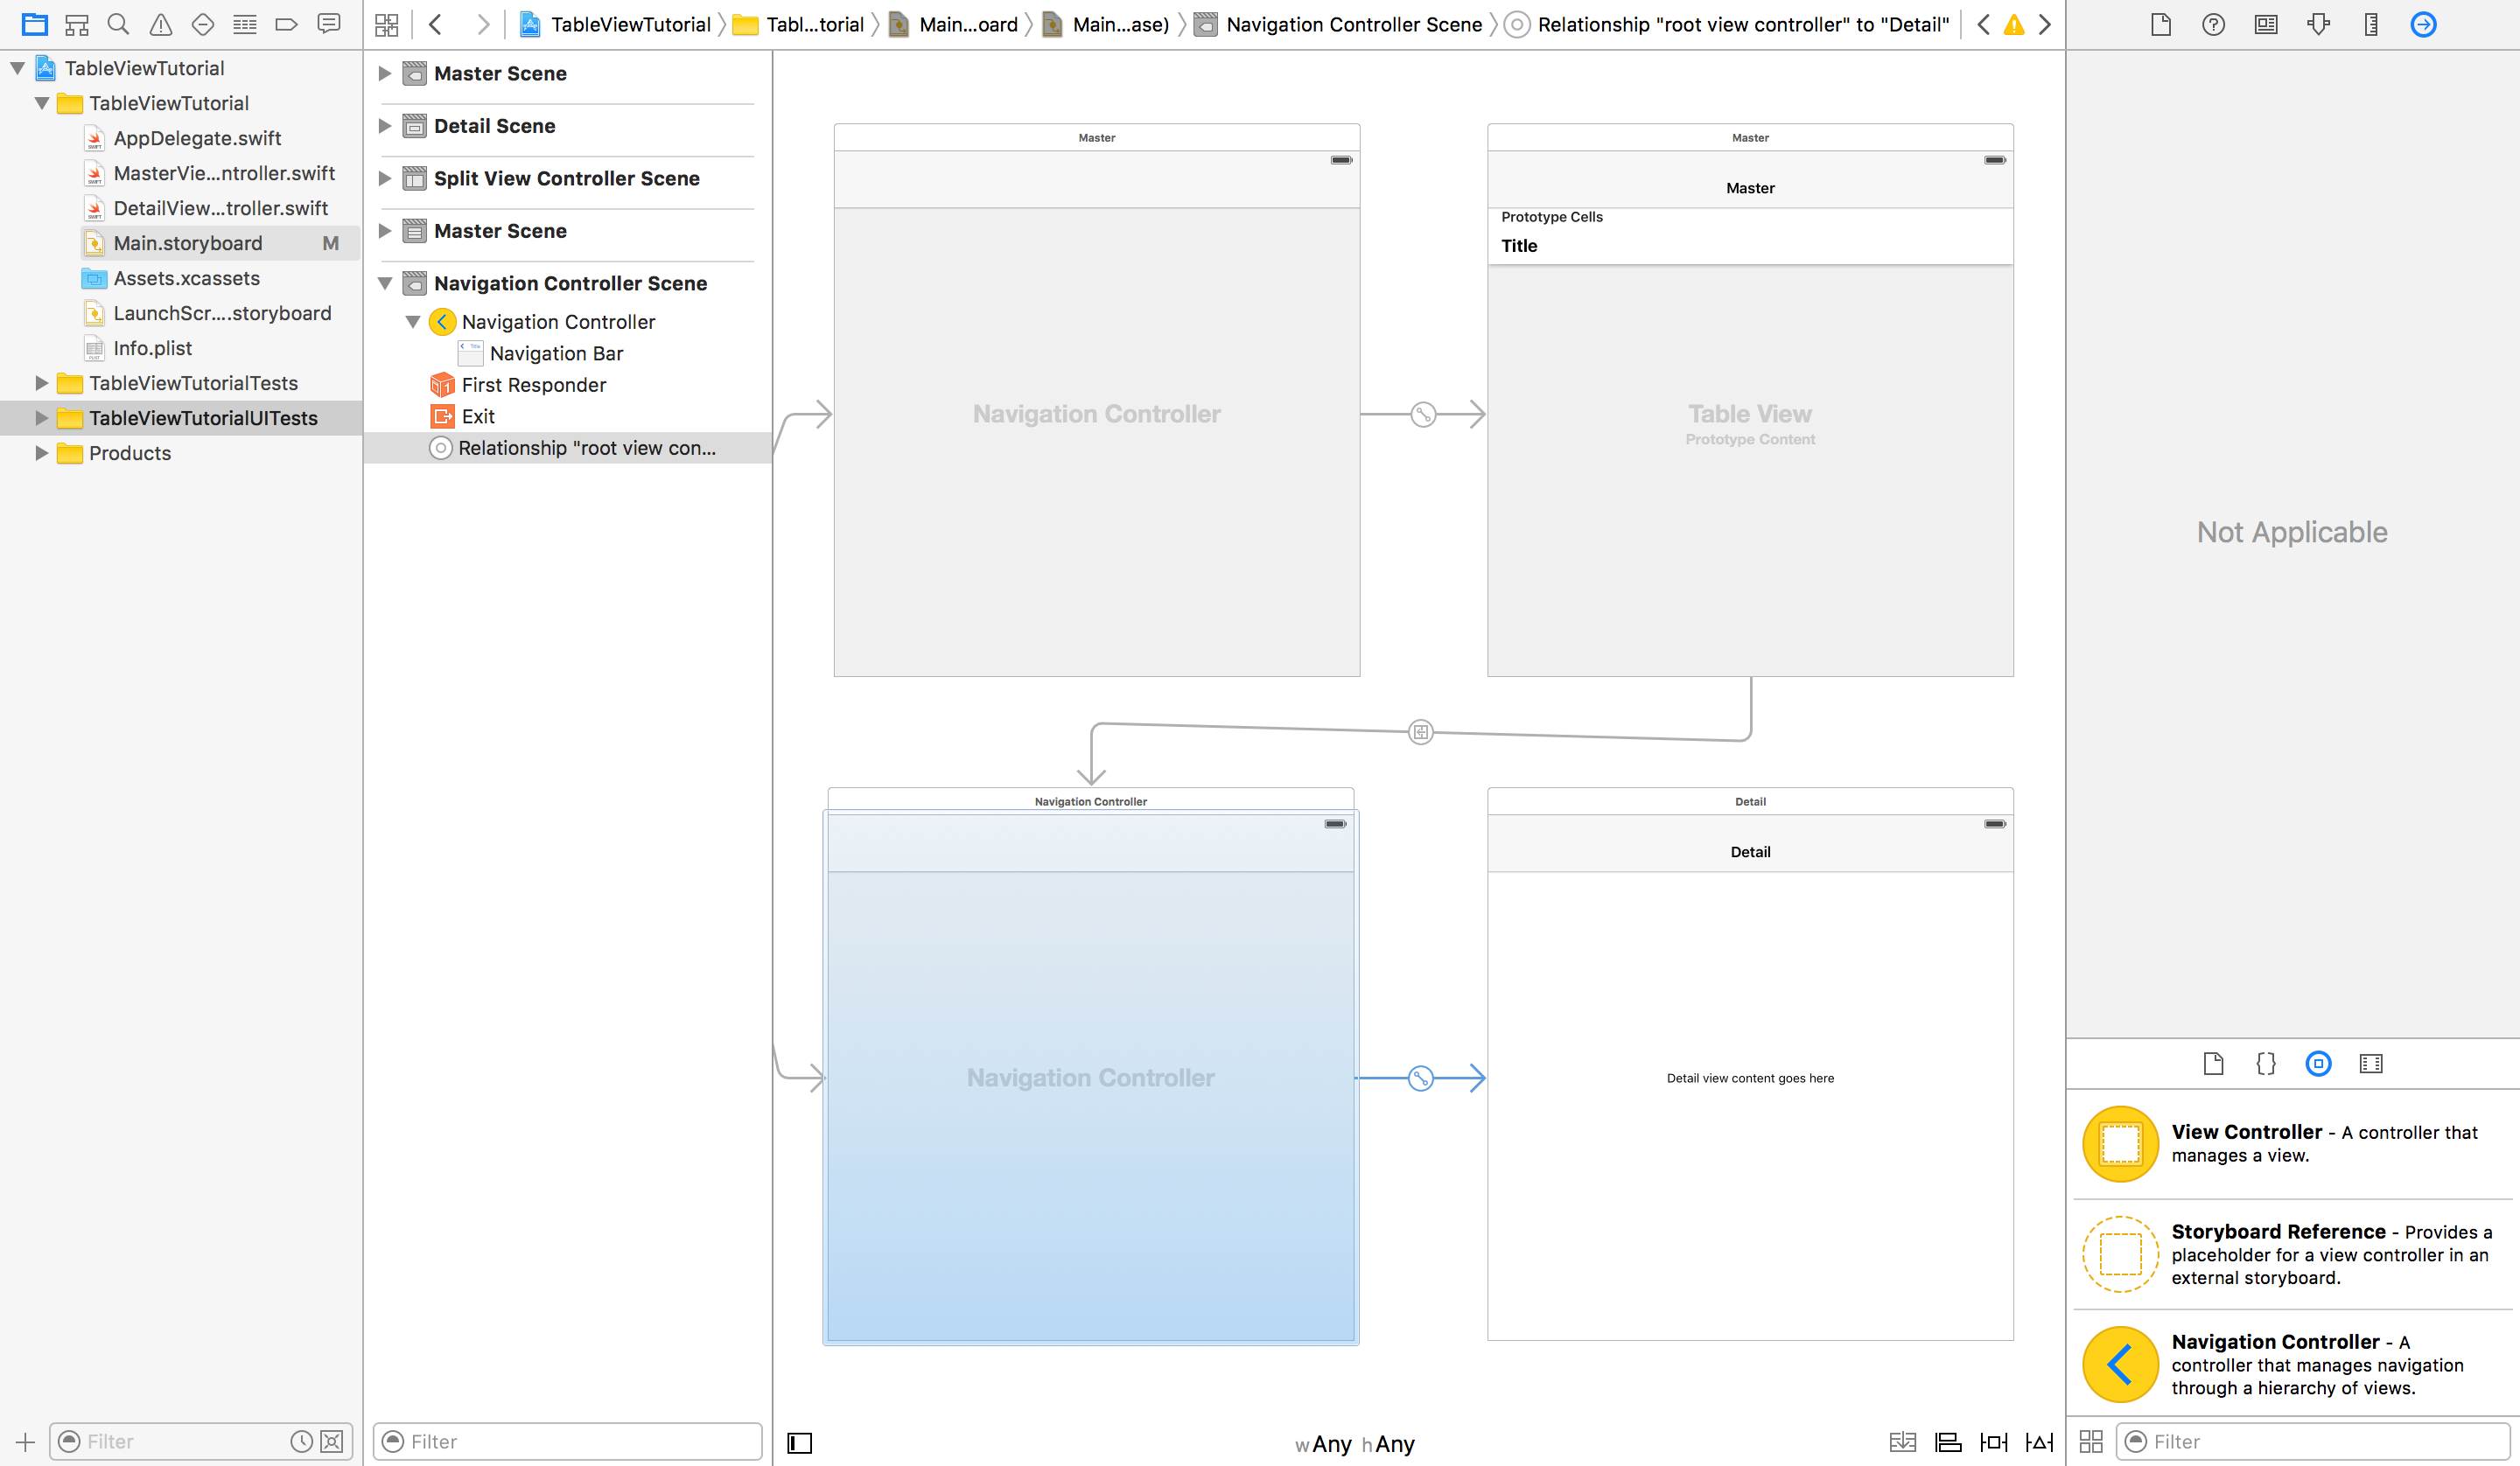
The Main.storyboard file handles most of the detail view. In the screenshot below, you can see the selected segue handles the selection of the row and presents it in the detail view.
When a user selects a row, the override func prepareForSegue(segue: UIStoryboardSegue, sender: AnyObject?) function of the MasterViewController class runs:
override func prepareForSegue(segue: UIStoryboardSegue, sender: AnyObject?) {
  if segue.identifier == "showDetail" {
      if let indexPath = self.tableView.indexPathForSelectedRow {
          let object = objects[indexPath.row] as! NSDate
          let controller = (segue.destinationViewController as! UINavigationController).topViewController as! DetailViewController
          controller.detailItem = object
          controller.navigationItem.leftBarButtonItem = self.splitViewController?.displayModeButtonItem()
          controller.navigationItem.leftItemsSupplementBackButton = true
      }
  }
}
This function checks if the segue is the detail view and sets the detail view properties according to the selected row.
Fill the Table with Content
Now fill the table with static content from an array. To do this, first remove the following lines from the override func viewDidLoad() function of MasterViewController.swift.
self.navigationItem.leftBarButtonItem = self.editButtonItem()
let addButton = UIBarButtonItem(barButtonSystemItem: .Add, target: self, action: "insertNewObject:")
self.navigationItem.rightBarButtonItem = addButton
This removes the + and edit buttons.
Now add the following lines to the same function.
objects.insert("January", atIndex: 0)
objects.insert("February", atIndex: 1)
objects.insert("March", atIndex: 2)
objects.insert("April", atIndex: 3)
objects.insert("May", atIndex: 4)
objects.insert("June", atIndex: 5)
objects.insert("July", atIndex: 6)
objects.insert("August", atIndex: 7)
objects.insert("September", atIndex: 8)
objects.insert("October", atIndex: 9)
objects.insert("November", atIndex: 10)
objects.insert("December", atIndex: 11)
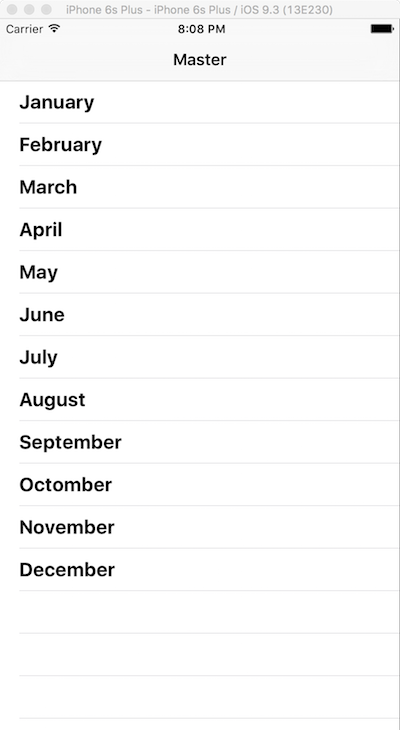
These lines populate the objects array that feeds the table view with the names of all the months in a year as string values.
In the tableView(tableView: UITableView, cellForRowAtIndexPath indexPath: NSIndexPath) -> UITableViewCell function change the following 2 lines:
let object = objects[indexPath.row] as! NSDate
cell.textLabel!.text = object.description
to:
let object = objects[indexPath.row] as! String
cell.textLabel!.text = object
And in override func prepareForSegue(segue: UIStoryboardSegue, sender: AnyObject?) { change:
let object = objects[indexPath.row] as! NSDate
to:
let object = objects[indexPath.row]
These lines are changed because now the values of the objects array are string values and you can instantly set the cell.textLabel!.text value to the objects[indexPath.row] because it’s a string.
Run the app and you should see the table filled with the months of the year. When you tap on a row of the table, the detail view shows, presenting a label of the month name.
You can find the final project with the changes you made on GitHub.
This was a basic introduction to the tableview and they have a lot of potential, if you’re interested in learning more, SitePoint has more advanced tutorials and the iOS developer library has some great next steps.
Any questions or comments? Please let me know below.


