Teaching Your Raspberry Pi to Speak with IBM Watson

It turns out there’s a lot you can do with a Raspberry Pi and IBM Bluemix. In the first article in this series, we explored how to connect up a Raspberry Pi to IBM Bluemix, IBM Watson and Node-RED. If you haven’t yet got your Raspberry Pi set up with Bluemix and Node-RED, go through part one first and then come back! I personally used a Raspberry Pi 3 for this, however I’ll assume a Raspberry Pi 2 can work just as well.
In this article, we are going to explore how to bring in text to speech to our Node-RED flow from the previous example.
Artwork by SitePoint/PatCat, Logo rights: IBM and Raspberry Pi Foundation
Connecting Text to Speech in IBM Bluemix
In order to have access to IBM Watson’s text to speech services, we need to add the “Text to Speech” service in Bluemix. Let’s head over to the Bluemix Services page and find the “Text to Speech” service (be careful not to choose “Speech to Text”… that’s different!).
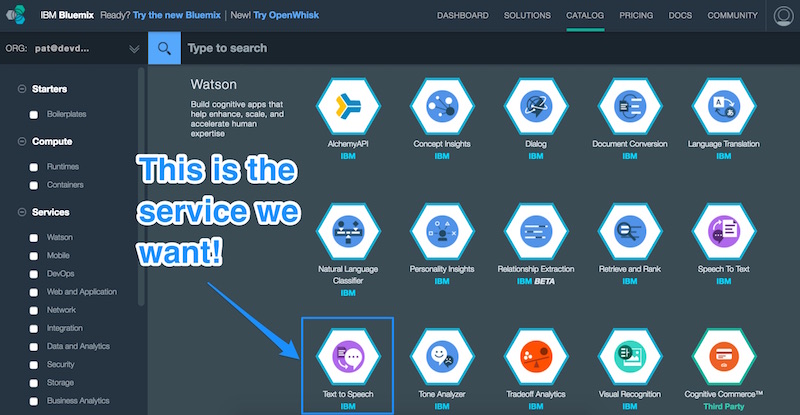
That should take us to the Text to Speech service Bluemix page.
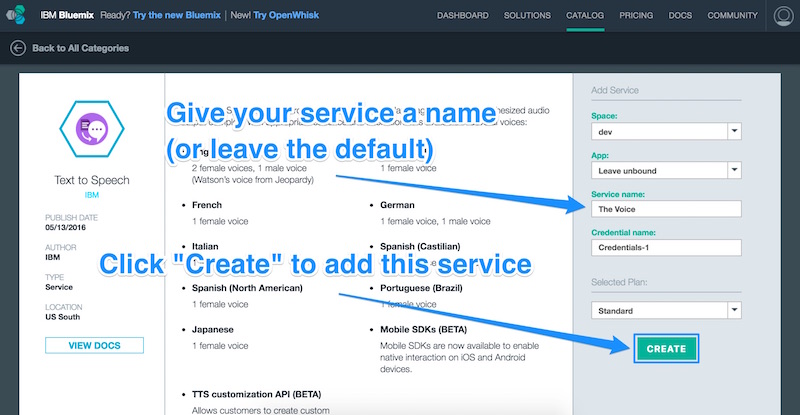
On that page, we’ll see various options for adding this service to our IBM Bluemix arsenal. We make sure our space that we are using for our Raspberry Pi is selected (I called mine “Dev” in the last article) and leave the app unbound. We can give the service a name (I called mine “The Voice”) and give the credentials a name (I left it as is). The only plan I had available was “Standard”, so I left that one as is too. Once we’re happy with our settings, we click “Create”.
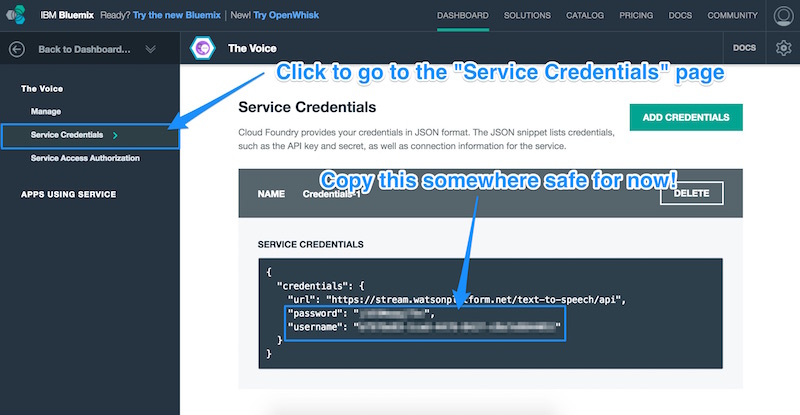
Once the service is created in our space, we’ll be taken to the page for that service. We click the “Service Credentials” menu item on the left to access the username and password we will need to give Node-RED in order to have access to our new IBM Watson Text to Speech service. Copy down the username and password from this page:
Adding New IBM Watson Services to Node-RED
In order to access the IBM Watson Text to Speech service in Node-RED, we will need to install some new nodes. To do so, we SSH into our Pi (or open the terminal from our Pi directly) and type in:
cd ~/.node-redThis brings us to the Node-RED app folder. From within here, we install a new collection of Node-RED nodes called node-red-node-watson. This includes access to a whole range of IBM Watson services, including the Text to Speech that we need. To install it, we run the following command on our Pi from the Node-RED folder:
sudo npm install node-red-node-watsonInstalling the ALSA Dev Library
The IBM Watson Text to Speech functionality will convert our Node-RED app’s text into spoken audio files, but we also need a way to get the Pi to play these files — otherwise those words will never be heard! In order for this to work on your Pi, you may need to run the following command to install the dev ALSA library:
sudo apt-get install libasound2-devRestarting Node-RED
In order for the new Node-RED node changes to come into effect, we need to restart Node-RED. To do so, we run the following two commands:
node-red-stop

node-red-start
Our New Node-RED Flow
We now have all the parts in place to be able to perform text to speech and have it playback — it is now time to put these into Node-RED and get it to run.
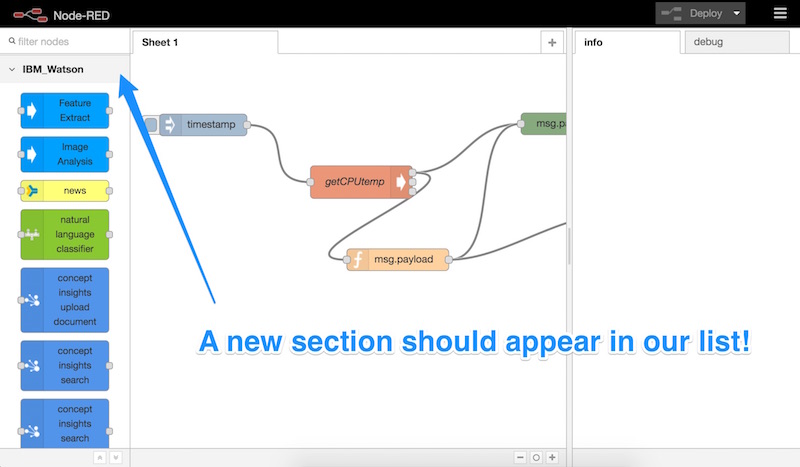
When we open up Node-RED after installing the node-red-node-watson package and restarting, we should see a bunch of new nodes under “IBM_Watson” on the left-hand side:
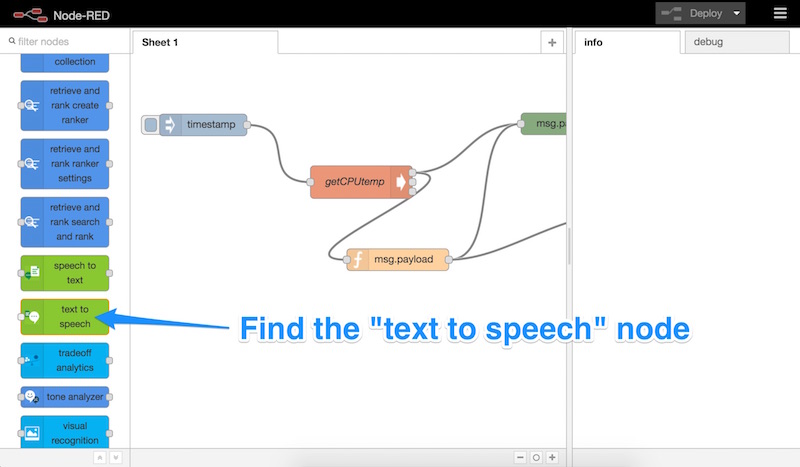
Let’s scroll down, find the “text to speech” node and drag it into our Node-RED sheet:
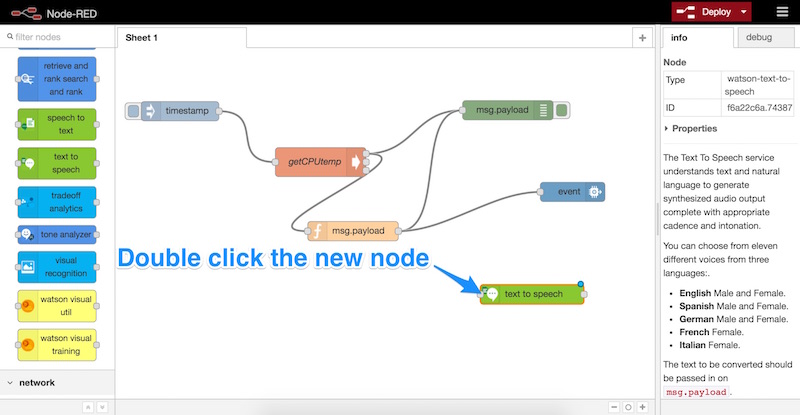
Once that’s in our sheet, we double click it to open up its settings:
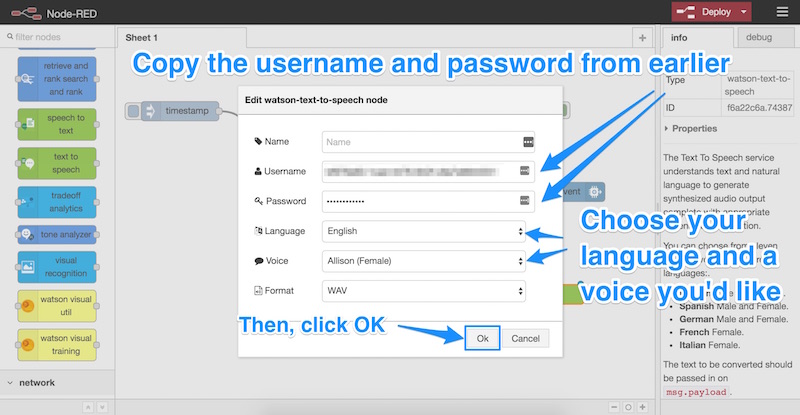
This is the section where we add in our credentials that we copied earlier from IBM Bluemix (the username and password). We paste those into here and choose a language and a voice for our Pi’s voice. We leave the file format as “WAV”, then we click “OK”:
Our text to speech is ready to work its magic. We now need a way to tell it what to say. Lets get it to tell us what the temperature of our Pi is, just as we previously were sending to IBM Bluemix’s system in the last article.
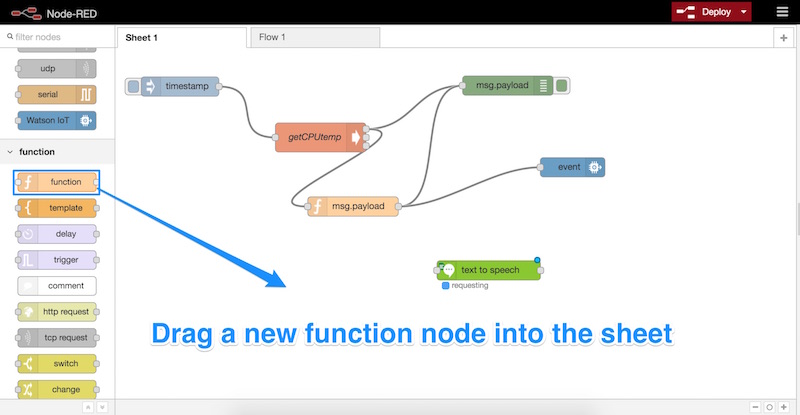
To begin, we’ll drag in a new function node into our sheet:
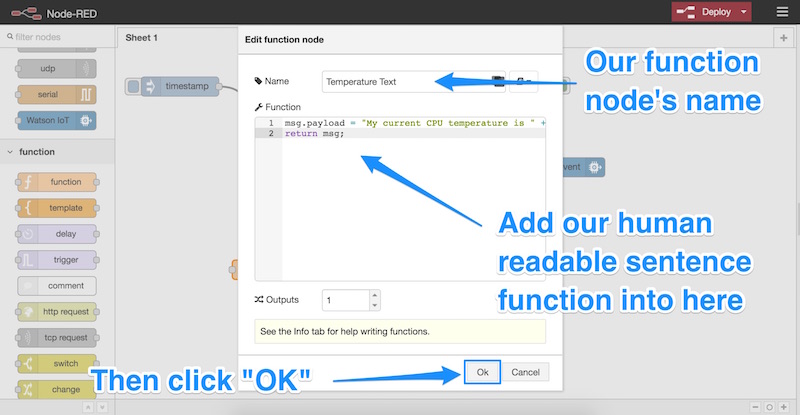
Double click that new node and enter in the following code to its function:
msg.payload = "My current CPU temperature is " +
              msg.payload.replace("temp=","").replace("'C\n","") +
              " degrees celsius";
return msg;
This function is working to format our message just like the one we used in the last article, however rather than formatting it into a JSON string, we are formatting it into a human readable sentence. The sentence will say, “My current CPU temperature is X degrees celsius”. We store this sentence within the msg.payload variable, which is what the IBM Watson Text to Speech node expects. We can also give the function node a label, I called mine “Temperature Text”:
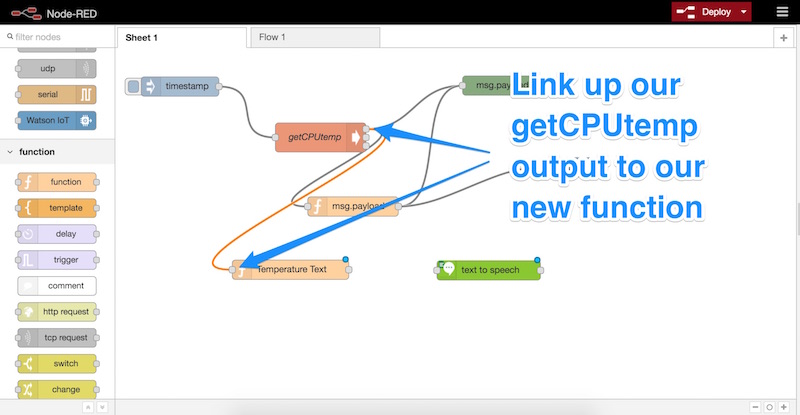
We link up our getCPUTemp node’s output to the input for the new function node:
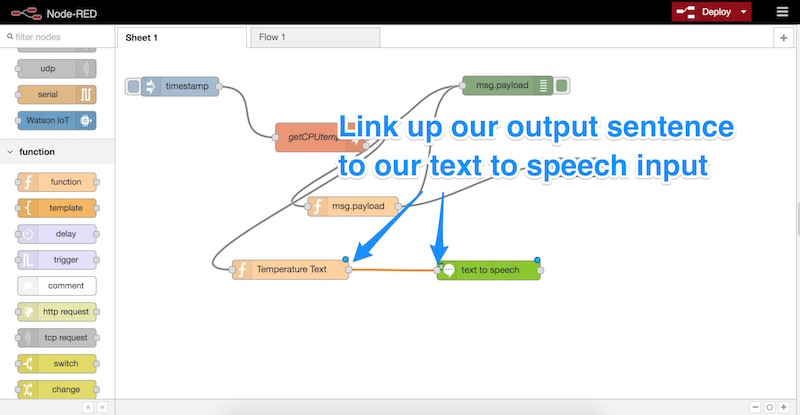
Followed by linking up the output of our function node to the input of our Text to Speech node:
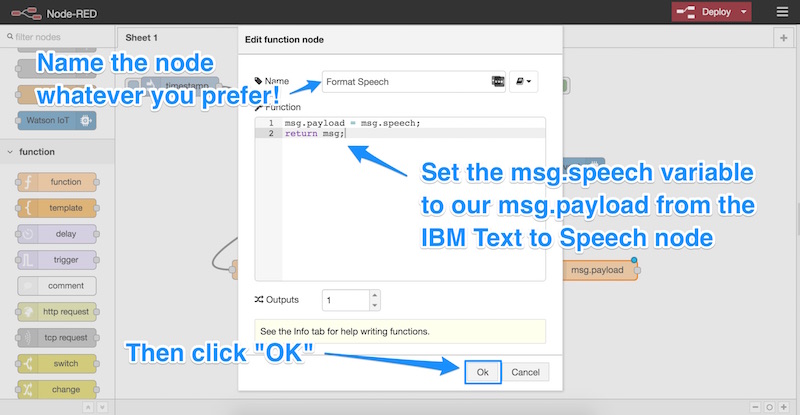
Then, we bring another function node into our sheet. Within that node, we set up a simple function that will set the msg.speech variable to the msg.payload which is what our text to speech node returns:
msg.payload = msg.speech;
return msg;
Feel free to call that node whatever you’d like, I called it “Format Speech”. Then click “OK”:
Storing and Retrieving Our Sound File
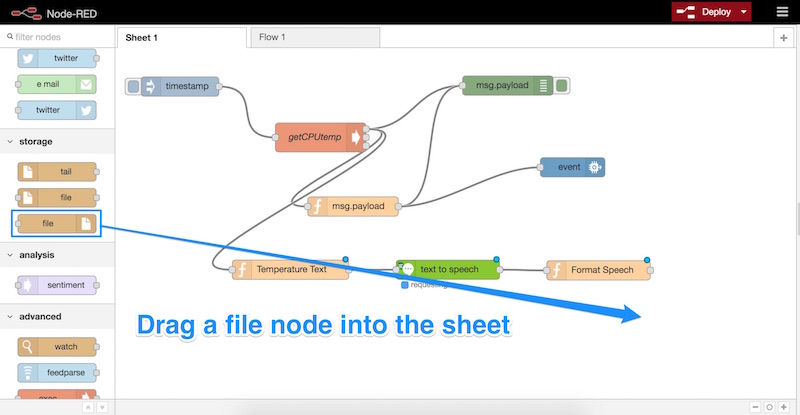
We now have a sound buffer that is generated and ready to be stored somewhere so we can play it. To store it in a file, we use the “file” node which can be found underneath the “storage” heading. Drag the one with no output into your sheet:
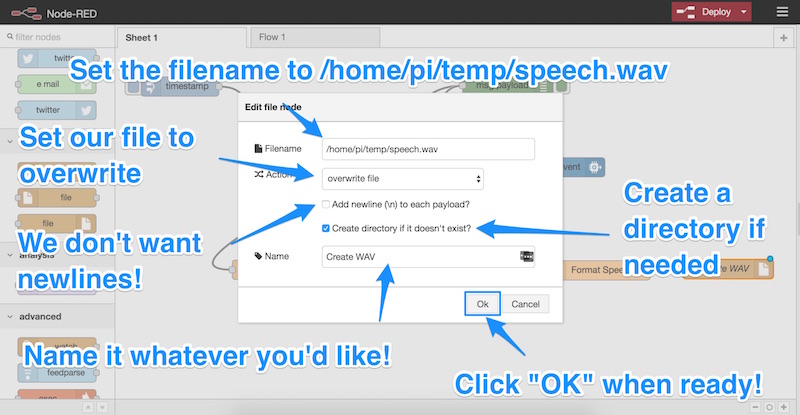
We double click on that new node and enter in the following settings:
- We set the filename to
/home/pi/temp/speech.wav(where pi is the username currently running Node-RED). - The action should be “overwrite file”.
- We ensure “Add newline (\n) to each payload?” is unchecked.
- “Create directory if it doesn’t exist” should be checked so that Node-RED can create a directory for the file if needed.
- We name our node — name it whatever you’d prefer! I named mine “Create WAV”.
- Click “OK”!
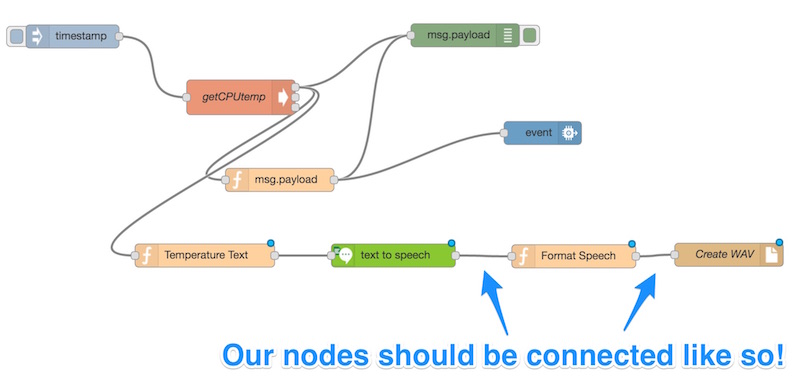
This has created a simple flow that will generate a WAV file for us each time IBM Watson has translated some text for us. Ensure you’ve got each of the nodes connected like so:
Playing Sound
Before we try to run this app, we need to adjust the frequency at which it runs. To do this, we double-click our “timestamp” node:
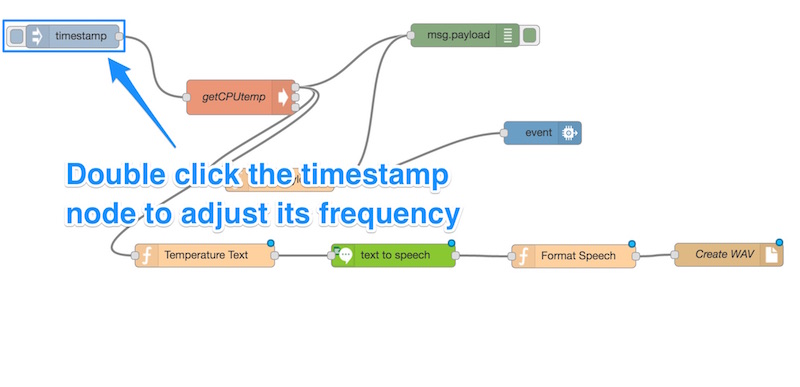
Let’s set the frequency to something more reasonable — remember, IBM Watson’s voice needs time to actually speak the line each time! Also, note that IBM will charge for the service if it goes over one million characters in a month, so you don’t want to overuse this — especially if you’re requesting it so frequently that the voice never gets heard! One minute intervals worked well for me:

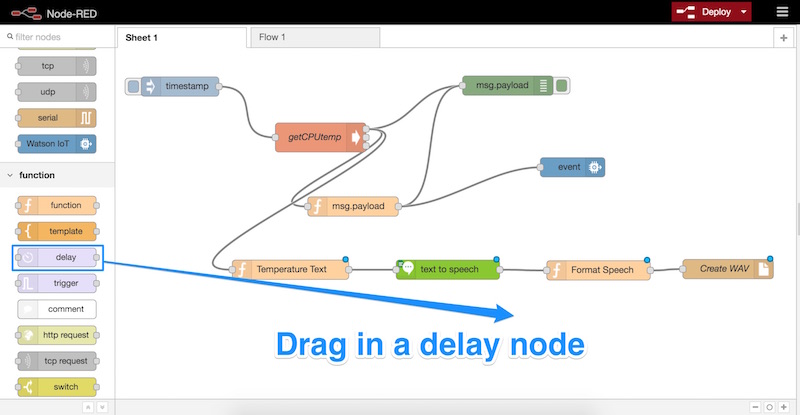
Now, we drag in a “delay” node. This will wait a little while for IBM Watson to have time to perform the text to speech before we try to play it. There are ways to run nodes in Node-RED when the sound file is updated but I found them to be a little buggy at times — a simple delay seemed to work best.
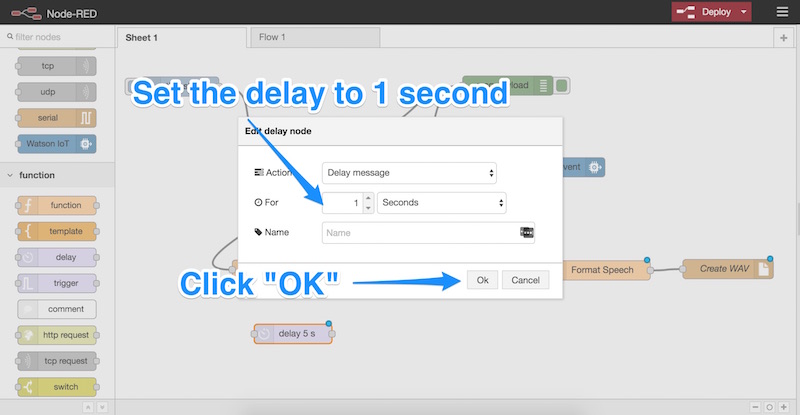
We double-click the node to open its settings, change the delay to 1 second and click “OK”:
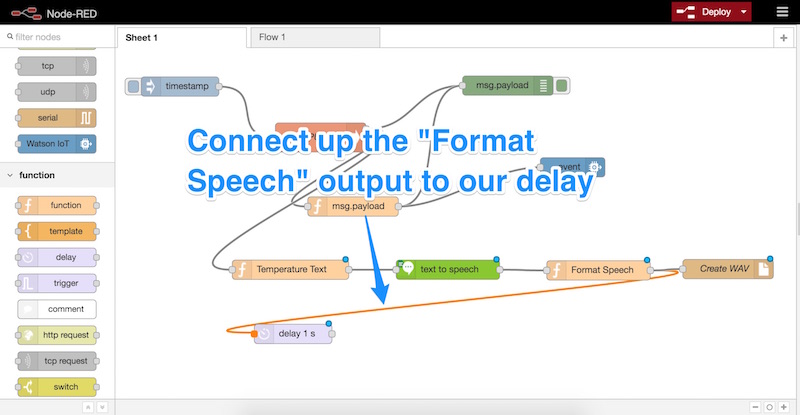
We connect up the “Format Speech” output (or whatever you named the function) to our delay like so:
Then, we drag in a new node — the file reading node. It will be above the “file” node we dragged in earlier but has both an input and output:
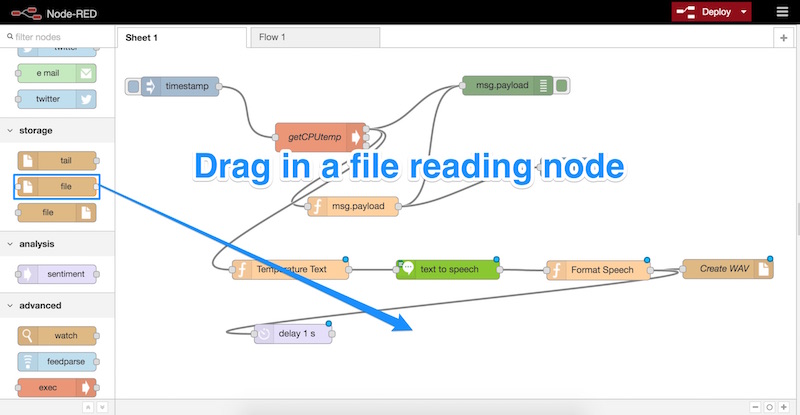
Double click that new node and enter the following settings:
- We set the filename to
/home/pi/temp/speech.wav(the same as the one we had created earlier). - We ensure the output is “a buffer”.
- We give it a name of “Read WAV” (this can be whatever you’d like to call it of course).
- Click OK!

We connect up our delay node to the “Read WAV” node and then drag in our final node — the “exec” node. This one is underneath the “advanced” section and can run Unix commands. This is how we will play our audio on the Pi.
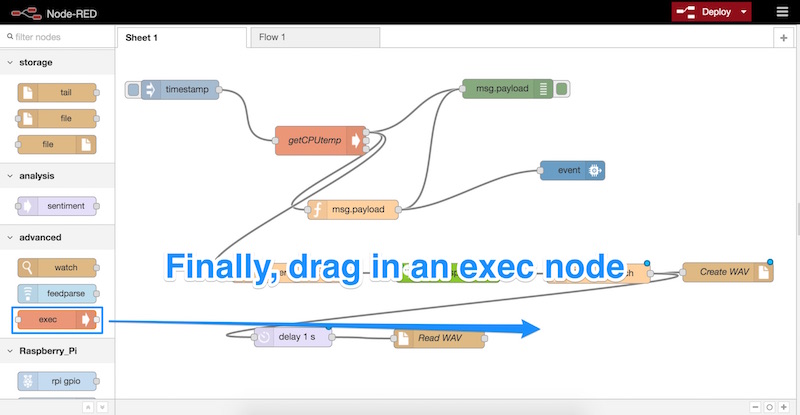
We double click that new node to change its settings. We set the command to:
aplay /home/pi/temp/speech.wavThis plays the sound file on our Pi! We don’t need the radio buttons to be selected or anything, we just name the node (I named mine “Play Audio”) and click OK:

In Action
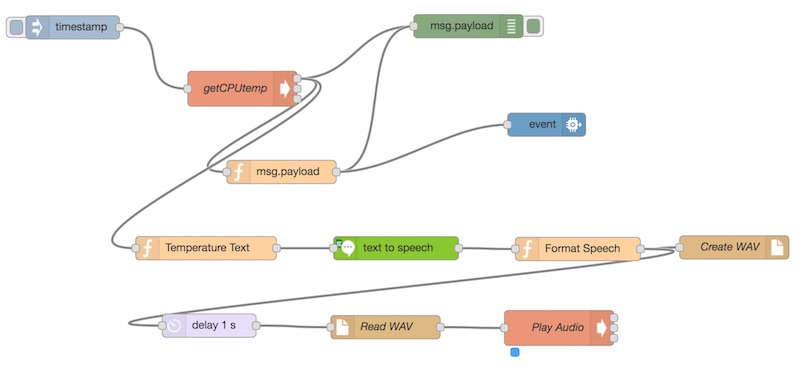
With that, we have all pieces in place for this to work:
One setting you may need to change on your Pi is where it is set up to output the audio. I used the following command to direct audio to the 3.5mm jack:
amixer cset numid=3 1You can find out more about changing your Raspberry Pi’s audio settings on the Raspberry Pi audio config page.
With the audio set up correctly and everything in place, click the “Deploy” button in the top right of your Node-RED interface. If all goes to plan, it should run successfully and your Raspberry Pi should begin speaking to you!
Below is a video I posted up on Twitter of my Raspberry Pi speaking to me through a Starbucks cup:
My @Raspberry_Pi continues to speak to me through a @StarbucksAu cup and it is wonderful. The joys of technology… pic.twitter.com/KIjgtPSnfe
— Patrick Catanzariti (@thatpatrickguy) May 24, 2016
(How did I do that you ask? I used a magical device called a Boombox Portable Vibration Speaker!)
Conclusion
The IBM Watson text to speech capabilities bring a whole new set of possibilities for developers working with IBM Bluemix and the Raspberry Pi! You could connect up the speech to almost anything, including other IBM Watson services. We will continue to explore more capabilities in the next article in this series, thank you to those currently following along!
If you have been giving the Raspberry Pi and IBM Bluemix combo a go, I’d love to hear what you create with it! Let me know in the comments below, or get in touch with me on Twitter at @thatpatrickguy.


