An Introduction to NodeBots

Many web developers out there would love the chance to build an incredibly cool robot that they can control via JavaScript, right? I’m here to tell you that this is already possible today! Right now.
NodeBots have been around for a while, and the community around them is growing like wildfire. In this article, I’m going to explain what NodeBots are, how they work and how you can get started tinkering away at robot creation.
What is a Microcontroller?
Before I get too far into things, we’ll be mentioning microcontrollers quite frequently. A microcontroller is a tiny and very simple computer. It has a simple physical programmable circuit board that can detect various inputs and send outputs. An Arduino is a type of microcontroller. It’s actually one of the most common ones for newcomers to experiment with. There are other sorts of microcontrollers too that can be powered by Node, including Particle boards (my favorite!), BeagleBone boards, Tessel boards (the board itself runs on JS) and Espruino boards (also runs on JS). In this article, I’ll be focusing on Arduinos, as they’re the most common.
What are NodeBots?
NodeBots are (quite literally) robots of one kind or another that can be controlled via Node. They can have everything from wheels, movable arms and legs, motion detectors, cameras, LED displays, the ability to play sound and so much more. The only limits are your imagination and the components you can find and put together!
The whole idea of NodeBots evolved through the increasing capabilities of Node.js and the interest of a few developers like Nikolai Onken, Jörn Zaefferer, Chris Williams, Julian Gautier and Rick Waldron who worked to develop the various Node modules we use in NodeBots today. The Node package called node-serialport by Chris Williams started it all, allowing access to real world devices via reading and writing to serial ports at a low level.
Julian Gautier then implemented the Firmata protocol, a protocol used to access microcontrollers like Arduinos via software on a computer, using JavaScript in his Node.js Firmata library.
Rick Waldron took it a massive step further. Using the Firmata library as a building block, he created a whole JavaScript Robotics and IoT programming framework called Johnny-Five. The Johnny-Five framework makes controlling everything from LEDs to various types of sensors relatively simple and painfree. This is what many NodeBots now use to achieve some very impressive feats!
Where To Start
If you’re completely new to the idea of building robots and any sort of real-world, JavaScript-controlled device, there are plenty of incredible resources for you to get started with. The very first thing I’d recommend you do is find yourself a good Arduino kit that provides a good range of components and sensors to give you a range of items to play around with. Below, I’ve got a list of some of the Arduino starter kits that are available from various companies. If the below list looks overwhelming, don’t worry! They all contain very similar components and are all a good choice for beginners.
Starter Kits
- SparkFun Inventors Kit. This is the kit that started it all for me years ago! It comes with a range of standard components like colored LED lights, sensors, buttons, a motor, a tiny speaker and more. It also comes with a guide and sample projects you can use to build your skills. You can find it here: SparkFun Inventor’s Kit.
- Freetronics Experimenter’s Kit for Arduino. This kit is by an Australian-based company called Freetonics. It has very similar components to the SparkFun one, with a few small differences. It also has its own guide with sample projects to try as well. For those based in Australia, these kits and other Freetronics parts are available at Jaycar. You can also order it online here: Freetronics Experimenter’s Kit.
- Seeed Studio ARDX starter kit. Seeed Studio have their own starter kit too, which is also very similar to the SparkFun and Freetronics ones. It has its own guide and such too! You can find it here: ARDX – The starter kit for Arduino.
- Adafruit ARDX Experimentation Kit for Arduino. This kit is also very similar to the ones above with its own guide. You can find it here: Adafruit ARDX Experimentation Kit for Arduino.
- Arduino Starter Kit. The guys at Arduino.cc have their own official kit that’s available too. The starter kit is similar to the ones above but has some interesting sample projects like a “Love-O-Meter”. You can find it here and often at other resellers too: Arduino Starter Kit.
With all of the above kits, keep in mind that none of them are targeted towards NodeBot development. So the examples in booklets and such are written in the simplified C++ code that Arduino uses. For examples using Node, see the resources below.
Resources for Learning NodeBots
There are a few key spots where you can learn how to put together various NodeBot projects on the Web. Here are a few recommendations:
- Controlling an Arduino with Node.js and Johnny-Five. This is a free SitePoint screencast I recorded a little while ago that introduces the basics of connecting up an Arduino to Node.js and using the framework to turn an LED light on and off.
- Arduino Experimenter’s Guide for NodeJS. An adaptation by Anna Gerber and other members of the NodeBots community from the SparkFun version of .:oomlout:.’s ARDX Guide. It shows how to do many of the examples from the kits mentioned above in Node instead of the simplified C++ code from Arduino.
- The official Johnny-Five website. Not so long ago, the Johnny-Five framework had a whole new website released that has great documentation on how to use the framework on Arduino and other platforms too!
- Make: JavaScript Robotics Book. A new book released by Rick Waldron and others in the NodeBot community that provides a range of JS projects using various devices. Great for those who’ve got the absolute basics down and want to explore some new projects!
- NodeBots Official Site. Check this page out if you’re looking for a local NodeBots meetup near you, or to read more about NodeBots in general.
- NodeBots – The Rise of JS Robotics. A great post by Chris Williams on how NodeBots came to be. It’s a good read for those interested.
The SimpleBot
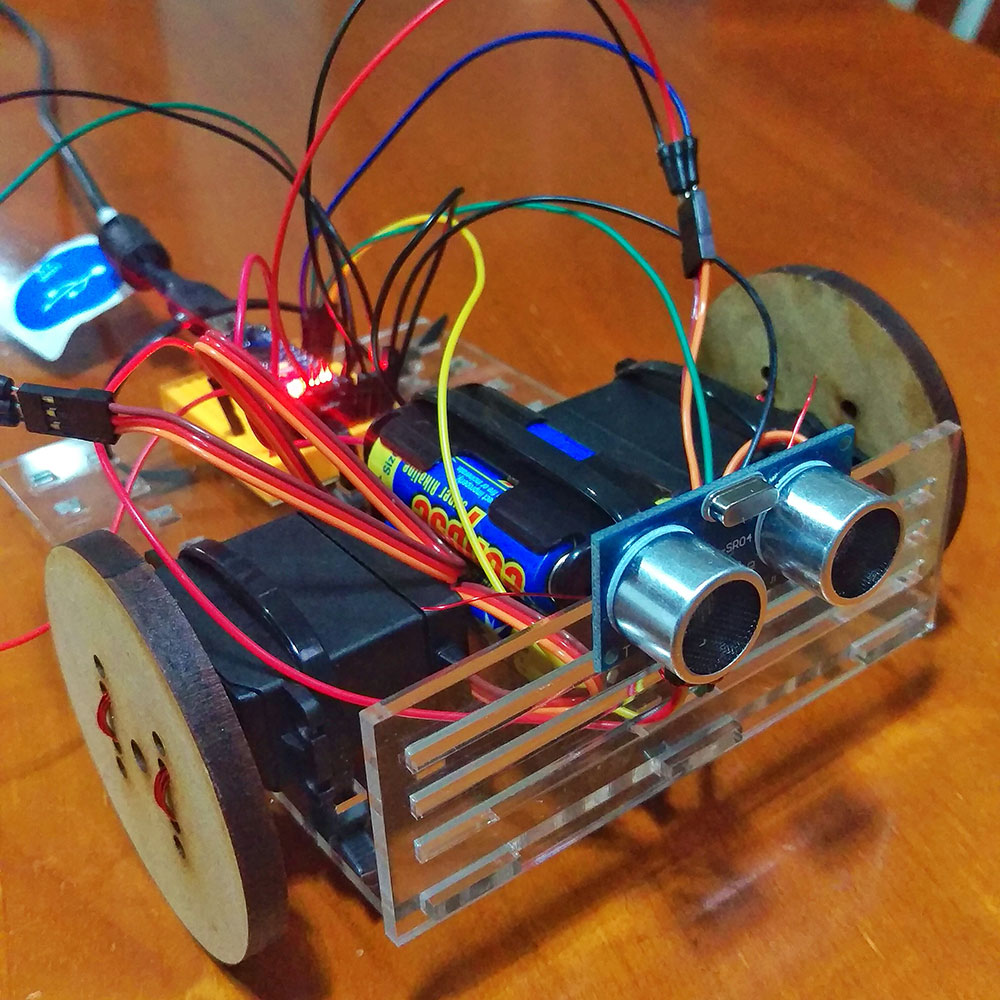
Andrew Fisher, a fellow Australian NodeBot enthusiast, put together a rather simple project for people to build for their first NodeBot experience. It’s called a “SimpleBot”, and it lives up to its name. It’s a NodeBot that you can typically build in a single day. If you’re keen on getting an actual robot up and running, rather than just a basic set of sensors and lights going on and off, this is a great project choice to start with. It comes available to Australian attendees of NodeBots Day (see below) in one of the ticket types for this very reason! It’s a bot with wheels and an ultrasonic sensor to detect if it’s about to run into things. Here’s what my own finished version looks like — which I prepared as a sample for NodeBots Day a few years ago:
A list of SimpleBot materials needed and some sample Node.js code is available at the SimpleBot GitHub repo. Andrew also has a YouTube video showing how to put the SimpleBot together.
Andrew also collaborated with the team at Freetronics to put together a SimpleBot Arduino shield that might also be useful to people who’d like to give it a go as a learning project without needing to solder anything: SimpleBot Shield Kit.
Conclusion
That concludes a simple introduction into the world of NodeBots! If you’re interested in getting involved, you’ve got all the info you should need to begin your NodeBot experience.
If you want to get more involved with NodeBots, keep an eye out for the annual International NodeBots Day. (It happens around July each year.) It’s a day where all sorts of people get together at various events around the world to build JavaScript powered bots and have a great time.
If you build yourself a pretty neat NodeBot with any of the above resources, leave a note in the comments or get in touch with me on Twitter (@thatpatrickguy), I’d love to check out your JavaScript powered robot!


