Embedding Virtual Reality Across the Web with VR Views

The methods available for web developers to build virtual reality experiences for the web is growing at a rapid and exciting pace! I previously covered how to build VR on the web last year and it has already advanced quite a bit since then. There are quite a few options for building virtual reality experiences for the web that have emerged in 2016 — in the past two weeks, we’ve explored A-Frame, an open source extensible VR web framework and building VR within VR using Primrose. Last month, Google themselves announced another exciting option that is set to bring even more VR to the web — embeddable VR Views.
What Are VR Views?
“VR Views” provide the ability for developers to embed 360 degree virtual reality images and video into websites on desktop and mobile. VR Views can also be embedded into native apps on Android and iOS. In this article, we will explore how simple it is to embed a 360 panoramic image into an existing website.
Device Compatibility
Google’s VR View works on the latest versions of the following browsers on both desktop and mobile:
- Chrome on Android, iOS, Windows, Mac OS X and Linux.
- Safari on iOS and Mac OS X.
- Firefox on Windows, Mac OS X and Linux.
- IE 11 and Edge on Windows.
With desktop versions, your “virtual reality” experience is mostly a panorama experience where you drag the view around with your mouse. They call this version of the experience a “magic window” — it is similar to desktop Quicktime VR panorama experiences that some may have seen a few years back. However, the VR Views from Google today are done using JavaScript rather than a third-party plugin, and can be enhanced through a true VR view using Google Cardboard.
Taking a Panoramic Photo
Google have a “Cardboard Camera” app that can take 360 degree panoramic photos on Android. For those on iOS, there is an app called Optonaut which can also take 360 photos. I’m not quite sure how easy Optonaut photos are to export and use elsewhere, so if you do have an iOS device and give this a go — I’d love to hear how it went!
With the Google Cardboard camera, you can take a 360 photo by standing in one place and moving in a circle, following the instructions on screen. The most effective scenes will be ones taken outdoors, with a wide open space and not too much detail at the bottom or top of your image. If you are taking a photo of a smaller room, you may need to adjust the image before it will look right (we’ll look at how to do so below).
When you have taken a photo with the camera, you should find the 360 photo on your phone over at /sdcard/DCIM/CardboardCamera. Copy that to the computer you will be doing your development on.
Preparing An Image
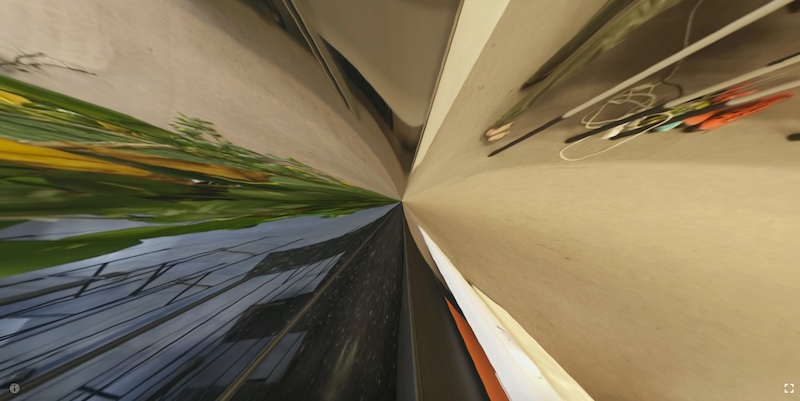
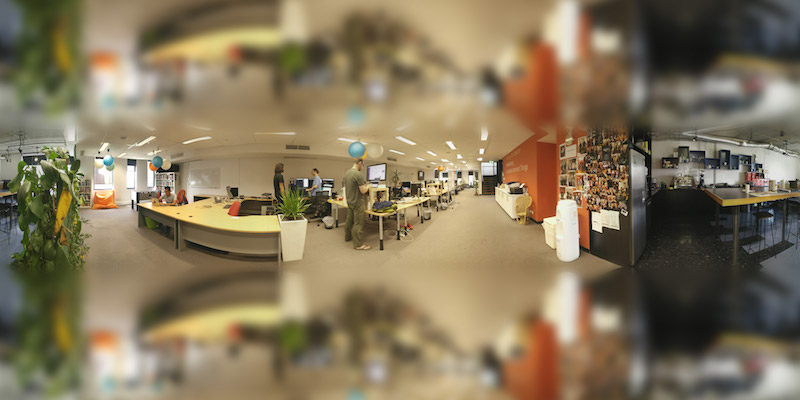
If you do not have a large amount of sky and ground in your scene, your image is likely to display a bit strangely in those areas. Sometimes, especially for indoor shots, this is unavoidable. We used a photo of the SitePoint office (thanks Angela!), which has a perfect example of what the bottom of an image that has a lot of unavoidable detail at the bottom will look like:
To avoid having too much detail at the top and bottom of your image, you can add space above and below the image that’ll keep things looking neater. There are plenty of techniques you can try to give a nice top and bottom area that doesn’t scrunch up too much, my favorite so far is to add a blurred reversed image on both the top and bottom.
To try this method, create a 2048 x 1024 image in photoshop and paste three of your panorama image inside it:
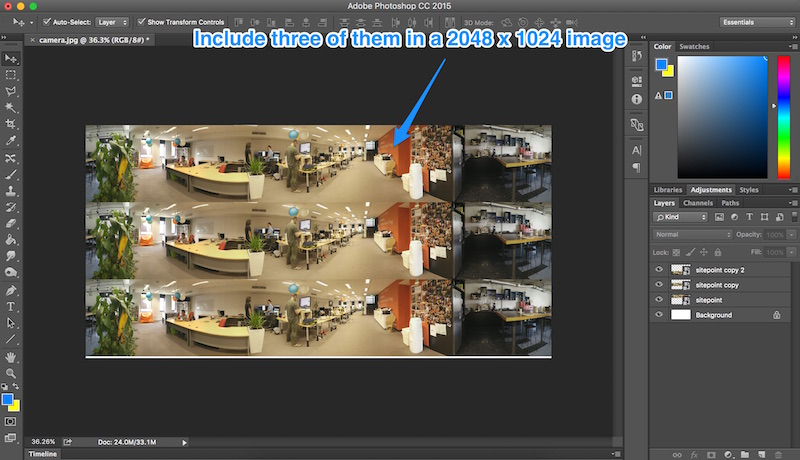
Stretch all three so that it fills the canvas and then flip the top and bottom images using Edit > Transform > Flip Vertical:

That should look like so:

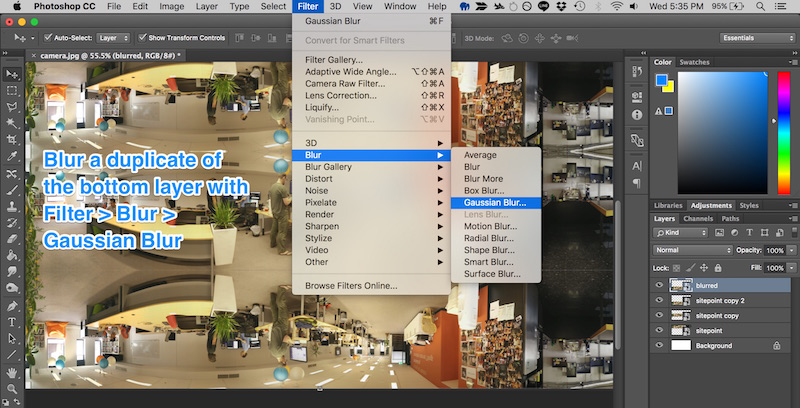
Duplicate the top and bottom images, then blur the duplicate using Filter > Blur > Gaussian Blur:
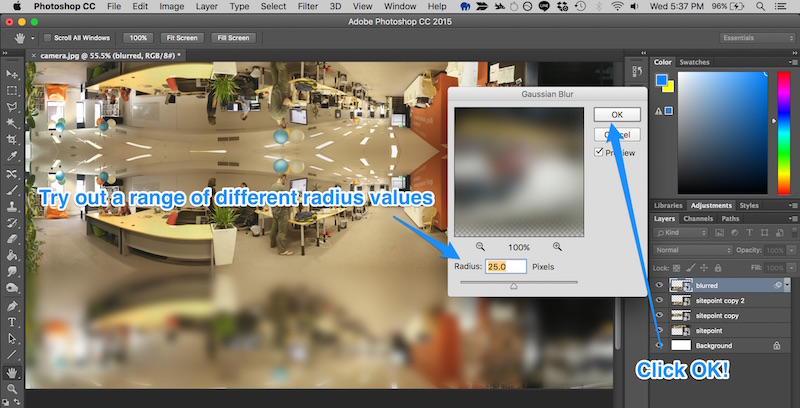
Try out different values for the radius value, as some scenes will look better with more blur and vice versa:
Stretch out each of the blurred layers so that they extend beyond the image (as the edges will fade out and we don’t want them to fade out on the edges of our canvas):
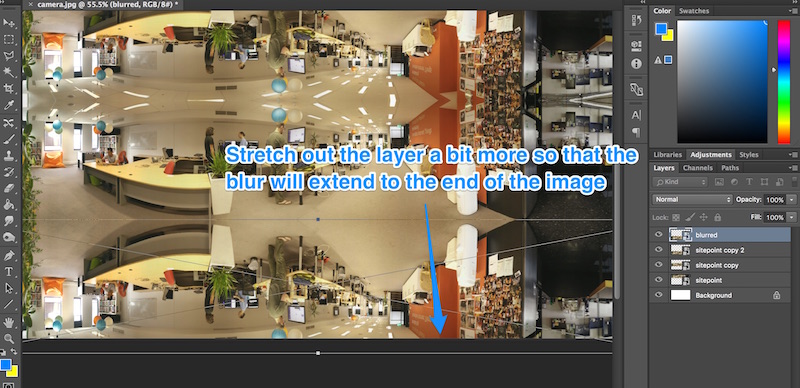
Our final result for the images should look like so:
If you have photoshop skills, you may come up with other ways of making the bottom and top of the image less conspicuously strange. Some scenes will be easier and less obvious than others!
Embedding Our Image
There are two options for embedding our image in a VR View. We can either embed Google’s hosted VR View or host our own version. At the moment, hosting our own version on the same server is more reliable. Things do not work quite right on iOS Safari when the VR View and image are hosted on different servers. The server with the image also needs to be able to allow cross-origin resource sharing (CORS) if using Google’s hosted VR View.
Using Google’s Hosted VR View
For a quick test of what the VR View is like, you can include the following in your web page:
<iframe width="100%"
	height="300px"
	allowfullscreen
	frameborder="0"
	src="//storage.googleapis.com/vrview/index.html?image=//storage.googleapis.com/vrview/examples/coral.jpg&
	is_stereo=true">
</iframe>
That sample code from Google looks like this in action:
By default, you will see a lovely 360 panoramic view of fish in a coral reef! If you change the image= parameter in the iframe’s URL, you can set the panorama to your own image. This should work as long as the server you are using to host the image works with CORS.
You’ll see an is_stereo=true attribute in there — this is when the image is set up with a duplicate of the panorama in the one image. To keep things simple, we haven’t gone down that route in our custom image example! For more info on this, see Google’s documentation on VR View.
Hosting The VR View Yourself
Google’s hosted VR View is incredibly convenient and about as simple as embedding a YouTube video — perfect for quick embedding of panoramic content. However, if you want to use this for a large audience on many platforms, you will want to host the VR View yourself. Otherwise, the images will have an incorrect orientation bug on iOS Safari. Hopefully, that will be solved soon enough and self-hosting will no longer be needed!
Self-hosting isn’t too difficult to set up. Download the code from Google’s VR View GitHub and host it somewhere with public access. If you keep it within a folder called “vrview” on your server, then you will be able to access it at //yourdomain.com/vrview/?image=examples/coral.jpg&is_stereo=true. If you have hosting set up directly for this (or have a domain name pointing directly at it), then you can avoid the /vrview bit.
To add other images, include them within your server wherever you’d prefer (e.g. images/yourimage.jpg) and then change the URL above to look for this new image (e.g. //yourdomain.com/vrview/?image=images/yourimage.jpg).
If you are just looking to quickly test this with your own images and don’t have hosting ready yourself, one great option is to use GitHub Pages.
Hosting The VR View On GitHub Pages
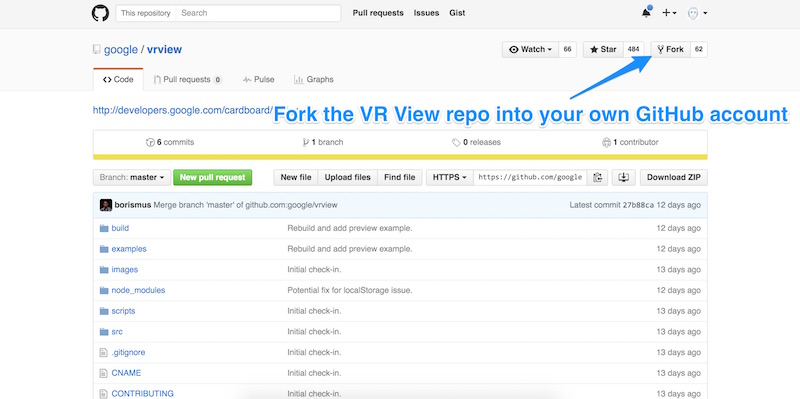
You can avoid downloading and hosting the VR View yourself by instead forking Google’s repository and then hosting it on your GitHub account using GitHub Pages.
To begin, go to Google’s VR View GitHub repo and click “Fork”:
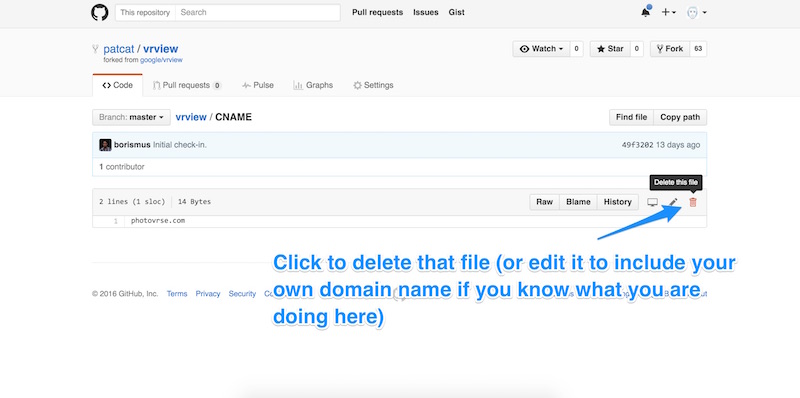
Then, inside your fork of the repo, find the CNAME file and click it:
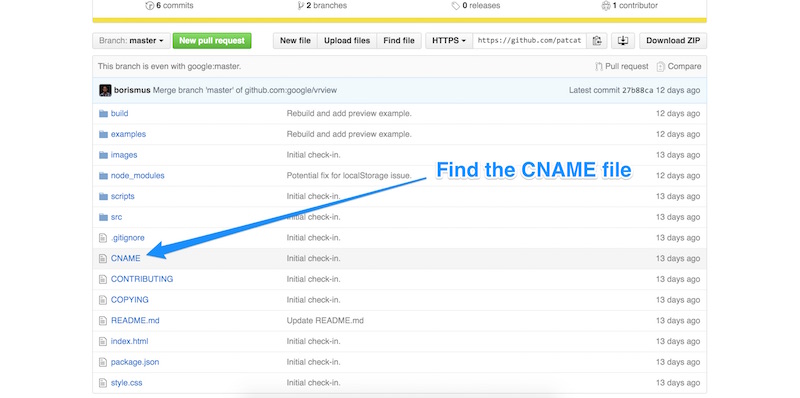
This file will assign a domain name to your GitHub Page. If you have a domain name ready to use and would like to set it up to work with this, read over GitHub’s guide to using a custom domain with GitHub Pages. Otherwise, click the trashcan icon on the right hand side to remove this file from your forked version of the repo. This will instead allow you to use a typical http://you.github.io/ address.
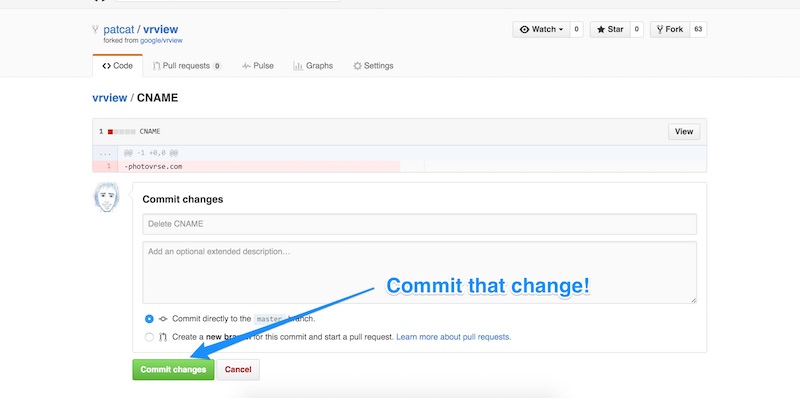
Commit that change:
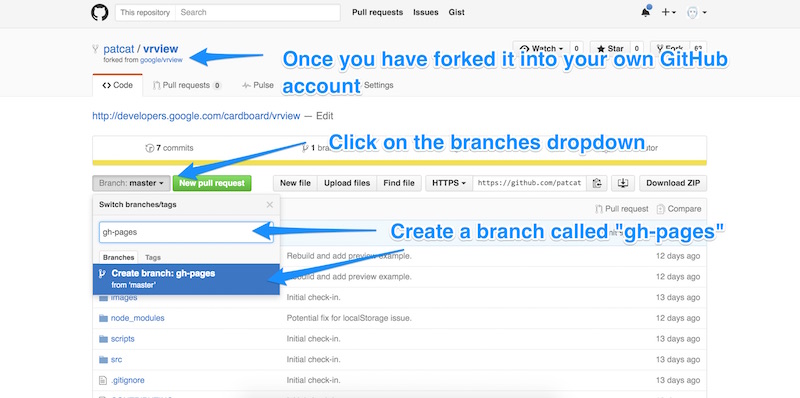
Finally, create a new branch in your forked version of the VR View and call it “gh-pages”. Everything in this branch will be what is accessible on your GitHub Page for this repo:
If you now visit http://you.github.io/vrview/?image=examples/coral.jpg, you should have your own working version of the VR View!
From here, you can add your own images wherever you’d prefer, just as you could do with self-hosting above. In this case, you’d need to add that image to your gh-pages branch directly, or add it to master and then bring it into the gh-pages branch from there. If you are new to GitHub, you can avoid much of the confusion of the command line and just drag your image into the browser window while the folder for your image is open.
Once you have updated the image, change the URL to target that image (e.g. http://you.github.io/vrview/?image=yourimage.jpg) and you should see it in a glorious 360 panorama!
In Action!
Here’s a 360 sneak peek of what’s like to work in the SitePoint office — finally, all of the SitePoint staff can re-visit the office virtually in their spare time! You can see it in full screen by clicking the full-screen icon in the bottom right. If you are on a smartphone, there will be a VR icon next to it too. Click that if you have a Google Cardboard headset and enjoy!
You can see the VR View on its own over on my VR View GitHub Page!
Conclusion
Google’s VR View adds yet another simple option for creating 360 VR content for the web and is incredibly easy to put together!
If you put together a 360 view of your own, I’d love to see what you create! Let me know in the comments below, or get in touch with me on Twitter at @thatpatrickguy.


