How to Export and Submit Your Meta App

A few weeks ago, we looked into getting started with augmented reality and Meta and put together a pretty augmented reality butterfly. The Meta 2 was then released for pre-order and we explored what the Meta 2 means for augmented reality developers. There is plenty more to be explored around Meta development that hasn’t really been covered much — so let’s explore a rather important part of the process — exporting your app!
I recently finalized my very own Meta 1 application and thought it would be useful to cover what is involved in the process, along with tips I undercovered along the way. We’ll look at the stages after your initial app has been developed — how to get your app into a final executable file that you can give to other Meta Pioneer friends and how to submit it to Meta’s Dev Center for even more Pioneers to see.
Exporting Your App In Unity
Those who have exported an app within Unity before will find this process pretty straightforward. There are only a few minor things to keep in mind that deviate from the typical Unity project export. For those who are completely new to Unity — we’ll be covering this process in detail, so you should be able to follow along.
To begin, open your Unity scene in the Unity Editor. If you are following along from the Butterfly tutorial, the scene was in Scenes > ButterflyScene. Make sure it is completely ready to be exported and that you’ve got everything visible in the scene that you’re looking to include in the final product. I’ve found it a good habit to always play the scene one last time within Unity before going to export.
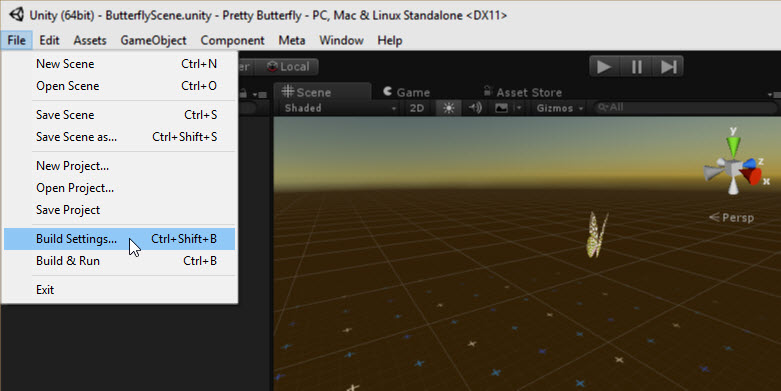
Once we are definitely happy to export our AR app, we go to File > Build Settings…:
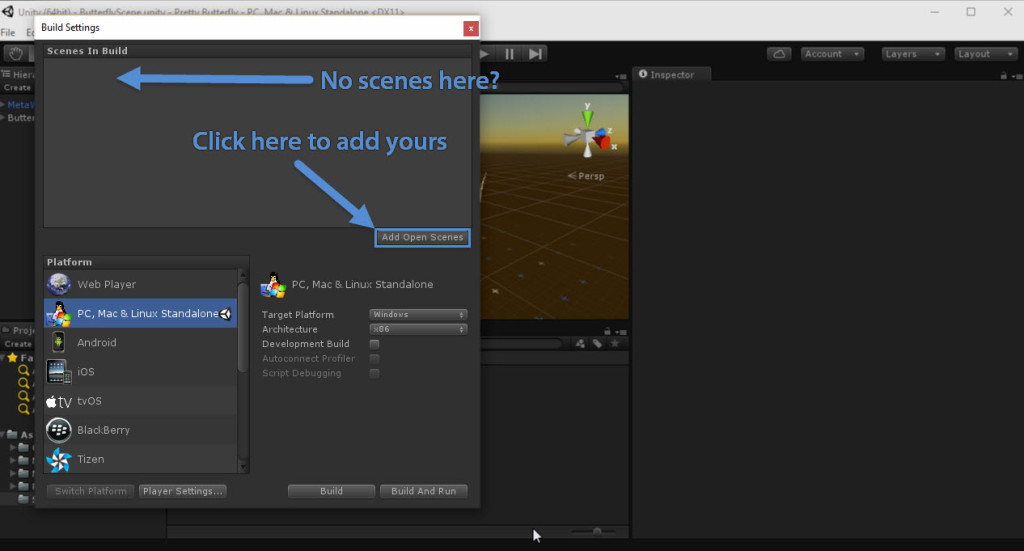
The first thing I’m going to stress here is to check the listed scenes under “Scenes for Build”. Make sure your current scene is there. If you have no scenes in that list, click “Add Open Scenes” to add your scene to this list:
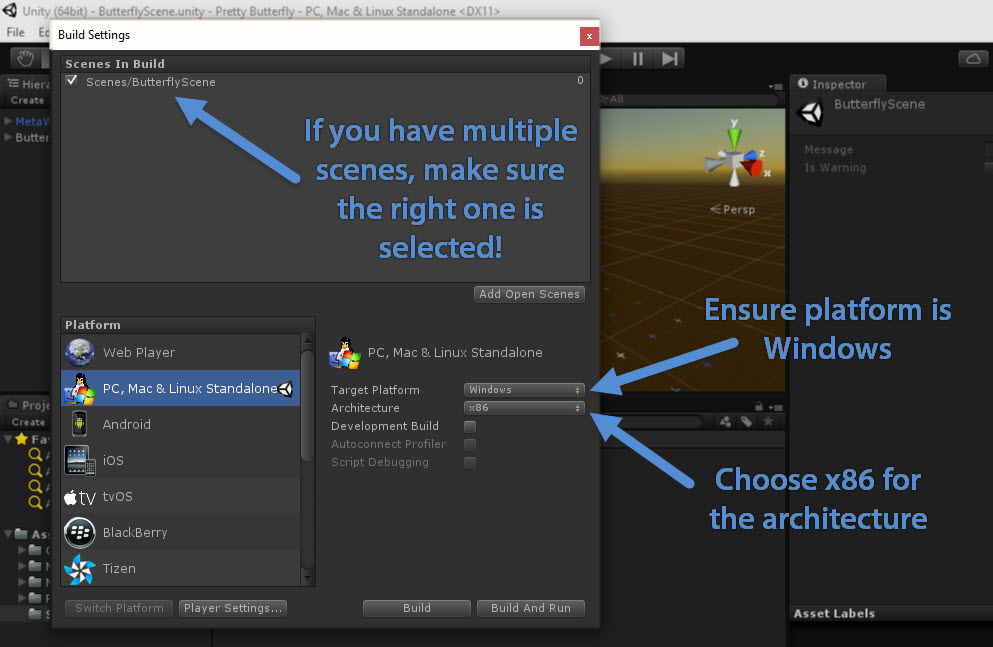
If you have multiple scenes — make sure the scene that is there is the one you expect to be there. This sounds obvious, but it caught me out when I was building my own AR app, MetaKitty, and had two versions of a scene in my project. I was incredibly confused for quite a while when none of my changes to the scene would export. Don’t make my silly mistake!
Also within the “Build Settings” window:
- Choose “PC, Mac & Linux Standalone”.
- Make sure the target platform is set to “Windows”.
- Set the architecture to be “x86”.
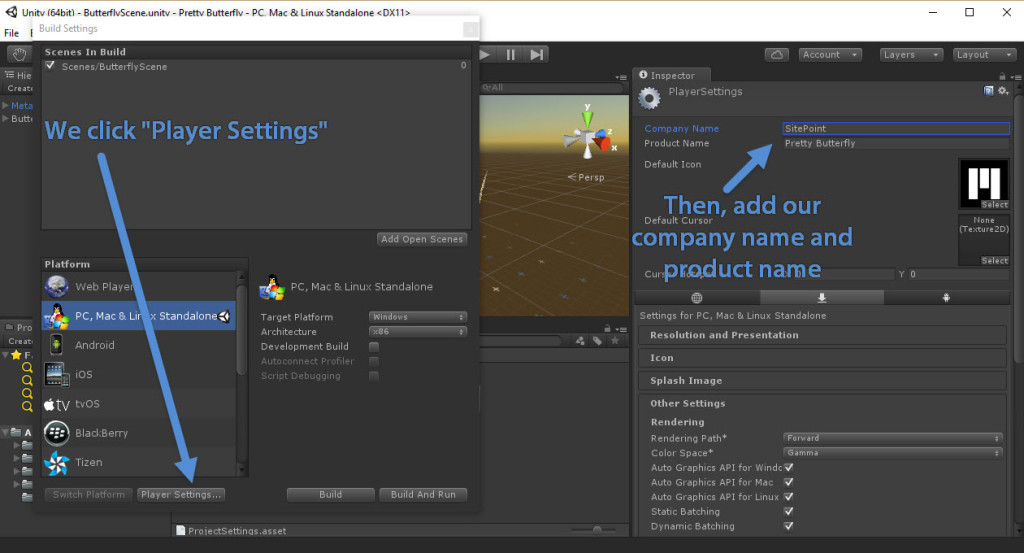
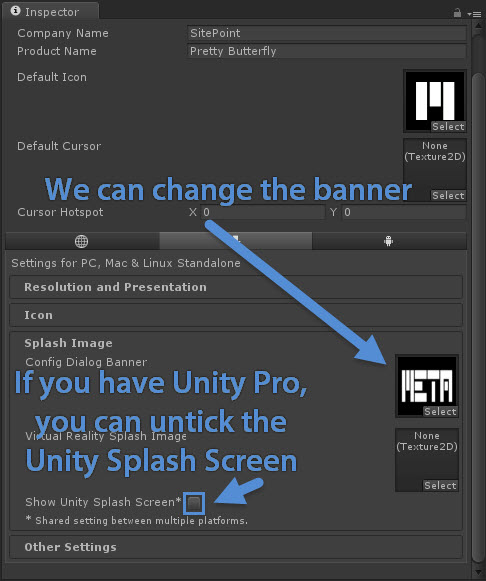
Now, we need to set a few specific settings for our app. To start with, we click “Player Settings…” underneath the “Platform” options. In the “Inspector” panel on the right hand side of our screen, we’ll see a bunch of settings for the exported app. We start by adding our own company name and product name. I’ve got “SitePoint” and “Pretty Butterfly” for the app from our last article.
If you’ve got your own icon for your app, you can also update it by clicking the “Default Icon” image underneath your “Product Name”. Otherwise, it will have the Meta logo by default.
Underneath that first section, there are several expandable sections of settings. We can click on “Splash Image” to adjust how the app looks when it first loads up. You can change the config dialog banner to your own image. This is the banner that appears in the initial window giving the user options for their screen resolution, graphics quality and monitor. If you’d like to customize it, it should be sized at 432 x 163 pixels. Unity does not scale up the image to fit, it only centers and crops it if needed.
If you have Unity Pro, you will also be able to turn off the “Show Unity Splash Screen” option to take away the Unity logo bit that always appears at the start:
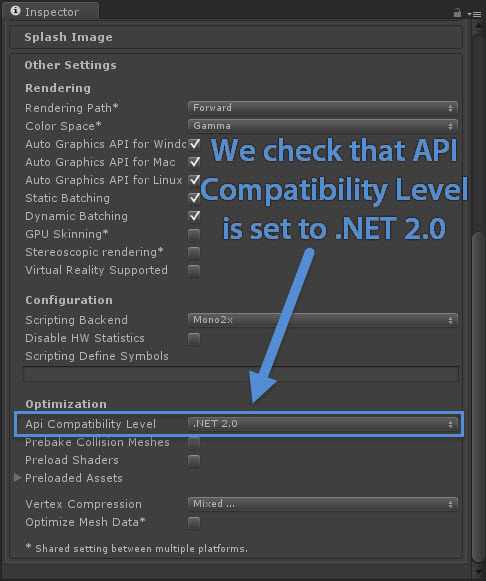
Finally, expand the “Other Settings” section and ensure that under “Optimization”, the “Api Compatibility Level” is set to “.NET 2.0”. For me, there hasn’t been a time when this wasn’t already the case, but it’s worth checking!
Then, if we go back to the “Build Settings” window, we can choose either “Build” or “Build Settings” to build our app. If you’d like it to run straight away once it is built, choose “Build and Run”. I generally choose that option:

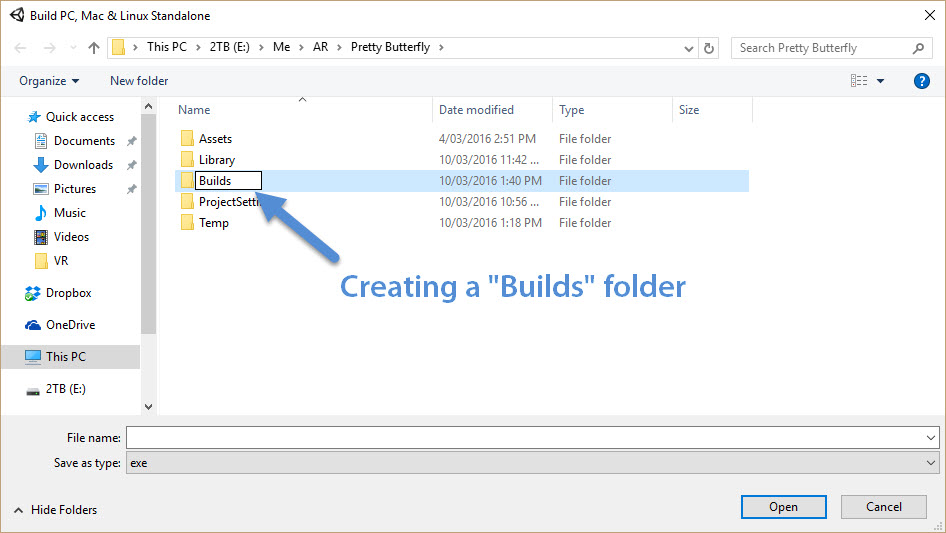
My personal preference at the moment is to add my builds into their own “Builds” folder in the project:
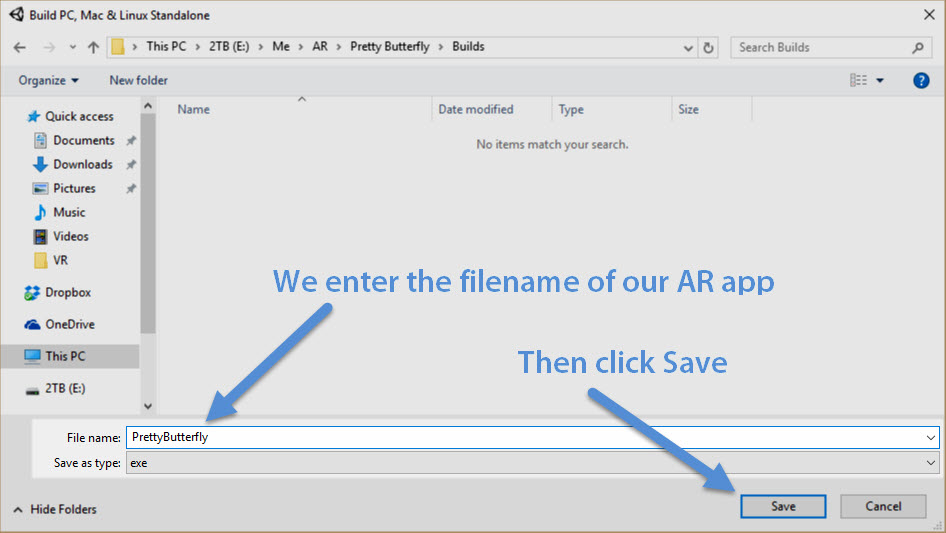
Then, we enter the filename for the AR app and click “Save”:
Our app should now go through the build process and run. If this happens successfully, we should see the configuration screen like so:
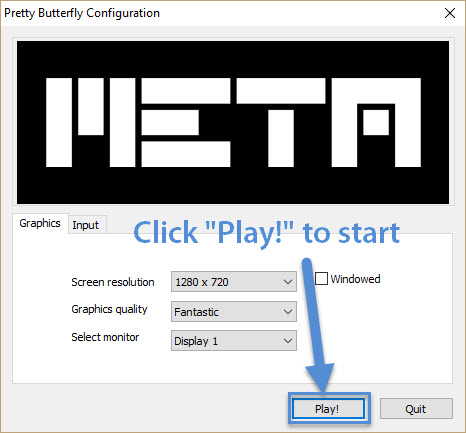
When we click “Play!”, ensuring that “Windowed” is not ticked, the app should now run in fullscreen and should appear in your Meta headset without that awkward Unity window around it!
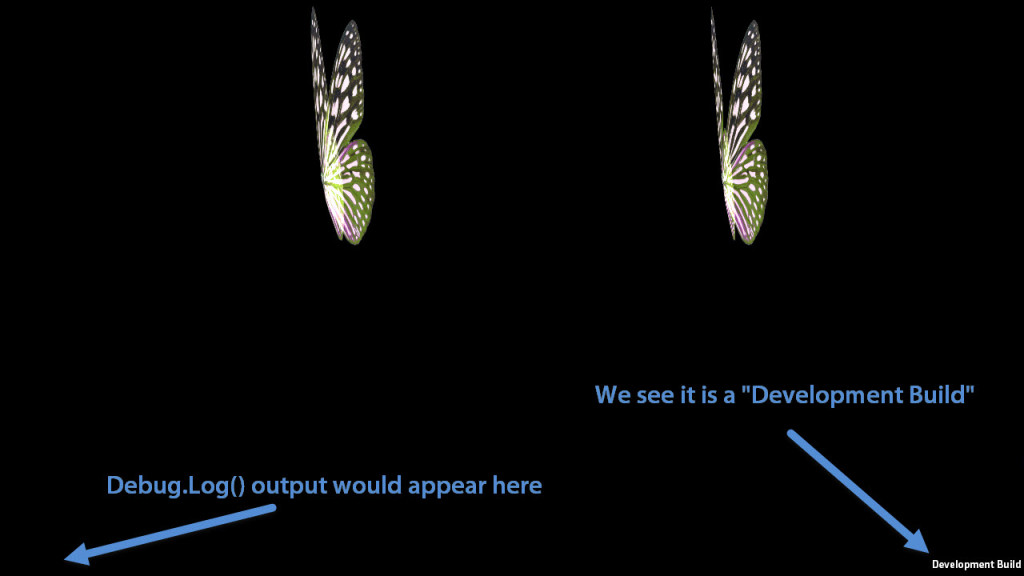
Seeing Logs Within Our Build
If you are finding issues when running your built app and want to debug them with Debug.Log() statements, you can tick the “Development Build” checkbox on the “Build Settings” screen. That’ll run the app with “Development Build” text on the bottom right and with logs appearing on the bottom left:
Submitting Your App To Meta
Once you have a fully featured app that you think is worthy of a larger audience, you can submit it to Meta to appear in their Dev Center. Once it is submitted, it appears like so:
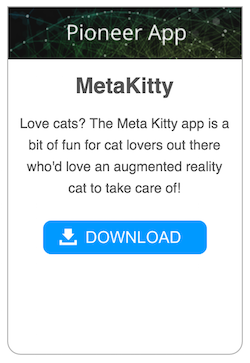
The above app is one I recently submitted to the Dev Center, it is a lovely prototype app of a cat which you can feed, move around and place on a bed to sleep. If you’re a Meta Pioneer, check it out!
Before going too far into the process, ensure that your app has been built using the latest Meta SDK — if it has been a while since you built this app, check that an update hasn’t come around since then and update your app prior to submission!
To submit an app of your own, you’ll need to fill out Meta’s App Submission Form. I would highly recommend writing out your answers in a text editor, Evernote, Google Keep… etc, to copy paste in afterwards. This can save you time when you need to resubmit future versions of the app and often a lot of these answers can come in handy if you do further promotion of the app in other places.
For app submission, you will want to be ready with the following details:
- Your final app name.
- Your app’s current version number.
- Your developer/company/team name.
- A contact e-mail address.
- Knowledge of what camera modes your app works in (“Widescale” mode is the one accessible via F3).
- A link to your app in a zip file. Upload it somewhere publically accessible such as Dropbox, Google Drive or your own public web server. Within that zip file, you’ll need:
- App.exe
- Your AppName_Data folder
- If you have a video of the app in action, be ready with a link to it.
- If you have a code repo with the app code and wish to share it — have that ready too.
- The following details will be used to create a readme.txt file for your download, so have them handy too:
- The app’s purpose — who will use the app and what will they use it for?
- A 20 word app description — this is the one that appears in the Dev Center, like with my MetaKitty app.
- Instructions for use — what do they need to know? Point out any specific keys that trigger functionality.
- Features of the app — list all of the various features your app can do!
- Troubleshooting info — is there a common bug which you often need to do certain things to fix? Such as a key to press to recenter elements if things go wrong?
- Release notes — if you have had previous submissions for this app, what was updated? This is likely to be your first app, so you can skip this if that’s the case!
Once you have submitted the app, you should hear from the Meta team who will do a quality assurance check on your app and suggest any fixes or ways to improve it before publishing. They provide some really valuable bits of feedback — just ensure you submit it with time to spare to adjust anything you’ve missed that the Meta QA team pick up.
Conclusion
If you have followed all of those steps, have a quality AR app and have adjusted it to meet any QA requests from the Meta team, you should find your app sitting proudly within the Meta Dev Center for other Meta Pioneers to try out!
Have you submitted an app to the Meta Dev Center? Let me know in the comments below, or get in touch with me on Twitter at @thatpatrickguy, I’d love to check it out!