Display Data Sets in InDesign with Porky

As a coder of many years, I am a keen believer in writing everything once and being able to use it in multiple places. In the coding world, thanks to open data formats and widely supported APIs we can generally have one central set of content and use it for different applications and use cases, all nicely in sync.
In the desktop design world, this has traditionally been harder, with sources of content in Word documents, InDesign files and maybe some content management systems or spreadsheets.
Imagine my delight when I by chance came across Porky, an open source InDesign extension (well, actually a script) that lets you connect your InDesign files to a variety of data sources.
Installation
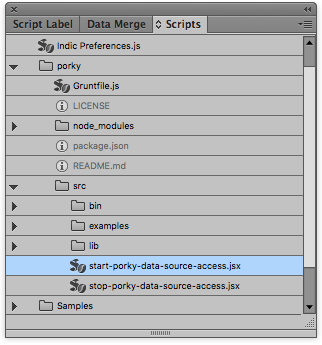
Download the current version of the script, unarchive it and add the folder into the InDesign Scripts/Scripts Panel folder (On my Mac this is inside the InDesign application package), Porky should now show in the InDesign scripts panel.

Scripts Panel
Porky needs node.js installed on your local computer, full instructions can be found here. When you have that installed, we can install some of the additions to node.js needed by Porky that handle connecting to the various services it supports. Install these by opening up your command line and issuing these two commands (This is for a Mac with InDesign CC installed, paths will vary depending on your platform and version):
cd /Applications/Adobe\ InDesign\ CC\ 2015/Scripts/Scripts\ Panel/porky
npm install
Start Porky
Double click start-porky-data-source-access.jsx in the Scripts panel, this may open up some terminal windows, just leave them for now.
Using Porky
Porky uses Adobe's ExtendScript to create the scripts that connect InDesign to the data sources it supports. There are some examples in the Porky/src/examples folder and I recommend you download the ExtendScript Toolkit to edit and create your own.
I will step through examples of how to connect to and use the data sources that Porky supports, if you want to dig further, read Porky's documentation.
SQL
I created a basic SQL table containing some SitePoint articles, you can find the file here.
//@include ../bin/porky.jsx;

settings.dataSource.type = "MySQL";
settings.dataSource.server = "127.0.0.1";
settings.dataSource.name ="SitePoint";
settings.dataSource.username = "root";
settings.dataSource.password = "";

var mySQLResult = "";

try{
    mySQLResult = connectToDataSource("SELECT * FROM articles");
    mySQLResult = JSON.parse(mySQLResult);
    alert(mySQLResult);
}catch(e){
    alert("Error\nCheck console window for details!");
}
JSON
As with all of my tutorials, I will use the Marvel API to show Porky's JSON features.
//@include ../bin/porky.jsx;

settings.dataSource.type = "JSON";
settings.dataSource.name = "http://gateway.marvel.com/v1/public/characters?ts=1448030805540&apikey=dfa06d77bc9c4f9f0ed01337848247e3&hash=0e54a94548adeb07b97e3e3428c6956f&limit=10";

// specify path in dot notation here or leave "" to request the entire object
var myJSONResult = connectToDataSource("data.results");

alert( JSON.parse(myJSONResult) );
alert( JSON.stringify(myJSONResult) );
CSV
Using a CSV version of the SQL table from earlier:
//@include ../bin/porky.jsx;

// read an existing text file from a specific folder
var myCSVFileContent = readFile('articles.csv'); // Absolute file path

if(myCSVFileContent){
  alert('File read with content\n' + myCSVFileContent);
} else {
  alert('File does not exist');
}
Displaying Data
Create a Text Frame
//@include ../bin/porky.jsx;
...
var myTextframe = addFrame(50, 50, 500, 250, "");
...
This creates a new text frame and the parameters (in respective order) are equal to the x and y coordinates and the width and height of the frame. The final parameter is the string or file for content, which we will leave empty for now.
Filling frame with data
This process depends on the structure of the data returned and is easier with some data return formats than others. We use the following function:
//@include ../bin/porky.jsx;
...
var myTable = appendToFrame(myTextframe, myArray);
...
The myArray variable expects a string or two-dimensional array, i.e. an array of rows, with each row containing sets of content values. Getting this array is what can end up being complicated.
JSON
JSON can be hard depending on the formatting of the return data and whether it's a JSON object or array. In the case of the Marvel API, this code partially worked for me:
...
var myArray = new Array(items.length);
myArray[0] = ["id", "Name", "Description"];
for(var i = 1; i Not the tidiest solution and you may experience some issues with escaping characters, but as I say, this all very much depends on your JSON result.
MySQL
Outputting results from a MySQL table is similar to JSON as the MySQL data set is returned as JSON:
[code language="javascript"]
var myArray = new Array(mySQLResult.length);
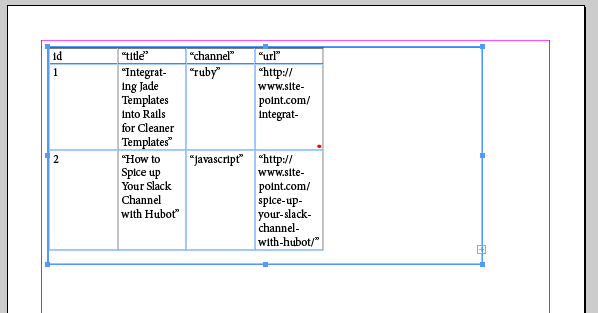
myArray[0] = ["id", "title", "channel", "url"];
for(var i = 1; i CSV
CSV is the easiest:
[code language="javascript"]
//@include ../bin/porky.jsx;
...
var myArray = csvToTwoDArray(myCSVFileContent, { rSep:'\n' , fSep:',' , quot:"'" , trim:true });
var myTextframe = addFrame(50, 50, 250, 250, "");
var myTable = appendToFrame(myTextframe, myArray);Depending on the connection and dataset, you should see something like this.
Conclusion
The main issue with Porky is that the people behind it are rather hoping that you will pay them consulting fees if you run into any issues. This isn't necessarily an issue, especially in the Adobe ecosystem, but it does mean that documentation often feels lacking.
It took me some time to get the simple examples above working due mainly to a lack of definition around the differences between JavaScript and ExtendScript and the lacking documentation.
There are several other features I haven't covered here such as creating placeholder images and other text box features, so if you're willing to dig around and experiment, Porky has the potential to save you a lot of repeated tasks when working with large data sets in InDesign.
However, it's not for the faint hearted.