Killer Backgrounds with Illustrator’s SVG Pattern Tool


Photo: HORIZON
Adobe Illustrator is the established go-to tool for vector graphics. You can scale graphics infinitely larger or smaller, without any loss of image quality.
That’s why Illustrator is perfect for creating backgrounds. You can create seamless repeating backgrounds easily in Adobe Illustrator with the Pattern Tool.
You simply arrange the elements and tell Illustrator how you want them to repeat or tile, which allows you to focus on the overall design, not on the mechanics of execution.
But patterns alone aren’t the real story here.
SVG — in many ways the web image format of the gods — has amazing built-in support for rendering patterns, and Illustrator CS6 is uniquely placed to help you produce these patterns.
Let’s take a look at how it works.
Let’s Make Patterns
To get started, open up Adobe Illustrator and go to Object > Pattern > Make. This changes the interface, so that you have a central square on your canvas. You’ll immediate receive a message that the Pattern has been added to the Swatches Panel.
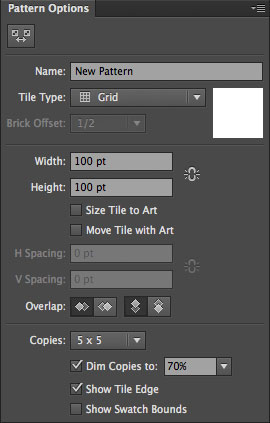
This image shows the Pattern Panel. You’ll be using this to control the behavior of your pattern. Notice the top menu item is where you will name your pattern.
Important Note: Before diving into creating patterns with the Pattern Tool, make sure that “Move Tile With Art in unchecked in the center of the Panel. Otherwise you’ll find the Pattern Tool more difficult to work with.
The default width and height for our pattern section is 100px x 100px, but you can make it whatever you need. You can also link the width and height so they scale together.
Before we choose how the pattern will tile, let’s give Illustrator something simple to tile. Select the Ellipse Tool and hold down the Option/Alt key (draw from center) and the Shift key (maintain aspect ration) and create a circle within the square tile.
Use the Direct Selection tool and select the circle. Hit Command/Ctrl+ C to copy, then hit Command/Ctrl+F to paste it in front, in the exact same place. Hold Down the Alt/Option Key + Shift and scale the top circle down.
Next, select both circles and hit Command/Ctrl + 8 to create a compound path.
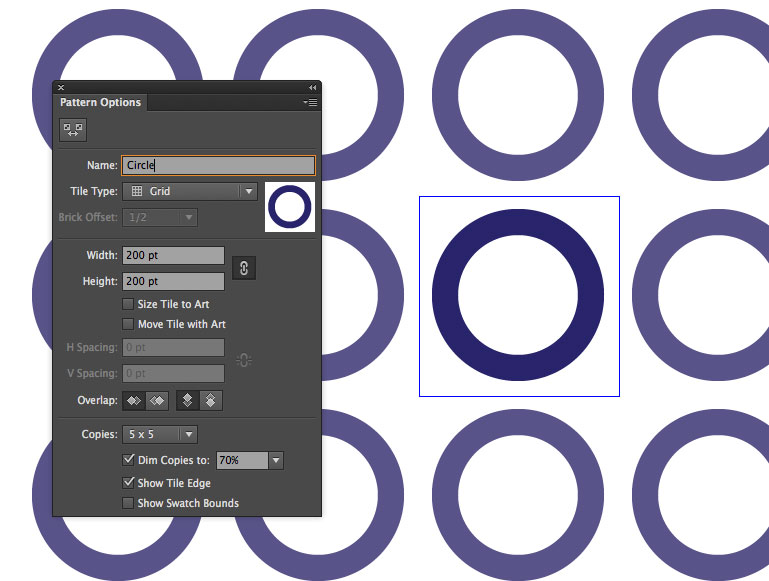
Remove any stroke you might have applied and select any color as the fill. I’ll choose a royal blue. Align the circle within the tile vertically and horizontally.
Now, we can decide how the pattern will be formed. Notice how the copies are faded. You can set the opacity and the number of the copies of your vector shapes at the bottom of the Pattern Panel.
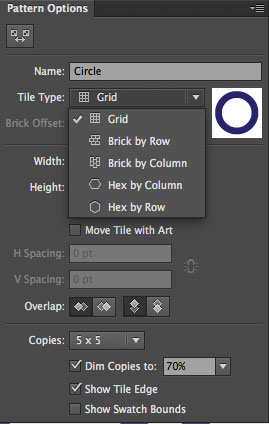
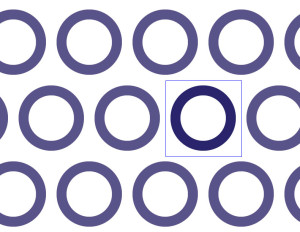
Different tiling options are presented in the ‘Tile Type’ dropdown. In the diagram you can see the different options, and how they drastically change the design.
Pattern tiling options
GridThe default grid spaces graphics equally horizontally and vertically. |
 |
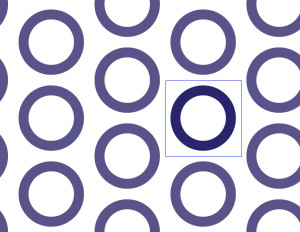
Brick By RowThis setting staggers graphics horizontally, like rows of bricks. |
 |
Brick By ColumnThis staggers graphics like rows of bricks, but vertically. |
 |
Hex By RowThis staggers graphics in a hexagonal pattern horizontally. |
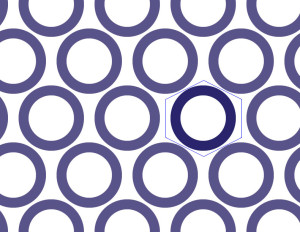 |
Hex By ColumnThis staggers graphics in a hexagonal pattern vertically. |
 |
The pattern tool makes it easy to create complex patterns in a matter of seconds.
You don’t really even need to use a ton of shapes. Select the Star Tool and use the down arrows to reduce the number of sides to three, giving you a triangle.
Point the triangle downward, so that the top side is flat, going outside of the pattern square.
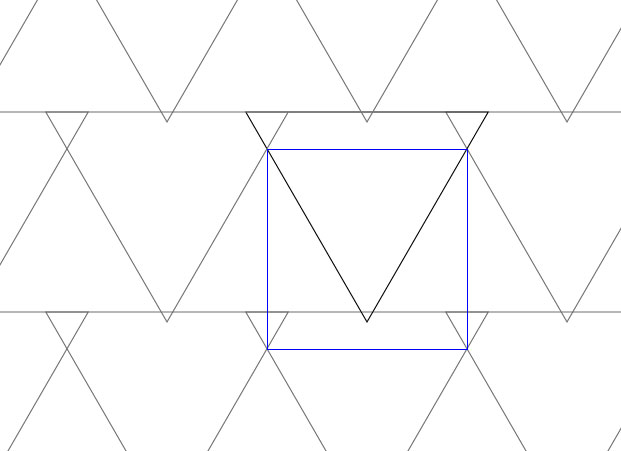
Next, add a circle, drawing the center over the bottom vertex of the triangle.
To do this, hold down the Alt/Option and the Shift keys while dragging outward. Notice how Illustrator automatically draws the circle at the top of the square, repeating the pattern.
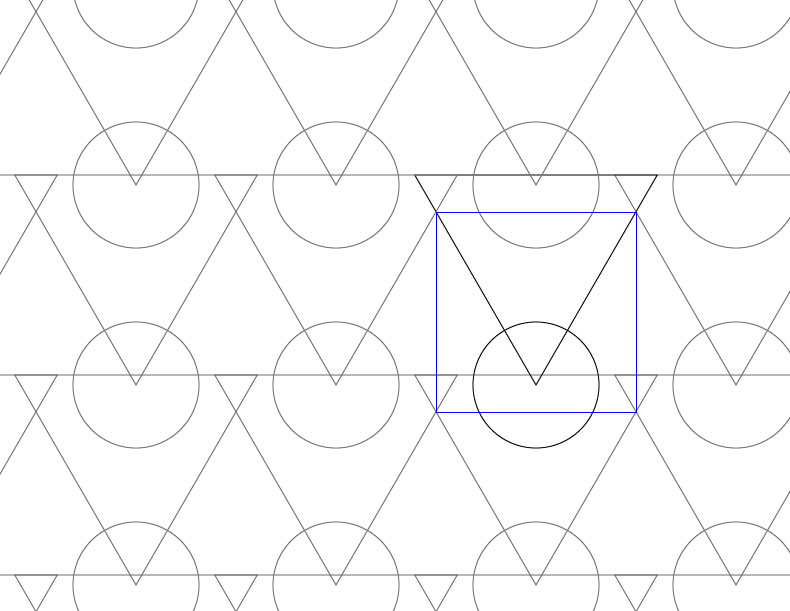
Next, select the Polygon Tool and create a hexagon. Make its bottom edge touch the bottom edge of the pattern’s square, and the top right corner touch the edge of the triangle, as in the image below.
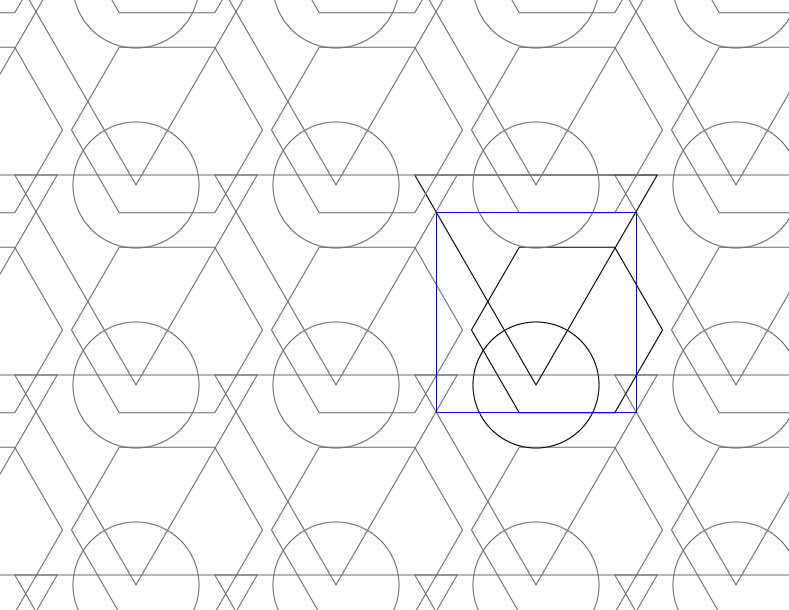
This is already an interesting pattern, but we can save as a copy and create another pattern with this same setup. To do this, look for the Save a Copy option at the top edge of the window. Name your new pattern something different, and now you can alter this pattern to create something new.
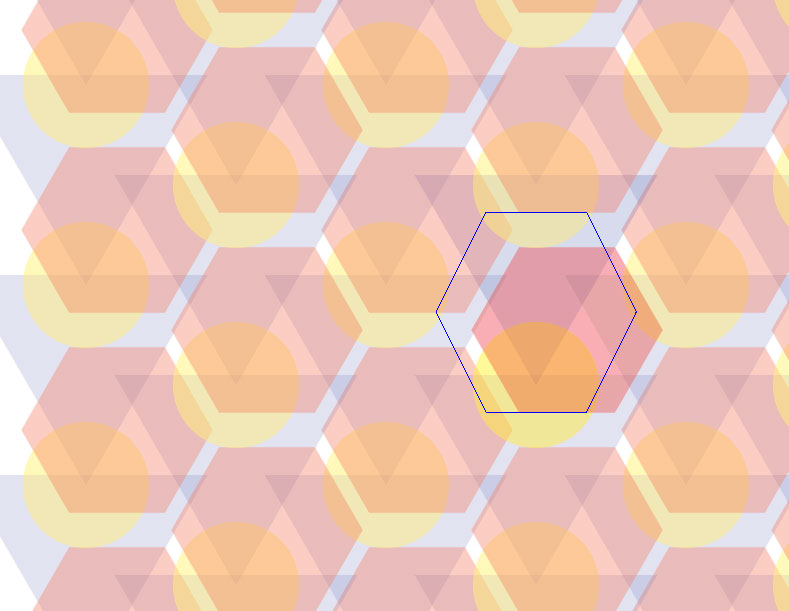
Here’s where the Pattern Tool is a huge time saver. Select all of the shapes, and remove their strokes. Next, make the circle yellow, the triangle blue, and the hexagon red. From here, select each one individually and go to the transparency panel. Set the shapes to the following transparency:
- Circle: 50%
- Triangle: 20%
- Hexagon: 35%
Then, change the Tile Type from gird to Hex by column. This creates a tight overlapping pattern, shown below.
Exporting Your Pattern as an SVG
Let’s create a pattern in Illustrator that will repeat endlessly. Make sure the tile size is square for this, because it will make it easier for you to line things up visually.
Step 1
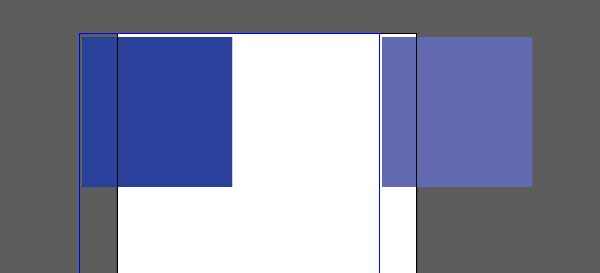
Select the Rectangle Tool and create a blue square that it 50px x 50px and draw it in the top right corner of the pattern tile.
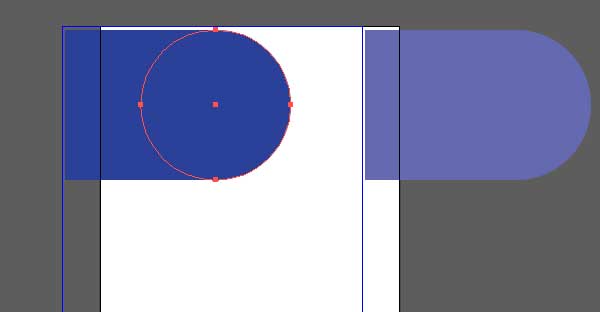
Step 2
Next, using the Ellipse Tool, Create a circle with the same dimensions, but place it so that half of it overlaps the square. Now, create a white circle that is 50px x 50px in dimensions and place it on the left side.
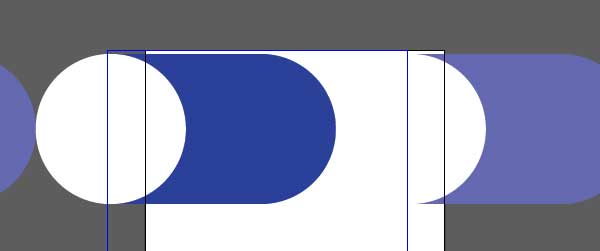
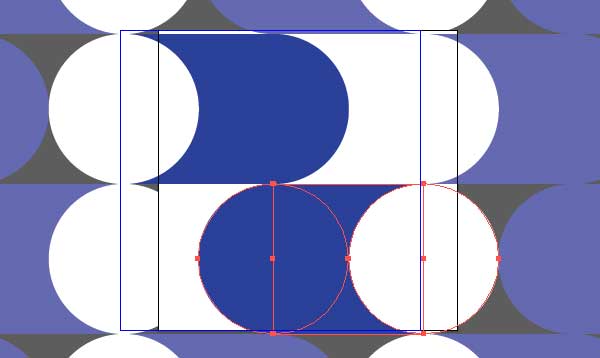
Step 3
Select all of this and hit Command/Ctrl + C to copy and then Command/Ctrl + F to paste in front. While the selection is still active, rotate the selection so that it faces the other direction. Position it in the lower half of the tile, so that you have a zig zag pattern.
Step 4
Hit Save a Copy and name it what you want to call your pattern, and it will be placed in the Swatches Panel.
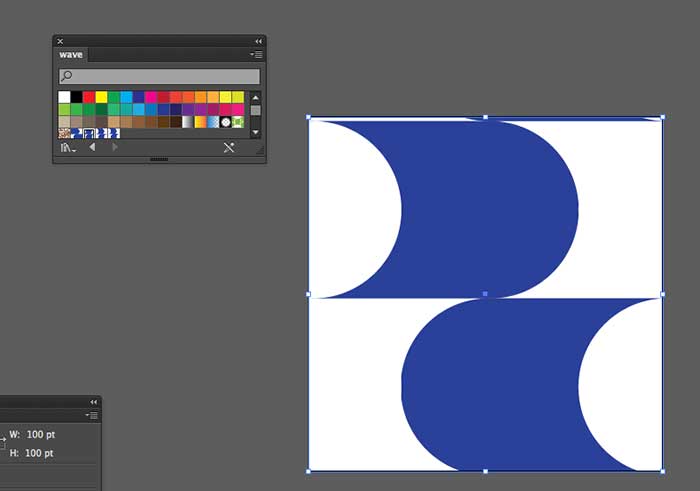
Click done, and you should appear back at a blank canvas. Use the Canvas Tool to set your canvas to 100px x 100px and use the Rectangle Tool to create a square at the same dimensions. Make sure the Fill is active and click on the pattern swatch you just finished making. It will fill your square with the swatch.
Step 5
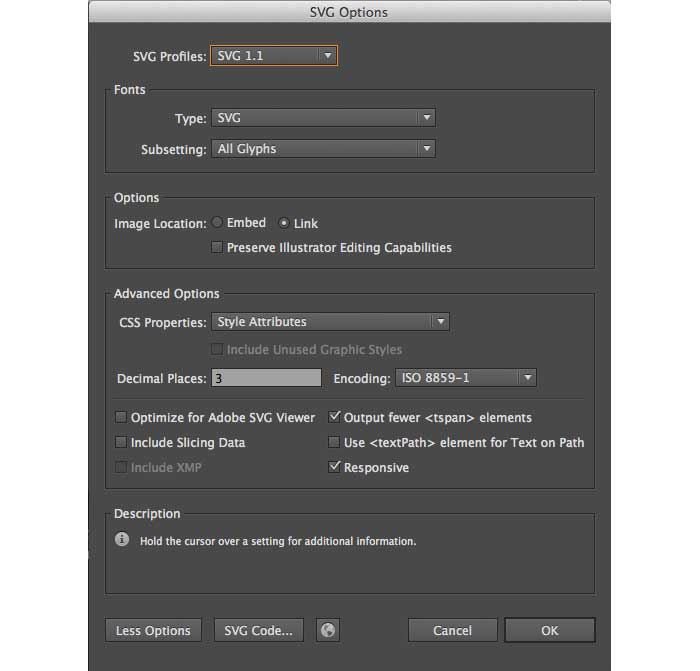
Next, go to File> Save As and a dialog box will come up. Choose SVG and make sure SVG 1.1 is checked. Once you have done this, hit ok and save your SVG as the name of your choice.
Step 6
If you open the SVG up in a browser (just click and drag the SVG over the Firefox icon) it will open up in the browser. Notice that it isn’t really a pattern yet. You should only see a 100px x 100px area of your pattern. We have to do something to it to enable it to fill the browser.
When you save a file as an SVG in Illustrator it is your document size that determines the area of the pattern. The pattern is there; it is just currently restricted to the 100px x 100px area of your original canvas.
For example, if your canvas was 1024px x 768px, that’s how much of the browser would be filled with your pattern. To unleash it, we need to edit the SVG in 2 easy places, changing the width and height to 100% both times.
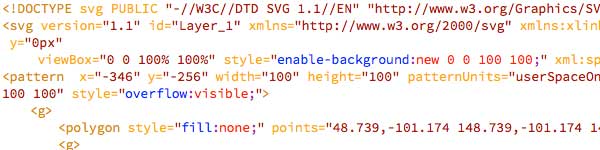
At the top where is says “viewbox = “ 0 0 100 100” it is saying that the pattern starts at the coordinates of 0 from the top and 0 from the left and the width and height are 100px in size.
Change the width and height to 100% — but you won’t see a difference just yet. We need to resize the rectangle area that contains the pattern.

Step 7
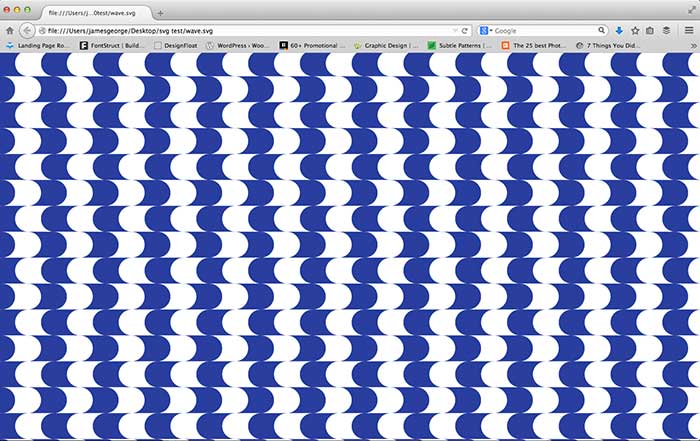
Go do to where it says “ <rect />” and change those values to 100% each. Instead of 100 pixels, it will make the pattern fill 100% of the width and height of the browser with the SVG pattern. The result is shown below, and an infinitely repeating SVG pattern.
If you want, you can precisely control the size of the pattern in this line of code, just under the viewbox code we first edited: <pattern x="-346" y="-256". Since it’s square, if we increase the values of the width and height equally, we will proportionally increase the pattern size. Set the width and height to 300 and you’ll see the result below.

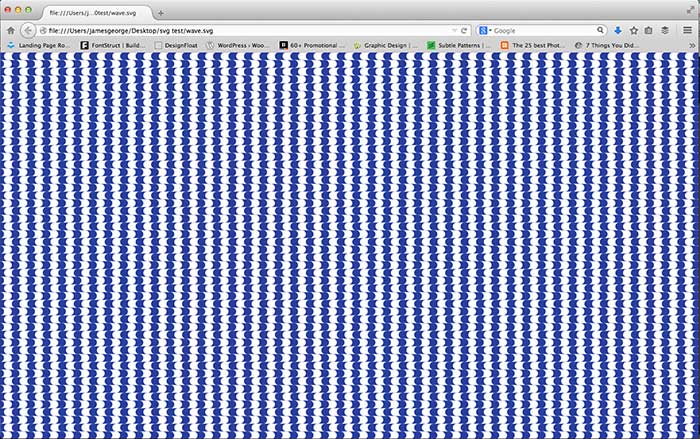
Setting the size to width and height to 30 each will create a tighter, smaller SVG pattern, show below.
I think you’ll agree that this makes Illustrator’s pattern maker a highly useful tool.
Not only can you create beautiful, seamless vector patterns for your print design work, but now, you can export your patterns as SVG files, edit them slightly, and have lightweight, infinitely scalable vector graphics for your websites.