Displaying Data from MySQL on the Web: an Introduction

The following article is an excerpt from PHP & MySQL: Novice to Ninja, 7th Edition, a hands-on guide to learning all the tools, principles, and techniques needed to build a professional web application. In this final tutorial in the series, you’ll learn how to take information stored in a MySQL database and display it on a web page for all to see.
- Setting Up Your PHP Development Environment with Docker
- A Beginner’s Guide to PHP
- Introducing MySQL: A Beginner’s Guide
- Displaying Data from MySQL on the Web: an Introduction
This is it — the stuff you signed up for! In this chapter, you’ll learn how to take information stored in a MySQL database and display it on a web page for all to see.
So far, you’ve written your first PHP code and learned the basics of MySQL, a relational database engine, and PHP, a server-side scripting language.
Now you’re ready to learn how to use these tools together to create a website where users can view data from the database and even add their own.
Note: as in Chapter 3, I’m using “MySQL” here to refer to the database protocol. Your PHP scripts will do the same. There are numerous references in this chapter — and in the PHP code you’ll write — to “MySQL”, even though we’re actually connecting to a MariaDB database.
The Big Picture
Before we leap forward, it’s worth taking a step back for a clear picture of our ultimate goal. We have two powerful tools at our disposal: the PHP scripting language and the MySQL database engine. It’s important to understand how these will fit together.
The purpose of using MySQL for our website is to allow the content to be pulled dynamically from the database to create web pages for viewing in a regular browser. So, at one end of the system you have a visitor to your site using a web browser to request a page. That browser expects to receive a standard HTML document in return. At the other end you have the content of your site, which sits in one or more tables in a MySQL database that only understands how to respond to SQL queries (commands).
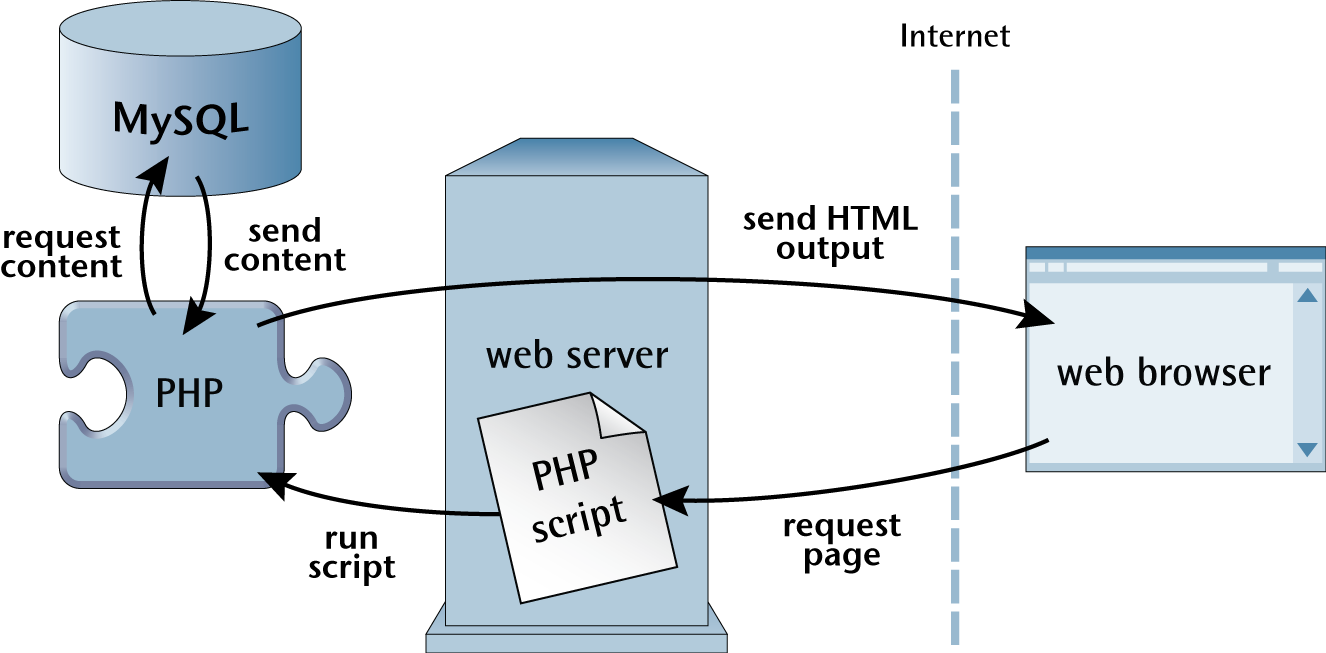
As shown in the image above, the PHP scripting language is the go-between that speaks both languages. It processes the page request and fetches the data from the MySQL database using SQL queries just like those you used to create a table of jokes in Chapter 3. It then spits it out dynamically as the nicely formatted HTML page that the browser expects.
Just so it’s clear and fresh in your mind, this is what happens when there’s a visitor to a page on your website:
- The visitor’s web browser requests the web page from your web server.
- The web server software (typically Apache or NGINX) recognizes that the requested file is a PHP script, so the server fires up the PHP interpreter to execute the code contained in the file.
- Certain PHP commands (which will be the focus of this chapter) connect to the MySQL database and request the content that belongs in the web page.
- The MySQL database responds by sending the requested content to the PHP script.
- The PHP script stores the content into one or more PHP variables, then uses
echostatements to output the content as part of the web page. - The PHP interpreter finishes up by handing a copy of the HTML it has created to the web server.
- The web server sends the HTML to the web browser as it would a plain HTML file, except that instead of coming directly from an HTML file, the page is the output provided by the PHP interpreter. The browser has no way of knowing this, however. As far as the browser is concerned, it’s requesting and receiving a web page like any other.
Creating a MySQL User Account
In order for PHP to connect to your MySQL database server, it will need to use a username and password. So far, all that your joke database contains is a number of pithy bon mots, but before long it may contain sensitive information like email addresses and other private details about the users of your website. For this reason, MySQL is designed to be very secure, giving you tight control over what connections it will accept and what those connections are allowed to do.
The Docker environment already contains a MySQL user in Chapter 3, which you’ve already used to log in to the MySQL server.
You could connect to the database from your PHP script using the same username (v.je) and password (v.je), but it’s useful to create a new account — because if you have a web server, you may want to use it to host more than one website. By giving each website its own user account, you’ll have more control over who has access to the data for any given site. If you’re working with other developers, you can give them access to the sites they’re working on, but no more.
You should create a new user account with only the specific privileges it needs to work on the ijdb database that your website depends upon. Let’s do that now.
To create a user, open up MySQL Workbench and connect to your server. Then run the following queries:
CREATE USER 'ijdbuser'@'%' IDENTIFIED BY 'mypassword';
GRANT ALL PRIVILEGES ON `ijdb`.* TO 'ijdbuser'@'%';
The first query is fairly self explanatory: It creates a user called ijdbuser with the password mypassword. The % sign after the username indicates that the database can be connected to from any location. The second query gives the user full acces to the ijdb schema, as a result this user can see and modify all the tables, columns and data in the ijdb schema but has no access to anything outside it.
Now that the user ijdbuser has been created, we can use it to connect to the database. It’s possible to set up a connection in MySQL Workbench with this user, but since the permissions are limited, it’s better to keep MySQL Workbench using the v.je account. Instead, we’re going to use the new user when connecting from a PHP script.
Connecting to MySQL with PHP
Before you can retrieve content from your MySQL database for inclusion in a web page, you must know how to establish a connection to MySQL from inside a PHP script. So far, you’ve used an application called MySQL Workbench to connect to your database. Just as MySQL Workbench can connect directly to a running MySQL server, so too can your own PHP scripts.
Although this chapter talks entirely about connecting to MySQL from PHP, we’re actually connecting to the MariaDB database discussed in the previous chapter. PHP can’t see any difference between MySQL and MariaDB, as they’re interchangeable. I’ll refer to the database as MySQL throughout, because all of the commands used could be used to connect to a MySQL or MariaDB database server.
The original MySQL database provided a standardized method for clients such as MySQL Workbench and PHP to communicate with the server. MariaDB copied that standard, and all the commands in PHP use the name MySQL, so to keep things simple, I’ll use the term MySQL throughout this chapter to refer to the database.
There are three methods of connecting to a MySQL server from PHP:
- the MySQL library
- the MySQLi library
- the PDO library
These all essentially do the same job — connecting to the database and sending queries to it — but they use different code to achieve it.
The MySQL library is the oldest method of connecting to the database and was introduced in PHP 2.0. The features it contains are minimal, and it was superseded by MySQLi as of PHP 5.0 (released in 2004).
To connect and query the database using the old MySQL library, functions such as mysql_connect() and mysql_query() are used. These functions have been deprecated — meaning they should be avoided — since PHP 5.5, and have been removed from PHP entirely since PHP 7.0.
Although most developers saw the reason for the change as soon as PHP 5.0 was released, there are still hundreds of articles and code examples on the Web using these now non-existent mysql_* functions — despite the fact that MySQLi has effectively been the preferred library for fifteen years.
If you come across a code example that contains the line mysql_connect(), check the date of the article. It’s probably from the early 2000s, and in programming, you should never trust anything that old. Things change all the time — which is why this book is on its seventh edition!
In PHP 5.0, the MySQLi library — standing for “MySQL Improved” — was released to address some of the limitations in the original MySQL library. You can easily identify the use of MySQLi, because the code will use functions such as mysqli_connect() and mysqli_query().
Shortly after the release of the MySQLi library in PHP 5.0, PHP 5.1 was released, with a significant number of changes that helped shape the way we write PHP today (mostly to do with object-oriented programming, which you’ll see plenty of later in this book). One of the major changes in PHP 5.1 was that it introduced a third library, PDO (PHP Data Objects), for connecting to MySQL databases.
There are several differences between PDO and MySQLi, but the main one is that you can use the PDO library to connect to almost any database server — such as an Oracle server, or Microsoft SQL Server. For developers, the biggest advantage of this generic approach is that, once you’ve learned how to use the library to interact with a MySQL database, it’s very simple to interact with another database server.
Arguably, it’s simpler to write code for PDO, and there are some nuances that can make PDO code more readable — named parameters in prepared statements being the main benefit. (Don’t worry, I’ll explain what that means later on.)
For these reasons, most recent PHP projects use the PDO library, and it’s the library I’m going to show you how to use in this book. For more information on the differences, take a look at the SitePoint article “Re-introducing PDO – the Right Way to Access Databases in PHP”.
After that little history lesson, you’re probably eager to get back to writing code. Here’s how you use PDO to establish a connection to a MySQL server:
new PDO('mysql:host=hostname;dbname=database', 'username',
  'password')
For now, think of new PDO as a built-in function, just like the rand function we used in Chapter 2. If you’re thinking “Hey, functions can’t have spaces in their names!”, you’re smarter than the average bear, and I’ll explain exactly what’s going on here in a moment. In any case, it takes three arguments:
- a string specifying the type of database (
mysql:), the hostname of the server (host=hostname;), and the name of the database (dbname=database) - the MySQL username you want PHP to use
- the MySQL password for that username
You may remember from Chapter 2 that PHP functions usually return a value when they’re called. This new PDO “function” returns a value called a PDO object that identifies the connection that’s been established. Since we intend to make use of the connection, we should hold onto this value by storing it in a variable. Here’s how that looks, with the necessary values filled in to connect to your database:
$pdo = new PDO('mysql:host=mysql;dbname=ijdb', 'ijdbuser',
  'mypassword');
You can probably see what’s going on with the last two arguments: they’re the username and password you created earlier in this chapter.
The first argument is a little more complicated. The dbname=ijdb part tells PDO to use the database (also referred to as a schema) called ijdb. Any query run from PHP will default to tables in that schema. SELECT * FROM joke will select records from the joke table in the ijdb schema.
Even if you’re familiar with PHP, PDO and MySQL already, the host=mysql part looks confusing. Normally, this would be host=localhost (referring to the local computer, the same machine running PHP) or pointing to a specific domain name where the database is hosted, such as host=sitepoint.com.
Why is it host=mysql, and what does mysql refer to here? In Docker, each service is given a name. If you examine the docker-compose.yml file that configures the server, the database service is called mysql, and in Docker, one service can connect to another using the other service’s name.
Arguments aside, what’s important to see here is that the value returned by new PDO is stored in a variable named $pdo.
The MySQL server is a completely separate piece of software from the web server. Therefore, we must consider the possibility that the server may be unavailable or inaccessible due to a network outage, or because the username/password combination you provided is rejected by the server, or because you just forgot to start your MySQL server! In such cases, new PDO won’t run, and will throw a PHP exception.
Note: at least by default, PHP can be configured so that no exception is thrown and it simply won’t connect. This isn’t generally desirable behavior, as it makes it much more difficult to work out what went wrong.
If you’re wondering what it means to “throw a PHP exception”, brace yourself! You’re about to discover some more features of the PHP language.
A PHP exception is what happens when you tell PHP to perform a task and it’s unable to do it. PHP will try to do what it’s told, but will fail; and in order to tell you about the failure, it will throw an exception at you. An exception is little more than PHP just crashing with a specific error message. When an exception is thrown, PHP stops. No lines of code after the error will be executed.
As a responsible developer, it’s your job to catch that exception and do something about it so the program can continue.
Note: if you don’t catch an exception, PHP will stop running your PHP script and display a spectacularly ugly error message. That error message will even reveal the code of your script that threw the error. In this case, that code contains your MySQL username and password, so it’s especially important to avoid the error message being seen by users!
To catch an exception, you should surround the code that might throw an exception with a try … catch statement:
try {
  ⋮ do something risky
}
catch (ExceptionType $e) {
  ⋮ handle the exception
}
You can think of a try … catch statement like an if … else statement, except that the second block of code is what happens if the first block of code fails to run.
Confused yet? I know I’m throwing (no pun intended) a lot of new concepts at you, but it will make more sense if I put it all together and show you what we have:
try {
$pdo = new PDO('mysql:host=mysql;dbname=ijdb', 'ijdbuser',
’mypassword’);
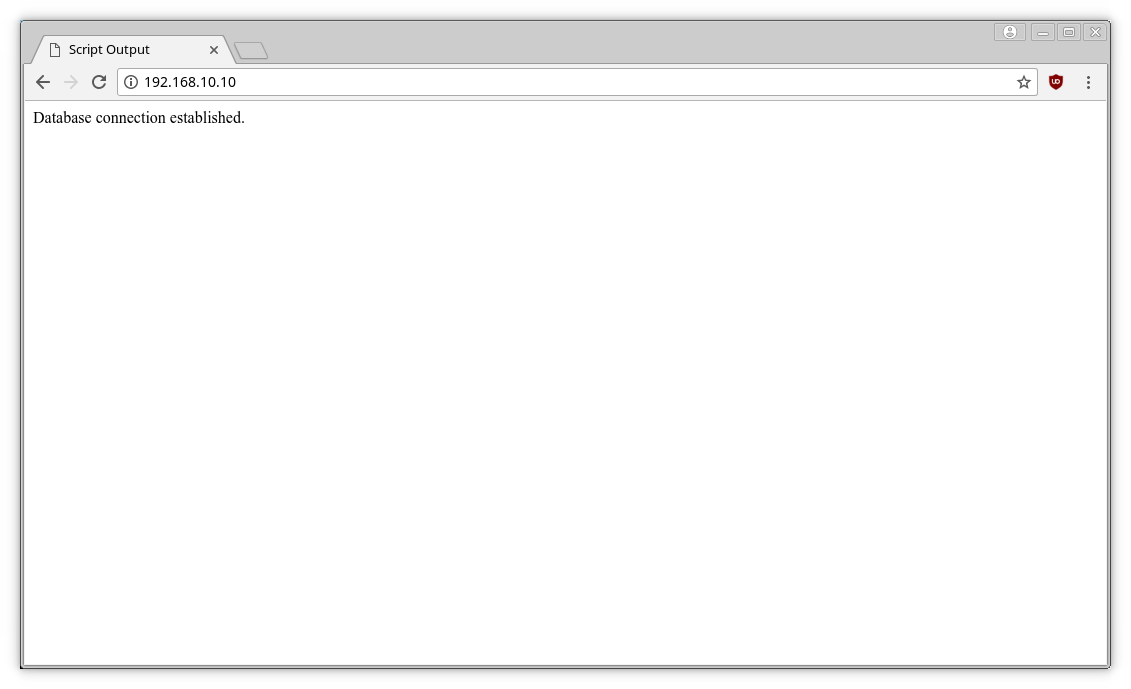
$output = 'Database connection established.';
}
catch (PDOException $e) {
$output = 'Unable to connect to the database server.';
}
include __DIR__ . '/../templates/output.html.php';
As you can see, this code is a try … catch statement. In the try block at the top, we attempt to connect to the database using new PDO. If this succeeds, we store the resulting PDO object in $pdo so that we can work with our new database connection. If the connection is successful, the $output variable is set to a message that will be displayed later.
Importantly, inside a try … catch statement, any code after an exception has been thrown won’t get executed. In this case, if connecting to the database throws an exception (maybe the password is wrong, or the server isn’t responding), the $output variable will never get set to “Database connection established”.
If our database connection attempt fails, PHP will throw a PDOException, which is the type of exception that new PDO throws. Our catch block, therefore, says that it will catch a PDOException (and store it in a variable named $e). Inside that block, we set the variable $output to contain a message about what went wrong.
However, this error message isn’t particularly useful. All it tells us is that PDO couldn’t connect to the database server. It would be better to have some information about why that was — for example, because the username and password were invalid.
The $e variable contains details about the exception that occurred, including an error message describing the problem. We can add this to the output variable using concatenation:
try {
  $pdo = new PDO('mysql:host=mysql;dbname=ijdb', 'ijdbuser',
    'mypassword');
   $output = 'Database connection established.';
}
catch (PDOException $e) {
  $output = 'Unable to connect to the database server: ' . $e->getMessage();
}

include  __DIR__ . '/../templates/output.html.php';
Note: the $e variable isn’t a string, but an object. We’ll come to what that means shortly. For now, though, all you need to know is that the code $e->getMessage() gets the error message based on the specific exception that occurred.
Like an if … else statement, one of the two branches of a try … catch statement is guaranteed to run. Either the code in the try block will execute successfully, or the code in the catch block will run. Regardless of whether the database connection was successful, there will be a message in the $output variable — either the error message, or the message saying the connection was successful.
Finally, regardless of whether the try block was successful, or the catch block runs, the template output.html.php is included. This is a generic template that just displays some text to the page:
<!doctype html>
<html>
  <head>
    <meta charset="utf-8">
    <title>Script Output</title>
  </head>
  <body>
      <?php echo $output; ?>
  </body>
</html>
The complete code can be found in Example: MySQL-Connect.
When the template is included, it will display either the error message or the “Database connection established” message.
I hope the aforementioned code is now making some sense to you. Feel free to go back to the start of this section and read it all again if you’re lost, as there were some tricky concepts in there. Once you have a firm grip on the code, however, you’ll probably realize that I’ve still left one mystery unexplained: PDOs. Just what exactly is new PDO, and when I said it returns a “PDO object”, just what exactly is an object?
Note: all downloaded sample code includes a schema called ijdb_sample and a user called ijdb_sample, so that you’re able to run it regardless of what you called your schema and user. A file containing the database is provided as database.sql, which you can import.
If you use the web-based sample code viewer provided, the idbj_sample database will be created as you load a sample, but any changes to this schema will be lost when you view another sample. (You can mess things up, and switching to another sample and back will reset it, but if you want to keep any changes you make, make them in the schema you created.)
If you want to load the sample data into your schema using MySQL Workbench, import database.sql from the project directory by selecting Data Import/Restore. Then select Import from self-contained file, browse to database.sql, and select your schema name in default target schema. If you have created any tables with the same name, they’ll be overwritten and all records lost.
A Crash Course in Object-oriented Programming
You may have noticed the word “object” beginning to creep into my vocabulary in the previous section. PDO is the PHP Data Objects extension, and new PDO returns a PDO object. In this section, I’d like to explain what objects are all about.
Perhaps you’ve come across the term object-oriented programming (OOP) in your own explorations of PHP or of programming in general. OOP is an advanced style of programming that’s especially suited to building really complex programs with a lot of parts. Most programming languages in active use today support OOP. Some of them even require you to work in an OOP style. PHP is a little more easygoing about it, and leaves it up to the developer to decide whether or not to write their scripts in the OOP style.
So far, we’ve written our PHP code in a simpler style called procedural programming, and we’ll continue to do so for now, with a more detailed look at objects later on. Procedural style is well suited to the relatively simple projects we’re tackling at the moment. However, almost all complex projects you’ll come across use OOP, and I’ll cover it in more detail later in this book.
That said, the PDO extension we’ll use to connect to and work with a MySQL database is designed in the object-oriented programming style. This means that, rather than simply calling a function to connect to MySQL and then calling other functions that use that connection, we must first create a PDO object that will represent our database connection, and then use the features of that object to work with the database.
Creating an object is a lot like calling a function. In fact, you’ve already seen how to do it:
$pdo = new PDO('mysql:host=mysql;dbname=ijdb', 'ijdbuser',
  'mypassword');
The new keyword tells PHP that you want to create a new object. You then leave a space and specify a class name, which tells PHP what type of object you want to create. A class is a set of instructions that PHP will follow to create an object. You can think of a class as being a recipe, such as for a cake, and an object being the actual cake that’s produced from following the recipe. Different classes can produce different objects, just as different recipes can produce different dishes.
Just as PHP comes with a bunch of built-in functions that you can call, PHP comes with a library of classes that you can create objects from. new PDO, therefore, tells PHP to create a new PDO object — that is, a new object of the built-in PDO class.
In PHP, an object is a value, just like a string, number, or array. You can store an object in a variable or pass it to a function as an argument — all the same stuff you can do with other PHP values. Objects, however, have some useful additional features.
First of all, an object behaves a lot like an array, in that it acts as a container for other values. As we saw in Chapter 2, you can access a value inside an array by specifying its index (for example, $birthdays['Kevin']). When it comes to objects, the concepts are similar but the names and code are different. Rather than accessing the value stored in an array index, we say that we’re accessing a property of the object. Instead of using square brackets to specify the name of the property we want to access, we use arrow notation (->) — for instance, $myObject->someProperty:
$myObject = new SomeClass();    // create an object
$myObject->someProperty = 123;  // set a property's value
echo $myObject->someProperty;   // get a property's value
Whereas arrays are normally used to store a list of similar values (such as an array of birthdays), objects are used to store a list of related values (for example, the properties of a database connection). Still, if that’s all objects did, there wouldn’t be much point to them: we might just as well use an array to store these values, right? Of course, objects do more.
In addition to storing a collection of properties and their values, objects can contain a group of functions designed to bring us more useful features. A function stored in an object is called a method (one of the more confusing names in the programming world, if you ask me). A method is just a function inside a class. More confusingly, when we get onto writing our own classes, methods are defined using the function keyword! Even experienced developers often wrongly use function and method interchangeably.
To call a method, we again use arrow notation — $myObject->someMethod():
$myObject = new SomeClass();    // create an object
$myObject->someMethod();        // call a method
Just like standalone functions, methods can take arguments and return values.
At this stage, this is probably all sounding a little complicated and pointless, but trust me: pulling together collections of variables (properties) and functions (methods) into little bundles called objects results in much tidier and easier-to-read code for certain tasks — working with a database being just one of them. One day, you may even want to develop custom classes that you can use to create objects of your own devising.
For now, however, we’ll stick with the classes that come included with PHP. Let’s keep working with the PDO object we’ve created, and see what we can do by calling one of its methods.
Configuring the Connection
So far, I’ve shown you how to create a PDO object to establish a connection with your MySQL database, and how to display a meaningful error message when something goes wrong:
<?php
try {
    $pdo = new PDO('mysql:host=mysql;dbname=ijdb', 'ijdbuser', 'mypassword');
    $output = 'Database connection established.';
} catch (PDOException $e) {
    $output = 'Unable to connect to the database server: ' . $e->getMessage();
}

include  __DIR__ . '/../templates/output.html.php';
Assuming the connection succeeds, though, you need to configure it before use. You can configure your connection by calling some methods of your new PDO object.
Before sending queries to the database, we’ll need to configure the character encoding of our database connection. As I mentioned briefly in Chapter 2, you should use UTF-8 encoded text in your websites to maximize the range of characters users have at their disposal when filling in forms on your site. By default, when PHP connects to MySQL, it uses the simpler ISO-8859-1 (or Latin-1) encoding instead of UTF-8. If we were to leave it as is, we wouldn’t easily be able to insert Chinese, Arabic or most non-English characters.
Even if you’re 100% sure that your website will only be used by English speakers, there are other problems caused by not setting the character set. If your web page is not set to UTF-8, you’ll run into problems when people write certain characters such as curly quotes ” into a text box, because they’ll appear in the database as a different character.
Therefore, we now need to set our new PDO object to use the UTF-8 encoding.
We can instruct PHP to use UTF-8 when querying the database by appending ;charset=utf8mb4 to the connection string. There are no downsides to doing this, provided your PHP script is also being sent to the browser as UTF-8 (which is the default in recent PHP versions):
$pdo = new PDO('mysql:host=mysql;dbname=ijdb;charset=utf8mb4', 'ijdbuser',
  'mypassword');
Note: if you go searching, you’ll find different ways to set the charset, and earlier editions of this book instructed you to use this code:
$pdo->exec('SET NAMES "utf8"');This is because, until PHP 5.3.6, the charset option was not correctly applied by PHP. Since this is fixed in any PHP version you’re actually going to be using, setting the charset as part of the connection string is the preferred option.
The complete code we use to connect to MySQL and then configure that connection, therefore, is shown below.
Example: MySQL-Connect-Complete
<?php
try {
    $pdo = new PDO('mysql:host=mysql;dbname=ijdb;charset=utf8mb4', 'ijdbuser', 'mypassword');
    $output = 'Database connection established.';
} catch (PDOException $e) {
    $output = 'Unable to connect to the database server: ' . $e->getMessage();
}

include  __DIR__ . '/../templates/output.html.php';
Fire up this example in your browser. (If you’ve placed your database code in index.php inside the public directory and the output.html.php file in the templates directory, the URL for the page will be https://v.je/.)
If your server is up and running, and everything is working properly, you should see a message indicating success.
If PHP is unable to connect to your MySQL server, or if the username and password you provided are incorrect, you’ll instead see a similar screen to that shown below. To make sure your error-handling code is working properly, you might want to misspell your password intentionally to test it out.
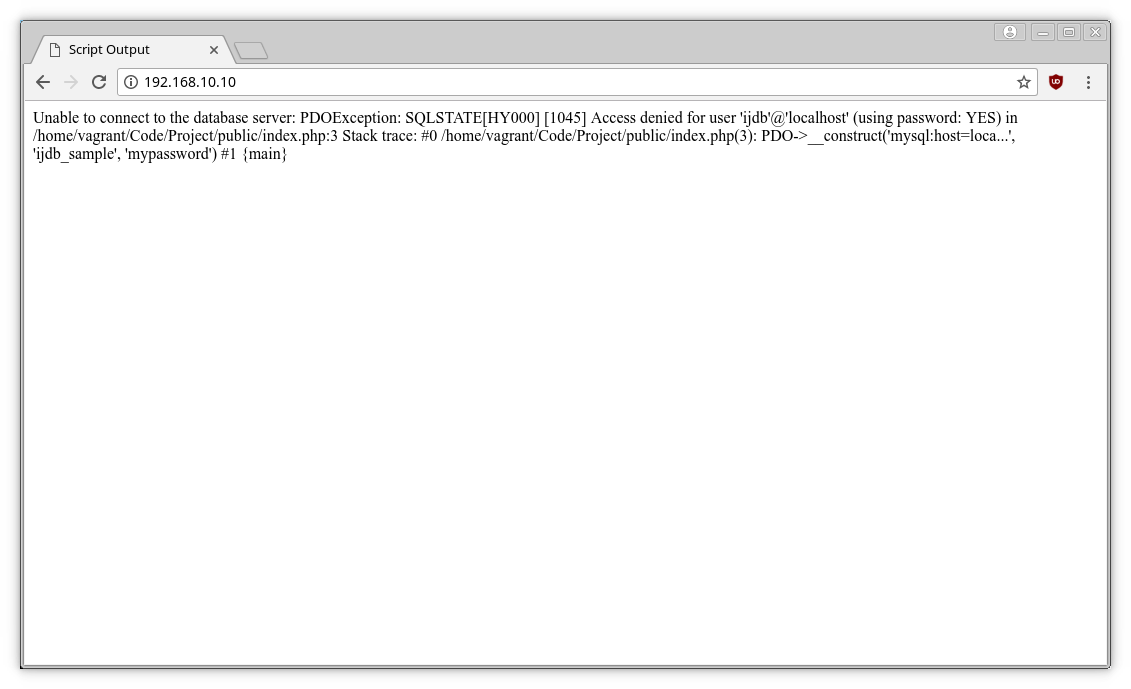
Thanks to our catch block, the error message from the database has been included on the page:
catch (PDOException $e) {
  $output = 'Unable to connect to the database server: ' . $e->getMessage();
}
The method getMessage() returns a message describing the exception that occurred. There are some other methods — including getFile() and getLine() — for returning the file name and line number that the exception was thrown on. You can generate a very detailed error message like this:
catch (PDOException $e) {
  $output = 'Unable to connect to the database server: ' . $e->getMessage() . ' in ' .
  $e->getFile() . ':' . $e->getLine();
}
This is incredibly useful if you have a large website with dozens of include files. The error message will tell you exactly which file to look in and which line the error occurred on.
If you’re curious, try inserting some other mistakes in your database connection code (for example, a misspelled database name) and observe the detailed error messages that result. When you’re done, and your database connection is working correctly, go back to the simple error message. This way, your visitors won’t be bombarded with technical gobbledygook if a genuine problem emerges with your database server.
With a connection established and a database selected, you’re ready to begin using the data stored in the database.
You might be wondering what happens to the connection with the MySQL server after the script has finished executing. If you really want to, you can force PHP to disconnect from the server by discarding the PDO object that represents your connection. You do this by setting the variable containing the object to null:
$pdo = null; // disconnect from the database serverThat said, PHP will automatically close any open database connections when it finishes running your script, so you can usually just let PHP clean up after you.
Sending SQL Queries with PHP
In Chapter 3, we connected to the MySQL database server using MySQL Workbench, which allowed us to type SQL queries (commands) and view the results of those queries immediately. The PDO object offers a similar mechanism — the exec method:
$pdo->exec($query)
Here, $query is a string containing whatever SQL query you want to execute.
As you know, if there’s a problem executing the query (for instance, if you made a typing mistake in your SQL query), this method will throw a PDOException for you to catch.
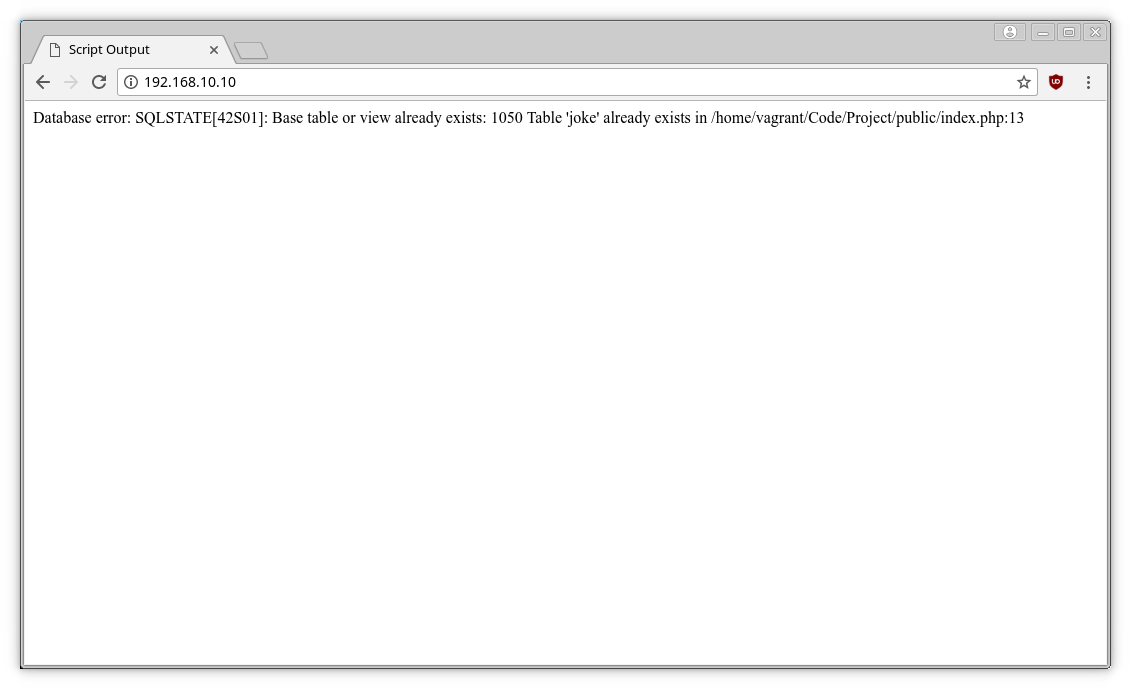
Consider the following example, which attempts to produce the joke table we created in Chapter 3.
Example: MySQL-Create
try {
  $pdo = new PDO('mysql:host=mysql;dbname=ijdb;charset=utf8mb4', 'ijdbuser', 'mypassword');

  $sql = 'CREATE TABLE joke (
    id INT NOT NULL AUTO_INCREMENT PRIMARY KEY,
    joketext TEXT,
    jokedate DATE NOT NULL
  ) DEFAULT CHARACTER SET utf8 ENGINE=InnoDB';

  $pdo->exec($sql);

  $output = 'Joke table successfully created.';
}
catch (PDOException $e) {
  $output = 'Database error: ' . $e->getMessage() . ' in ' .
  $e->getFile() . ':' . $e->getLine();
}

include  __DIR__ . '/../templates/output.html.php';
Note that we use the same try … catch statement technique to handle possible errors produced by the query. It would be possible to use multiple try … catch blocks to display different error messages — one for the connection and one for the query — but this can result in a considerable amount of extra code.
Instead, I’ve opted to use the same try statement to contain both the connection and the query. The try … catch block will stop executing code once an error occurs, so if an error occurs during the database connection, the $pdo->exec($run) line will never run, ensuring that, if a query is sent to the database, a connection must have been established.
This approach gives us a little less control over the error message that’s displayed, but saves typing a try … catch statement for each database operation. Later in this book, we’ll break these up into different blocks, but for now, keep all the database operations in the same try block.
This example also uses the getMessage method to retrieve a detailed error message from the MySQL server. The following image shows the error that’s displayed when, for example, the joke table already exists.
For DELETE, INSERT, and UPDATE queries (which serve to modify stored data), the exec method returns the number of table rows (entries) that were affected by the query. Consider the following SQL command, which we used in Chapter 3 to set the dates of all jokes that contained the word “programmer”.
Example: MySQL-Update
try {
  $pdo = new PDO('mysql:host=mysql;dbname=ijdb;charset=utf8mb4', 'ijdbuser', 'mypassword');

  $sql = 'UPDATE joke SET jokedate="2021-04-01"
      WHERE joketext LIKE "%programmer%"';

  $affectedRows = $pdo->exec($sql);

  $output = 'Updated ' . $affectedRows .' rows.';
}
catch (PDOException $e) {
  $output = 'Database error: ' . $e->getMessage() . ' in ' .
  $e->getFile() . ':' . $e->getLine();
}

include  __DIR__ . '/../templates/output.html.php';
By storing the value returned from the exec method in $affectedRows, we can use the variable in the $output variable for printing in the template.
The image below shows the output of this example, assuming there’s only one “programmer” joke in your database.
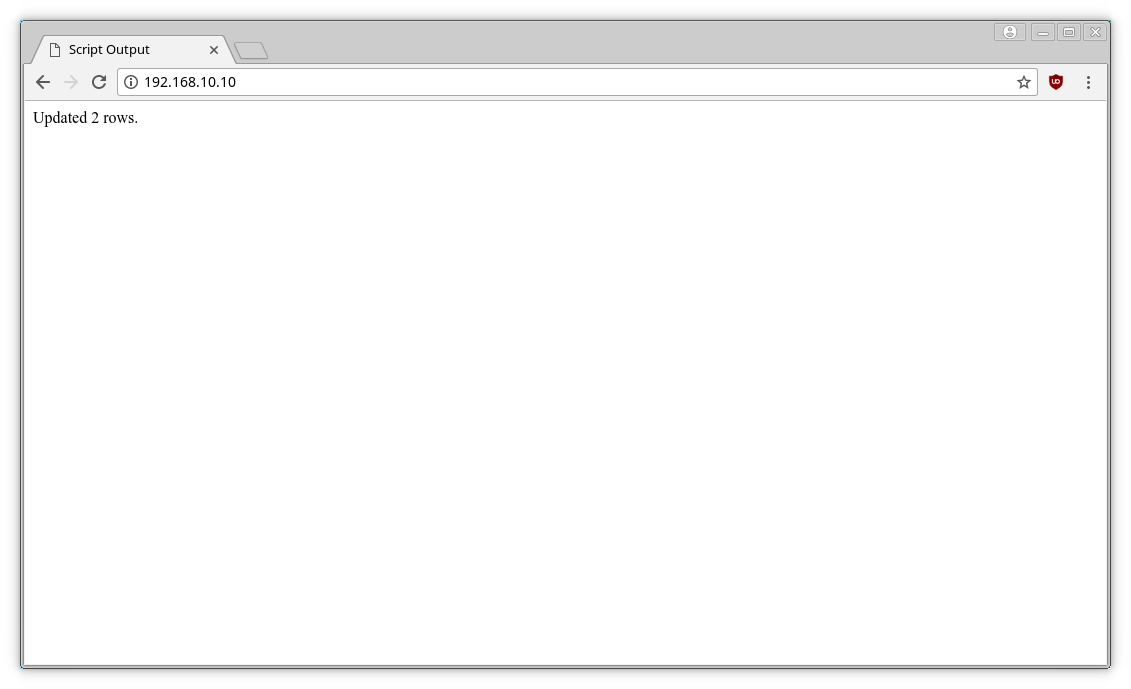
If you refresh the page to run the same query again, you should see the message change, as shown in the following image. It indicates that no rows were updated, since the new date being applied to the jokes is the same as the existing date.

SELECT queries are treated a little differently, as they can retrieve a lot of data, and PHP provides ways to handle that information.
Handling SELECT Result Sets
For most SQL queries, the exec method works just fine. The query does something to your database, and you get the number of affected rows (if any) from the method’s return value. SELECT queries, however, require something a little fancier than exec. You’ll recall that SELECT queries are used to view stored data in the database. Instead of only affecting the database, SELECT queries have results — and we need a method to return them.
The query method looks just like exec, in that it accepts an SQL query as an argument to be sent to the database server. What it returns, however, is a PDOStatement object, which represents a result set containing a list of all the rows (entries) returned from the query:
<?php
try {
    $pdo = new PDO('mysql:host=mysql;dbname=ijdb;charset=utf8mb4', 'ijdbuser', 'mypassword');

    $sql = 'SELECT `joketext` FROM `joke`';
    $result = $pdo->query($sql);
} catch (PDOException $e) {
    $error = 'Unable to connect to the database server: ' . $e->getMessage() . ' in ' .
  $e->getFile() . ':' . $e->getLine();
}
Provided that no error was encountered in processing the query, this code will store a result set (in the form of a PDOStatement object) into the variable $result. This result set contains the text of all the jokes stored in the joke table. As there’s no practical limit on the number of jokes in the database, the result set can be quite big.
I mentioned back in Chapter 2 that the while loop is a useful control structure when we need to loop but don’t know how many times. We can’t use a for loop, because we don’t know how many records the query returned. Indeed, you could use a while loop here to process the rows in the result set one at a time:
while ($row = $result->fetch()) {
  ⋮ process the row
}
The condition for the while loop is probably different from the conditions you’re used to, so let me explain how it works. Consider the condition as a statement all by itself:
$row = $result->fetch();
The fetch method of the PDOStatement object returns the next row in the result set as an array (we discussed arrays in Chapter 2). When there are no more rows in the result set, fetch returns false instead. (This is one case where asking a PDO object to do something it can’t do — as fetch can’t return the next row when there are no rows left in the result set — will not throw a PDOException. If it did, we’d be unable to use the fetch method in a while loop condition the way we do here.)
Now, the above statement assigns a value to the $row variable, but, at the same time, the statement as a whole takes on that same value. This is what lets you use the statement as a condition in the while loop. Since a while loop will keep looping until its condition evaluates to false, this loop will occur as many times as there are rows in the result set, with $row taking on the value of the next row each time the loop executes. All that’s left to figure out is how to retrieve the values out of the $row variable each time the loop runs.
Rows of a result set returned by fetch are represented as associative arrays, with the indices named after the table columns in the result set. If $row is a row in our result set, $row['joketext'] is the value in the joketext column of that row.
Our goal in this code is to store away the text of all the jokes so that we can display them in a PHP template. The best way to do this is to store each joke as a new item in an array, $jokes:
while ($row = $result->fetch()) {
  $jokes[] = $row['joketext'];
}
With the jokes pulled out of the database, we can now pass them along to a PHP template jokes.html.php.
To summarize, here’s the code of the controller for this example so far:
<?php

try {
    $pdo = new PDO('mysql:host=mysql;dbname=ijdb;charset=utf8mb4', 'ijdbuser', 'mypassword');

    $sql = 'SELECT `joketext` FROM `joke`';
    $result = $pdo->query($sql);

    while ($row = $result->fetch()) {
        $jokes[] = $row['joketext'];
    }
} catch (PDOException $e) {
    $error = 'Unable to connect to the database server: ' . $e->getMessage() . ' in ' .
  $e->getFile() . ':' . $e->getLine();
}

include  __DIR__ . '/../templates/jokes.html.php';
The $jokes variable is an array that stores a list of jokes. If you wrote out the contents of the array in PHP, it would look something like this:
$jokes = [];
$jokes[0] = 'A programmer was found dead in the shower. The instructions read: lather, rinse, repeat.';
$jokes[1] = '!false - it\'s funny because it\'s true';
$jokes[2] = 'A programmer\'s wife tells him to go to the store and "get a gallon of milk, and if they have eggs, get a dozen." He returns with 13 gallons of milk.';
However, the data has been retrieved from the database rather than being typed out manually in the code.
You’ll have noticed that there are two different variables being set — $jokes and $error — depending on whether or not the try block executed successfully.
In the jokes.html.php template, we need to display the contents of the $jokes array or the error message contained in the $error variable.
To check whether or not a variable has been assigned a value, we can use the isset function that we used earlier for checking if a form has been submitted. The template can include an if statement to determine whether to display the error or the list of jokes:
if (isset($error)) {
  ?>
  <p>
  <?php
  echo $error;
  ?>
  </p>
}
else {
  : display the jokes
}
There’s nothing new here, but to display the jokes, we need to display the contents of the $jokes array. Unlike other variables we’ve used up to this point, the $jokes array contains more than just a single value.
The most common way to process an array in PHP is to use a loop. We’ve already seen while loops and for loops. The foreach loop is particularly helpful for processing arrays:
foreach (array as $item) {
  ⋮ process each $item
}
Instead of a condition, the parentheses at the top of a foreach loop contain an array, followed by the keyword as, and then the name of a new variable that will be used to store each item of the array in turn. The body of the loop is then executed once for each item in the array. Each time that item is stored in the specified variable, so that the code can access it directly.
It’s common to use a foreach loop in a PHP template to display each item of an array in turn. Here’s how this might look for our $jokes array:
<?php
foreach ($jokes as $joke) {
    ?>
  ⋮ HTML code to output each $joke
<?php
}
?>
With this blend of PHP code to describe the loop and HTML code to display it, the code looks rather untidy. Because of this, it’s common to use an alternative way of writing the foreach loop when it’s used in a template:
foreach (array as $item):
  ⋮ process each $item
endforeach;
The two pieces of code are functionally identical, but the latter looks more friendly when mixed with HTML code. Here’s how this form of the code looks in a template:
<?php foreach ($jokes as $joke): ?>
  ⋮ HTML code to output each $joke
<?php endforeach; ?>
The same thing can be done with the if statement, making it nicer to look at inside HTML templates by avoiding the braces:
<?php if (isset($error)): ?>
  <p>
  <?php echo $error; ?>
  </p>
<?php else: ?>
  : display the jokes
<?php endif; ?>
With these new tools in hand, we can write our template to display the list of jokes.
Example: MySQL-ListJokes
<!doctype html>
<html>
  <head>
    <meta charset="utf-8">
    <title>List of jokes</title>
  </head>
  <body>
  <?php if (isset($error)): ?>
  <p>
    <?php echo $error; ?>
  </p>
  <?php else: ?>
  <?php foreach ($jokes as $joke): ?>
  <blockquote>
    <p>
    <?php echo htmlspecialchars($joke, ENT_QUOTES, 'UTF-8') ?>
    </p>
  </blockquote>
  <?php endforeach; ?>
  <?php endif; ?>
  </body>
</html>
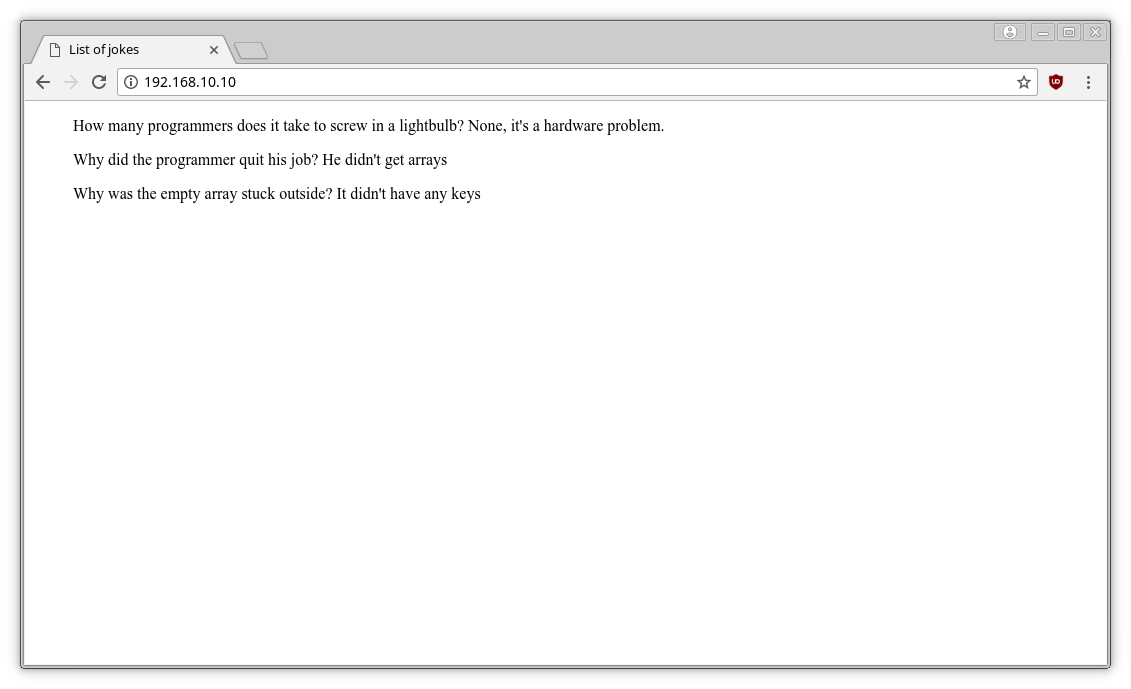
Either the $error text is displayed on the page or each joke is displayed in a paragraph (<p>) contained within a block quote (<blockquote>), since we’re effectively quoting the author of each joke in this page.
Because jokes might conceivably contain characters that could be interpreted as HTML code (for example, <, >, or &), we must use htmlspecialchars to ensure they’re translated into HTML character entities (that is, <, >, and &) so that they’ll be displayed correctly.
The following image shows what this page looks like once you’ve added a couple of jokes to the database.
Remember how we used a while loop in our controller to fetch the rows out of the PDOStatement result set one at a time?
while ($row = $result->fetch()) {
  $jokes[] = $row['joketext'];
}
It turns out that PDOStatement objects are designed to behave just like arrays when you pass them to a foreach loop. You can therefore slightly simplify your database processing code using a foreach loop instead of a while loop:
foreach ($result as $row) {
  $jokes[] = $row['joketext'];
}
I’ll be using this tidier foreach form in the rest of this book.
Another neat tool PHP offers is a shorthand way to call the echo command — which, as you’ve already seen, we need to use frequently. Our echo statements look like this:
<?php echo $variable; ?>
Instead, we can use this:
<?=$variable?>
This does exactly the same thing. <?= means echo and gives you a slightly shorter way to print variables. There’s a limitation to this, though: if you use <?=, you can only print. You can’t include if statements, for statements, and so on, although you can use concatenation, and it can be followed by a function call.
Here’s an updated template using the shorthand echo.
Example: MySQL-ListJokes-Shorthand
<!doctype html>
<html>
  <head>
    <meta charset="utf-8">
    <title>List of jokes</title>
  </head>
  <body>
  <?php if (isset($error)): ?>
  <p>
    <?=$error?>
  </p>
  <?php else: ?>
  <?php foreach ($jokes as $joke): ?>
  <blockquote>
    <p>
    <?=htmlspecialchars($joke, ENT_QUOTES, 'UTF-8')?>
    </p>
  </blockquote>
  <?php endforeach; ?>
  <?php endif; ?>
  </body>
</html>
I’ll be using the shorthand notation when it’s applicable from this point on.
Note: in versions of PHP prior to 5.4, this shorthand notation required a fairly uncommon PHP setting to be enabled, so it was discouraged for compatibility reasons. Using the shorthand notation may have caused your code to stop working when moving from a server that had it enabled to one that didn’t.
As of PHP 5.4 (so any version you’re realistically going to encounter these days), the shorthand echo works regardless of PHP settings, so you can safely use it without worrying that it might not work on all servers.
Thinking Ahead
In the example we just looked at, we created a template, jokes.html.php, which contains all the HTML required to display the page. However, as our website grows, we’ll add more pages. We’ll certainly want a page for people to be able to add jokes to the website, and we’ll also need a home page with some introductory text, a page with the owner’s contact details, and, as the site grows, perhaps even a page where people can log in to the website.
I’m jumping ahead a quite a bit here, but it’s always worth considering how a project will grow. If we apply the approach we just used for jokes.html.php to the rest of the templates — addjoke.html.php, home.html.php, contact.html.php, login.html.php and so on — we’ll end up with a lot of repeated code.
Every page on the website will require a template that will look something like this:
<!doctype html>
<html>
  <head>
    <meta charset="utf-8">
    <title>IJDB - Internet Joke Database</title>
  </head>
  <body>
  <?php if (isset($error)): ?>
  <p>
    <?=$error?>
  </p>
  <?php else: ?>
    : do whatever is required for this page: show text,
    : show a form, list records from the database, etc.
  <?php endif; ?>
  </body>
</html>
As a programmer, repeating code is one of the worst things you can do. In fact, programmers often refer to the DRY principle, which stands for “Don’t repeat yourself”. If you find yourself repeating sections of code, there’s almost certainly a better solution.
All the best programmers are lazy, and repeating code means repeating work. Using this copy/paste approach for templates makes the website very difficult to maintain. Let’s imagine there’s a footer and a navigation section that we want to appear on each page. Our templates would now look like this:
<!doctype html>
<html>
<head>
<meta charset="utf-8">
<title>IJDB - Internet Joke Database</title>
</head>
<body>
<nav>
<ul>
<li><a href="index.php">Home</a></li>
<li><a href="jokes.php">Jokes List</a></li>
</ul>
</nav>
<main>
<?php if (isset($error)): ?>
<p>
<?=$error?>
</p>
<?php else: ?>
: do whatever is required for this page: show text,
: show a form, list jokes, etc.
<?php endif; ?>
</main>
<footer>
© IJDB 2021
</footer>
</body>
</html>
We’ll run into a problem in 2022! If the templates for all the pages on the website — for example, jokes.html.php addjoke.html.php, home.html.php, contact.html.php andlogin.html.php — contain code in the structure above, to update the year in the copyright notice to “2022” you’d need to open each of the templates and change the date.
We could be clever and have the date dynamically read from the server’s clock (echo date('Y'); if you’re curious!) to avoid this issue, but what if we wanted to add a <script> tag that was included on every page? Or add a new link to the menu? We’d still need to open every template file and change it!
Changing five or six templates may be slightly annoying, but it’s not going to pose much of a problem. However, what if the website grows to dozens or hundreds of pages? Each time you wanted to add a link to the menu you’d have to open every single template and change it.
This problem could be solved with a series of include statements. For example:
<!doctype html>
<html>
  <head>
    <meta charset="utf-8">
    <title>IJDB - Internet Joke Database</title>
  </head>
  <body>
  <nav>
    <?php include 'nav.html.php'; ?>
  </nav>

  <main>
  <?php if (isset($error)): ?>
  <p>
    <?=$error?>
  </p>
  <?php else: ?>
    : do whatever is required for this page: show text,
    : show a form, list jokes, etc.
  <?php endif; ?>

  </main>

  <footer>
  <?php include 'footer.html.php'; ?>
  </footer>
  </body>
</html>
But this method requires clairvoyance: we need to anticipate exactly what changes might need to be made in the future and use relevant include statements in the places we foresee changes will happen.
In the example above, for example, it’s easy to add new menu entries by adding them to nav.html.php, but adding a <script> tag to every page, or even something as trivial as adding a CSS class to the nav element, still means opening every template to make the change.
There’s no way to accurately predict all the changes that might be needed over the lifetime of the website, so instead the approach I showed you at the beginning of this chapter is actually better:
<!doctype html>
<html>
<head>
<meta charset="utf-8">
<link rel="stylesheet" href="jokes.css">
<title><?=$title?></title>
</head>
<body>
<header>
<h1>Internet Joke Database</h1>
</header>
<nav>
<ul>
<li><a href="index.php">Home</a></li>
<li><a href="jokes.php">Jokes List</a></li>
</ul>
</nav>
<main>
<?=$output?>
</main>
<footer>
© IJDB 2021
</footer>
</body>
</html>
If we always include this template, which we’ll call layout.html.php, it’s possible to set the $output variable to some HTML code and have it appear on the page with the navigation and footer. The benefit of this is that, to change the date on every page of the website, we’ll only need to change it in one location.
I’ve also snuck in a $title variable so each controller can define a value that appears between the <title> and </title> tags along with some CSS (available as jokes.css in the sample code) to make the page a little prettier.
Any controller can now use include __DIR__ . '/../templates/layout.html.php'; and provide values for $output and $title.
Our jokes.php using layout.html.php is coded as shown below.
Example: MySQL-ListJokes-Layout-1
<?php

try {
    $pdo = new PDO('mysql:host=mysql;dbname=ijdb;charset=utf8mb4', 'ijdbuser', 'mypassword');

    $sql = 'SELECT `joketext` FROM `joke`';
    $result = $pdo->query($sql);

    while ($row = $result->fetch()) {
        $jokes[] = $row['joketext'];
    }

    $title = 'Joke list';

    $output = '';

    foreach ($jokes as $joke) {
        $output .= '<blockquote>';
        $output .= '<p>';
        $output .= $joke;
        $output .= '</p>';
        $output .= '</blockquote>';
    }
} catch (PDOException $e) {
    $title = 'An error has occurred';

    $output = 'Database error: ' . $e->getMessage() . ' in ' .
  $e->getFile() . ':' . $e->getLine();
}

include  __DIR__ . '/../templates/layout.html.php';
But wait! What’s going on with $output in the try block? The $output variable actually contains some HTML code: the loop builds a string containing the HTML code for the jokes list.
In principle, this is what we want to happen: the $output variable contains the HTML code that’s going to be inserted between the navigation and the footer in layout.html.php, but I think you’ll agree the code is incredibly ugly.
I already showed you how to avoid mixing HTML and PHP code via the include statement. Like we did earlier, it would be good to move the HTML for displaying the jokes to its own file — but this time, only the HTML code that’s unique to the joke list page.
jokes.html.php in the templates directory should contain this code:
<?php foreach ($jokes as $joke): ?>
<blockquote>
  <p>
  <?=htmlspecialchars($joke, ENT_QUOTES, 'UTF-8')?>
  </p>
</blockquote>
<?php endforeach; ?>
Importantly, this is only the code for displaying the jokes. It doesn’t contain the navigation, footer, <head> tag or anything we want repeated on every page; it’s only the HTML code that’s unique to the joke list page.
To use this template, you might try the following:
  while ($row = $result->fetch()) {
    $jokes[] = $row['joketext'];
  }

  $title = 'Joke list';

  include 'jokes.html.php';
}
Or if you’re very clever:
  while ($row = $result->fetch()) {
    $jokes[] = $row['joketext'];
  }

  $title = 'Joke list';

  $output = include 'jokes.html.php';
}
With this approach, your logic would be entirely sound. We need to include jokes.html.php. Unfortunately, the include statement just executes the code from the included file at the point it’s called. If you run the code above, the output will actually be something like this:
<blockquote>
  <p>
  A programmer was found dead in the shower. The instructions read: lather, rinse, repeat.
  </p>
</blockquote>
<blockquote>
  <p>
  !false - it's funny because it's true
  </p>
</blockquote>
<!doctype html>
<html>
  <head>
    <meta charset="utf-8">
    <title>Joke List</title>
  </head>
  <body>
  …
Because jokes.html.php is included first, it’s sent to the browser first. What we need to do is load jokes.html.php, but instead of sending the output straight to the browser, we need to capture it and store it in the $output variable so that it can be used later by layout.html.php.
The include statement doesn’t return a value, so $output = include 'jokes.html.php'; doesn’t have the desired effect, and PHP doesn’t have an alternative statement to do that. However, that doesn’t mean that it’s not possible.
PHP does have a useful feature called “output buffering”. It might sound complicated, but the concept is actually very simple: when you use echo to print something, or include to include a file that contains HTML, usually it’s sent directly to the browser. By making use of output buffering, instead of having the output being sent straight to the browser, the HTML code is stored on the server in a “buffer”, which is basically just a string containing everything that’s been printed so far.
Even better, PHP lets you turn on the buffer and read its contents at any time.
There are two functions we need:
ob_start(), which starts the output buffer. After calling this function, anything printed viaechoor HTML printed viaincludewill be stored in a buffer rather than sent to the browser.ob_get_clean(), which returns the contents of the buffer and clears it.
As you’ve probably guessed, “ob” in the function names stands for “output buffer”.
To capture the contents of an included file, we just need to make use of these two functions:
while ($row = $result->fetch()) {
   $jokes[] = $row['joketext'];
}

$title = 'Joke list';

// Start the buffer

ob_start();

// Include the template. The PHP code will be executed,
// but the resulting HTML will be stored in the buffer
// rather than sent to the browser.

include  __DIR__ . '/../templates/jokes.html.php';

// Read the contents of the output buffer and store them
// in the $output variable for use in layout.html.php

$output = ob_get_clean();
}
When this code runs, the $output variable will contain the HTML that was generated in the jokes.html.php template.
We’ll use this approach from now on. Each page will be made up of two templates:
layout.html.php, which contains all of the common HTML needed by every page- a unique template that contains only the HTML code that’s unique to that particular page
The complete jokes.php looks like this:
try {
  $pdo = new PDO('mysql:host=mysql;dbname=ijdb;charset=utf8mb4', 'ijdbuser', 'mypassword');

  $sql = 'SELECT `joketext` FROM `joke`';
  $result = $pdo->query($sql);

  while ($row = $result->fetch()) {
     $jokes[] = $row['joketext'];
  }

  $title = 'Joke list';

  ob_start();

  include  __DIR__ . '/../templates/jokes.html.php';

  $output = ob_get_clean();
}
catch (PDOException $e) {
  $title = 'An error has occurred';

  $output = 'Database error: ' . $e->getMessage() . ' in ' .
  $e->getFile() . ':' . $e->getLine();
}

include  __DIR__ . '/../templates/layout.html.php';
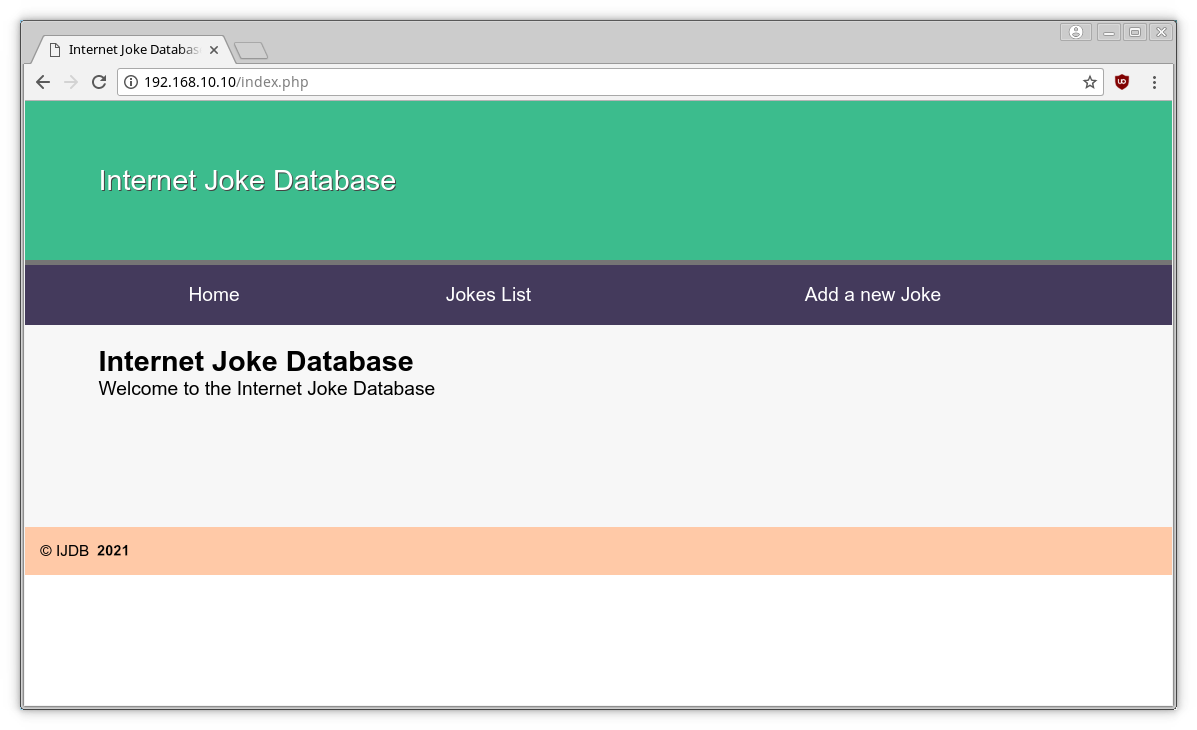
Let’s make the “Home” link work by adding an index.php file. We could put anything on this page: the latest jokes, the best joke of the month, or whatever we like. For now, though, we’ll keep it simple and just have a message that says “Welcome to the Internet Joke Database”.
Create a file called home.html.php in the templates folder:
<h2>Internet Joke Database</h2>

<p>Welcome to the Internet Joke Database</p>
Our index.php is considerably simpler than jokes.html.php. It doesn’t get any information from the database, so it doesn’t need a database connection and we don’t need a try … catch statement, so we’ll just load the two templates and set the $title and $output variables.
Example: MySQL-ListJokes-Layout-3
<?php

$title = 'Internet Joke Database';

ob_start();

include  __DIR__ . '/../templates/home.html.php';

$output = ob_get_clean();

include  __DIR__ . '/../templates/layout.html.php';
Note: it’s good practice to only connect to the database if you need to. Databases are the most common performance bottleneck on many websites, so making as few connections as possible is preferred.
Test that both pages work in your browser. You should have a list of jokes visible when you visit https://v.je/jokes.php and the welcome message on https://v.je/jokes.php. Both pages should contain the navigation and the footer.
Try amending layout.html.php. The changes you make will appear on both pages. If the site had dozens of pages, changes to the layout would affect every page.
Inserting Data into the Database
In this section, I’ll demonstrate how to use the tools at your disposal to enable site visitors to add their own jokes to the database.
If you want to let your site visitors enter new jokes, you’ll obviously need a form. Here’s a template for a form that will fit the bill:
<form action="" method="post">
  <label for="joketext">Type your joke here:</label>
  <textarea id="joketext" name="joketext" rows="3" cols="40">
  </textarea>
  <input type="submit" name="submit" value="Add">
</form>
Save this as addjoke.html.php in the templates directory.
The most important part of the <form> element is the action attribute. The action attribute tells the browser where to send the data once the form is submitted. This can be the name of a file, such as "addjoke.php".
However, if you leave the attribute empty by setting it to "", the data provided by the user will be sent back to the page you’re currently viewing. If the browser’s URL shows the page as addjoke.php, that’s were the data will be sent when the user presses the Add button.
Let’s tie this form into the preceding example, which displayed the list of jokes in the database. Open up layout.html.php and add a URL to the “Add a new Joke” link that goes to addjoke.php:
<!doctype html>
<html>
<head>
<meta charset="utf-8">
<link rel="stylesheet" href="jokes.css">
<title><?=$title?></title>
</head>
<body>
<nav>
<header>
<h1>Internet Joke Database</h1>
</header>
<ul>
<li><a href="index.php">Home</a></li>
<li><a href="jokes.php">Jokes List</a></li>
<li><a href="addjoke.php">Add a new Joke</a></li>
</ul>
</nav>
<main>
<?=$output?>
</main>
<footer>
© IJDB 2021
</footer>
</body>
</html>
While you have layout.html.php open, include the form.css stylesheet from Chapter 2 as I have above. Now, any form displayed inside the layout will have the styles we used before.
When this form is submitted, the request will include a variable — joketext — that contains the text of the joke as typed into the text area. This variable will then appear in the $_POST array created by PHP.
Let’s create addjoke.php in the public directory. The basic logic for this controller is:
- If no
joketextPOST variable is set, display a form. - Otherwise, insert the supplied joke into the database.
Create this skeleton addjoke.php:
<?php
if (isset($_POST['joketext'])) {
    try {
        $pdo = new PDO('mysql:host=mysql;dbname=ijdb;charset=utf8mb4', 'ijdbuser', 'mypassword');
    } catch (PDOException $e) {
        $title = 'An error has occurred';

        $output = 'Database error: ' . $e->getMessage() . ' in ' .
    $e->getFile() . ':' . $e->getLine();
    }
} else {
    $title = 'Add a new joke';

    ob_start();

    include  __DIR__ . '/../templates/addjoke.html.php';

    $output = ob_get_clean();
}
include  __DIR__ . '/../templates/layout.html.php';
This opening if statement checks if the $_POST array contains a variable called joketext. If it’s set, the form has been submitted. Otherwise, the form from addjoke.html.php is loaded into the $output variable for displaying in the browser.
If you do open addjoke.php in your browser at this point, you’ll see the form, but typing in a joke and pressing Add won’t work, because we haven’t yet done anything with the data contained in $_POST['joketext'].
To insert the submitted joke into the database, we must execute an INSERT query using the value stored in $_POST['joketext'] to fill in the joketext column of the joke table. This might lead you to write some code like this:
$sql = 'INSERT INTO `joke` SET
  `joketext` ="' . $_POST['joketext'] . '",
  `jokedate` ="2021-02-04"';

$pdo->exec($sql);
There’s a serious problem with this code, however: the contents of $_POST['joketext'] are entirely under the control of the user who submitted the form. If a malicious user were to type some nasty SQL code into the form, this script would feed it to your MySQL server without question. This type of attack is called an SQL injection attack, and in the early days of PHP it was one of the most common security holes that hackers found and exploited in PHP-based websites. (In many programming niches, SQL injection attacks are still surprisingly effective, as developers don’t expect them. Consider this remarkable attempt to cause traffic cameras to drop their databases: “SQL Injection License Plate Hopes to Foil Euro Traffic Cameras”.)
A user might type this into the text box:
How many programmers does it take to screw in a lightbulb? None. It's a hardware problem.
The query sent to the database would be as follows:
INSERT INTO `joke` SET
  `joketext` ="How many programmers does it take to screw in a lightbulb? None. It's a hardware problem.",
  `jokedate` ="2021-02-04
But what if the user types in the following:
A programmer's wife tells him to go to the store and "get a gallon of milk, and if they have eggs, get a dozen." He returns with 13 gallons of milk.
In this case, the query sent to the database will be this:
INSERT INTO `joke` SET
  `joketext`="A programmer's wife tells him to go to the store and "get a gallon of milk,
and if they have eggs, get a dozen." He returns with 13 gallons of milk.",
  `jokedate`="2021-02-04
Because the joke contains a quote character, MySQL will return an error, as it will see the quote before “get” as the end of the string.
To make this a valid query, we need to escape all quotes in the text so that the query sent to the database becomes this:
INSERT INTO `joke` SET
  `joketext`="A programmer's wife tells him to go to the store and \"get a gallon of milk, and if they have eggs, get a dozen.\" He returns with 13 gallons of milk.",
  `jokedate`="2021-02-04
Data not being inserted if it contains a quote is an annoying problem for users. They’ll lose whatever they typed in. But malicious users are able to abuse this. In older versions of PHP, it was possible to run multiple queries from PHP by separating them with a semicolon (;).
Imagine if the user were to type this into the box:
"; DELETE FROM `joke`; --
This would send the following queries to the database:
INSERT INTO `joke` SET
        `joketext`="";

DELETE FROM `joke`;

--`jokedate`="2021-02-04
-- is a single line comment in MySQL, so the last line would be ignored, and the INSERT query would run, followed by the DELETE query the user had typed into the box. In fact, the user could type any query they liked into the box and it would be run on the database!
Magic Quotes
In the early days of PHP, SQL injection attacks were so feared that the team behind PHP added some built-in protections against SQL injections to the language. Firstly, they disabled the ability to send multiple queries at once. Secondly, they added something called magic quotes. This protective feature of PHP automatically analyzed all values submitted by the browser and inserted backslashes (\) in front of any “dangerous” characters like apostrophes — which can cause problems if they’re included in an SQL query inadvertently.
The problem with the magic quotes feature is that it caused as many problems as it prevented. First of all, the characters that it detected, and the method it used to sanitize them (prefixing them with a backslash), were only valid in some circumstances. Depending on the character encoding of your site and the database server you were using, these measures could be completely ineffective.
Second, when a submitted value was used for some purpose other than creating an SQL query, those backslashes could be really bothersome. The magic quotes feature would insert a spurious backslash into the user’s last name if it contained an apostrophe.
In short, the magic quotes feature was a bad idea — so much so that it was removed from PHP from version 5.4. However, due to PHP’s age and the amount of code out there, you might come across some references to it, so it’s worth having a basic understanding of what the magic quotes feature was supposed to do.
Once magic quotes was identified as a bad idea, the advice from PHP developers was to turn it off. However, this meant that there were some web servers with it turned off and others with it turned on. This was a headache for developers: they either had to instruct everyone who was ever going to use their code to turn it off — which wasn’t possible on some shared servers — or write extra code to account for it.
Most developers chose the latter, and you may come across some code like this:
if (get_magic_quotes_gpc()) {
  // code here
}
If you see an if statement like this in legacy code you’ve been given to work with, you can safely delete the entire block, as no code inside the if statement will ever be executed on recent PHP versions.
If you do see code like this, it means the original developer understood the problems with magic quotes and was doing their best to prevent it. As of PHP 5.4 (which you should never come across, as it’s no longer supported), get_magic_quotes_gpc() will always return false and the code will never be executed.
All you really need to know about magic quotes is that it was a bad solution to the problem at hand. Of course, without magic quotes, you need to find a different solution to the problem. Luckily, the PDO class can do all the hard work for you, by using something called “prepared statements”.
Prepared Statements
A prepared statement is a special kind of SQL query that you’ve sent to your database server ahead of time, giving the server a chance to prepare it for execution — but not actually execute it. Think of it like writing a .php script. The code is there, but it doesn’t actually get run until you visit the page in your web browser. The SQL code in prepared statements can contain placeholders that you’ll supply the values for later, when the query is to be executed. When filling in these placeholders, PDO is smart enough to guard against “dangerous” characters automatically.
Here’s how to prepare an INSERT query and then execute it safely with $_POST['joketext'] as the text of the joke:
$sql = 'INSERT INTO `joke` SET
  `joketext` = :joketext,
  `jokedate` = "today's date"';

$stmt = $pdo->prepare($sql);

$stmt->bindValue(':joketext', $_POST['joketext']);
$stmt->execute();
Let’s break this down, one statement at a time. First, we write our SQL query as a PHP string and store it in a variable ($sql) as usual. What’s unusual about this INSERT query, however, is that no value is specified for the joketext column. Instead, it contains a placeholder for this value (:joketext). Don’t worry about the jokedate field just now; we’ll circle back to it in a moment.
Next, we call the prepare method of our PDO object ($pdo), passing it our SQL query as an argument. This sends the query to the MySQL server, asking it to prepare to run the query. MySQL can’t run it yet, as there’s no value for the joketext column. The prepare method returns a PDOStatement object (yes, the same kind of object that gives us the results from a SELECT query), which we store in $stmt.
Now that MySQL has prepared our statement for execution, we can send it the missing value(s) by calling the bindValue method of our PDOStatement object ($stmt). We call this method once for each value to be supplied (in this case, we only need to supply one value — the joke text), passing as arguments the placeholder that we want to fill in (':joketext') and the value we want to fill it with ($_POST['joketext']). Because MySQL knows we’re sending it a discrete value, rather than SQL code that needs to be parsed, there’s no risk of characters in the value being interpreted as SQL code. When using prepared statements, SQL injection vulnerabilities simply aren’t possible!
Finally, we call the PDOStatement object’s execute method to tell MySQL to execute the query with the value(s) we’ve supplied. (Yes, this PDOStatement method is called execute, unlike the similar method of PDO objects, which is called exec. PHP has many strengths, but consistency isn’t one of them!)
One interesting thing you’ll notice about this code is that we never placed quotes around the joke text. :joketext exists inside the query without any quotes, and when we called bindValue we passed it the plain joke text from the $_POST array. When using prepared statements, you don’t need quotes because the database (in our case, MySQL) is smart enough to know that the text is a string and it will be treated as such when the query is executed.
The lingering question in this code is how to assign today’s date to the jokedate field. We could write some fancy PHP code to generate today’s date in the YYYY-MM-DD format that MySQL requires, but it turns out that MySQL itself has a function to do this — CURDATE:
$sql = 'INSERT INTO `joke` SET
  `joketext` = :joketext,
  `jokedate` = CURDATE()';

$stmt = $pdo->prepare($sql);
$stmt->bindValue(':joketext', $_POST['joketext']);
$stmt->execute();
The MySQL CURDATE function is used here to assign the current date as the value of the jokedate column. MySQL actually has dozens of these functions, but I’ll introduce them only as required.
Now that we have our query, we can complete the if statement we started earlier to handle submissions of the “Add Joke” form:
if (isset($_POST['joketext'])) {
  try {
    $pdo = new PDO('mysql:host=mysql;dbname=ijdb;charset=utf8mb4', 'ijdbuser', 'mypassword');

    $sql = 'INSERT INTO `joke` SET
      `joketext` = :joketext,
      `jokedate` = CURDATE()';

    $stmt = $pdo->prepare($sql);

    $stmt->bindValue(':joketext', $_POST['joketext']);

    $stmt->execute();
  }
  catch (PDOException $e) {
    $title = 'An error has occurred';

    $output = 'Database error: ' . $e->getMessage() . ' in ' .
    $e->getFile() . ':' . $e->getLine();
  }
}
But wait! This if statement has one more trick up its sleeve. Once we’ve added the new joke to the database, instead of displaying the PHP template as previously, we want to redirect the user’s browser back to the list of jokes. That way, users are able to see the newly added joke among them. That’s what the two lines at the end of the if statement above do.
In order to achieve the desired result, your first instinct might be to allow the controller to simply fetch the list of jokes from the database after adding the new joke and displaying the list using the jokes.html.php template as usual. The problem with doing this is that the list of jokes, from the browser’s perspective, would be the result of having submitted the “Add Joke” form. If the user were then to refresh the page, the browser would resubmit that form, causing another copy of the new joke to be added to the database! This is rarely the desired behavior.
Instead, we want the browser to treat the updated list of jokes as a normal web page that’s able to be reloaded without resubmitting the form. The way to do this is to answer the browser’s form submission with an HTTP redirect — a special response that tells the browser to navigate to a different page. (HTTP stands for HyperText Transfer Protocol, and is the language that describes the request/response communications that are exchanged between the visitor’s web browser and your web server.)
The PHP header function provides the means of sending special server responses like this one, by letting you insert specific headers into the response sent to the browser. In order to signal a redirect, you must send a Location header with the URL of the page you want to direct the browser to:
header('Location: URL');
In this case, we want to send the browser to jokes.php. Here are the two lines that redirect the browser back to our controller after adding the new joke to the database:
header('Location: jokes.php');
Below is the complete code of the addjoke.php controller.
Example: MySQL-AddJoke
<?php
if (isset($_POST['joketext'])) {
    try {
        $pdo = new PDO('mysql:host=mysql;dbname=ijdb;charset=utf8mb4', 'ijdbuser', 'mypassword');

        $sql = 'INSERT INTO `joke` SET
      `joketext` = :joketext,
      `jokedate` = CURDATE()';

        $stmt = $pdo->prepare($sql);

        $stmt->bindValue(':joketext', $_POST['joketext']);

        $stmt->execute();

        header('location: jokes.php');
    } catch (PDOException $e) {
        $title = 'An error has occurred';

        $output = 'Database error: ' . $e->getMessage() . ' in ' .
    $e->getFile() . ':' . $e->getLine();
    }
} else {
    $title = 'Add a new joke';

    ob_start();

    include  __DIR__ . '/../templates/addjoke.html.php';

    $output = ob_get_clean();
}
include  __DIR__ . '/../templates/layout.html.php';
As you review this to ensure it all makes sense to you, note that the code that connects to the database by creating a new PDO object must come before any of the code that runs database queries. But a database connection isn’t required for displaying the “Add Joke” form. The connection is only made when the form has been submitted.
Load this up and add a new joke or two to the database via your browser.
There you have it: you’re able to view existing jokes in — and add new jokes to — your MySQL database.
Deleting Data from the Database
In this section, we’ll make one final enhancement to our joke database site. Next to each joke on the jokes page (jokes.php), we’ll place a button labeled Delete. When clicked, it will remove that joke from the database and display the updated joke list.
If you like a challenge, you might want to take a stab at writing this feature yourself before you read on to see my solution. Although we’re implementing a brand new feature, we’ll mainly be using the same tools as employed in the previous examples in this chapter. Here are a few hints to start you off:
- You’ll need a new controller (
deletejoke.php). - The SQL
DELETEcommand will be required, which I introduced in Chapter 3. - To delete a particular joke in your controller, you’ll need to identify it uniquely. The
idcolumn in thejoketable was created to serve this purpose. You’re going to have to pass the ID of the joke to be deleted with the request to delete a joke. The easiest way to do this is to use a hidden form field.
At the very least, take a few moments to think about how you’d approach this. When you’re ready to see the solution, read on!
To begin with, we need to modify the SELECT query that fetches the list of jokes from the database. In addition to the joketext column, we must also fetch the id column so that we can identify each joke uniquely:
try {
  $pdo = new PDO('mysql:host=mysql;dbname=ijdb;charset=utf8mb4', 'ijdbuser', 'mypassword');

  $sql = 'SELECT `id`, `joketext` FROM `joke`';
  $result = $pdo->query($sql);
  // …
We also have to modify the while loop that stores the database results into the $jokes array. Instead of simply storing the text of each joke as an item in the array, we store both the ID and text of each joke. One way to do this is to make each item in the $jokes array an array in its own right:
while ($row = $result->fetch()) {
  $jokes[] = ['id' => $row['id'], 'joketext' => $row['joketext']];
}
Note: if you’ve already switched to using a foreach loop to process your database result rows, that will work just fine too:
foreach ($result as $row) {
  $jokes[] = array('id' => $row['id'], 'joketext' =>
    $row['joketext']);
}
Once this loop runs its course, we’ll have the $jokes array, each item of which is an associative array with two items: the ID of the joke and its text. For each joke ($jokes[n]), we can therefore retrieve its ID ($jokes[n]['id']) and its text ($jokes[n]['text']).
Our next step is to update the jokes.html.php template to retrieve each joke’s text from this new array structure, as well as provide a Delete button for each joke:
<?php foreach ($jokes as $joke): ?>
<blockquote>
  <p>
  <?=htmlspecialchars($joke['joketext'], ENT_QUOTES, 'UTF-8')?>
  <form action="deletejoke.php" method="post">
    <input type="hidden" name="id" value="<?=$joke['id']?>">
    <input type="submit" value="Delete">
  </form>
  </p>
</blockquote>
<?php endforeach; ?>
Here are the highlights of this updated code:
- Each joke will be displayed with a form, which, if submitted, will delete that joke. We signal this to a new controller,
deletejoke.php, using the form’sactionattribute. - Since each joke in the
$jokesarray is now represented by a two-item array instead of a simple string, we must update this line to retrieve the text of the joke. We do this using$joke['text']instead of just$joke. - When we submit the form to delete this joke, we send along the ID of the joke to be deleted. To do this, we need a form field containing the joke’s ID, but we’d prefer to keep this field hidden from the user; that’s why we use a hidden form field (
input type="hidden"). The name of this field isid, and its value is the ID of the joke to be deleted ($joke['id']).Unlike the text of the joke, the ID is not a user-submitted value, so there’s no need to worry about making it HTML-safe withhtmlspecialchars. We can rest assured it will be a number, since it’s automatically generated by MySQL for theidcolumn when the joke is added to the database. - The submit button (
input type="submit") submits the form when clicked. Its value attribute gives it a label of Delete. - Finally, we close the form for this joke.
Note: if you know your HTML, you’re probably thinking the form and input tags belong outside of the blockquote element, since they aren’t a part of the quoted text (the joke).
Strictly speaking, that’s true: the form and its inputs should really be either before or after the blockquote. Unfortunately, making that tag structure display clearly requires a little CSS (cascading style sheets) code that’s really beyond the scope of this book.
Rather than teach you CSS layout techniques in a book about PHP and MySQL, I’ve decided to go with this imperfect markup. If you plan to use this code in the real world, you should invest some time into learning CSS (or at least secure the services of a CSS guru). That way, you can take complete control of your HTML markup without worrying about the CSS required to make it look nice. If you want to learn more about CSS layouts, take a look at CSS Master, 3rd Edition, by Tiffany Brown.
Add the following CSS to jokes.css to make the buttons appear to the right of the jokes and draw a line between them:
blockquote {display: table; margin-bottom: 1em; border-bottom: 1px solid #ccc; padding: 0.5em;}
blockquote p {display: table-cell; width: 90%; vertical-align: top;}
blockquote form {display: table-cell; width: 10%;}
The following image shows what the joke list looks like with the Delete buttons added.
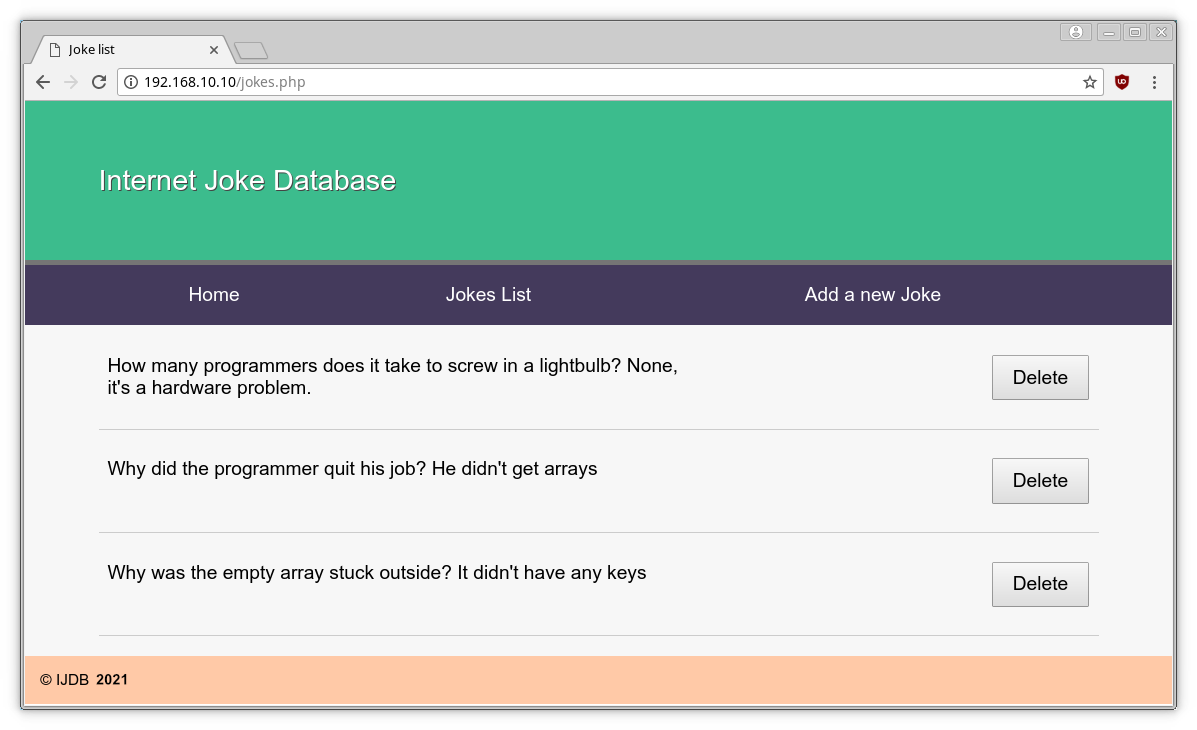
But wait! Before we move on to making the Delete button work, let’s briefly step back and take a careful look at this line:
$jokes[] = ['id' => $row['id'], 'joketext' => $row['joketext']];
Here, we’re looping over the PDOStatement object, which gives us a $row variable containing the keys id and joketext along with corresponding values, and we’re using that to build another array with the same keys and values.
You may have already realized this is terribly inefficient. We could achieve the same thing using this code:
while ($row = $result->fetch()) {
  $jokes[] = $row;
}
But as we know, this can also be achieved with a foreach loop:
foreach ($result as $row) {
 $jokes[] = $row;
}
In this instance, we’re using foreach to iterate over the records from the database and build an array. We’re then looping over the array with another foreach loop in the template. We could just write this:
$jokes = $result;
Now, when $jokes is iterated over in the template, it’s not an array but a PDOStatement object. However, that has no effect on the output and saves us some code. In fact, we can omit the $result variable altogether and load the PDOStatement object directly into the $jokes variable. The complete jokes.php controller now looks like this:
try {
  $pdo = new PDO('mysql:host=mysql;dbname=ijdb;charset=utf8mb4', 'ijdbuser', 'mypassword');

  $sql = 'SELECT `joketext`, `id` FROM joke';

  $jokes = $pdo->query($sql);

  $title = 'Joke list';

  ob_start();

  include  __DIR__ . '/../templates/jokes.html.php';

  $output = ob_get_clean();
}
catch (PDOException $e) {
  $title = 'An error has occurred';

  $output = 'Database error: ' . $e->getMessage() . ' in ' .
  $e->getFile() . ':' . $e->getLine();
}

include  __DIR__ . '/../templates/layout.html.php';
Now we don’t even have a while loop iterating over the records in the controller, but just iterate over the records directly in the template, saving some code and making the page execute slightly faster, as it now only loops over the records once.
Back to our new Delete button: all that remains to make this new feature work is to add a relevant deletejoke.php to issue a DELETE query to the database:
try {
  $pdo = new PDO('mysql:host=mysql;dbname=ijdb;charset=utf8mb4', 'ijdbuser', 'mypassword');

  $sql = 'DELETE FROM `joke` WHERE `id` = :id';

  $stmt = $pdo->prepare($sql);

  $stmt->bindValue(':id', $_POST['id']);
  $stmt->execute();

  header('location: jokes.php');
}
catch (PDOException $e) {
  $title = 'An error has occurred';

  $output = 'Unable to connect to the database server: ' . $e->getMessage() . ' in ' .
  $e->getFile() . ':' . $e->getLine();
}

include  __DIR__ . '/../templates/layout.html.php';
The complete code for the updated jokes.php and deletejoke.php is available as Example: MySQL-DeleteJoke.
This chunk of code works exactly like the one we added to process the “Add Joke” code earlier in the chapter. We start by preparing a DELETE query with a placeholder for the joke ID that we want to delete.
Tip: you might think that a prepared statement is unnecessary in this instance to protect our database from SQL injection attacks, since the joke ID is provided by a hidden form field invisible to the user. In fact, all form fields — even hidden ones — are ultimately under the user’s control. There are widely distributed browser add-ons, for example, that will make hidden form fields visible and available for editing by the user. Remember: any value submitted by the browser is ultimately suspect when it comes to protecting your site’s security.
We then bind the submitted value of $_POST['id'] to that placeholder and execute the query. Once that query is achieved, we use the PHP header function to ask the browser to send a new request to view the updated list of jokes.
Note: if you tackled this example yourself, your first instinct might have been to provide a Delete hyperlink for each joke, instead of going to the trouble of writing an entire HTML form containing a Delete button for each joke on the page. Indeed, the code for such a link would be much simpler:
<?php foreach ($jokes as $joke): ?>
<blockquote>
<p>
<?=htmlspecialchars($joke['joketext'], ENT_QUOTES, 'UTF-8')?>
<a href="deletejoke.php&id=<?=$joke['id']?>">Delete</a>
</p>
</blockquote>
<?php endforeach; ?>In short, hyperlinks should never be used to perform actions (such as deleting a joke). They must only be used to provide a link to some related content. The same goes for forms with method="get", which should only be used to perform queries of existing data. Actions must only ever be performed as a result of a form with method="post" being submitted.
The reason for this is that forms with method="post" are treated differently by browsers and related software. If you were to submit a form with method="post" and then click the refresh button in your browser, for example, the browser would ask if you’re certain you want to resubmit the form. Browsers have no similar protection against resubmission when it comes to links and forms with method="get".
Search engines and other web crawlers will also follow all the links on your site in order to work out when to show your site’s pages in search results.
If your site deleted a joke as a result of a hyperlink being followed, you could find your jokes being deleted whenever a search engine finds your site.
Mission Accomplished
In this chapter, you learned all about PHP Data Objects (PDO), a collection of built-in PHP classes (PDO, PDOException, and PDOStatement) that allow you to interface with a MySQL database server by creating objects and then calling the methods they provide. While you were at it, you also picked up the basics of object-oriented programming (OOP) — which is no mean feat for a PHP beginner!
Using PDO objects, you built your first database-driven website, which published the ijdb database online and allowed visitors to add and delete jokes.
In a way, you could say this chapter achieved the stated mission of this book: to teach you how to build a database-driven website. Of course, the example in this chapter contained only the bare essentials. In the rest of the book, I’ll show you how to flesh out the skeleton you learned to build in this chapter.
In Chapter 5, we’ll return to the SQL Query window in MySQL Workbench. We’ll learn how to use relational database principles and advanced SQL queries to represent more complex types of information, and give our visitors credit for the jokes they add!
We hope you’ve enjoyed this excerpt from PHP & MySQL: Novice to Ninja, 7th Edition. The full book is available on SitePoint Premium and from your favorite book and ebook retailers.