How to Use WordPress as a Headless CMS for Eleventy

The last few years have seen static site generators like Eleventy and Jamstack concepts evolve from niche tools to mainstream development approaches.
The benefits are appealing:
- simpler deployment and static hosting
- better security; there are few back-end systems to exploit
- easy backup and document version control using Git
- a great development experience, and
- super-fast performance
Unfortunately, static-site generator (SSG) projects are rarely handed over to clients. SSGs such as Jekyll, Hugo, and Gatsby are designed for developers. Navigating version branches, updating Markdown documents, and running command-line build processes is frustrating for editors coming from the world of one-click publishing on a content management system.
This tutorial describes one way to keep everyone happy and motivated! …
- content editors can use WordPress to edit and preview posts
- developers can import that content into Eleventy to build a static site
Headless CMSs and Loosely Coupled APIs
Some concepts illustrated here are shrouded in obscure jargon and terminology. I’ll endeavor to avoid it, but it’s useful to understand the general approach.
Most content management systems (CMSs) provide:
- A content control panel to manage pages, posts, media, categories, tags, etc.
- Web page generation systems to insert content into templates. This typically occurs on demand when a user requests a page.
This has some drawbacks:
- Sites may be constrained to the abilities of the CMS and its plugins.
- Content is often stored in HTML, so re-use is difficult — for example, using the same content in a mobile app.
- The page rendering process can be slow. CMSs usually offer caching options to improve performance, but whole sites can disappear when the database fails.
- Switching to an alternative/better CMS isn’t easy.
To provide additional flexibility, a headless CMS has a content control panel but, instead of page templating, data can be accessed via an API. Any number of systems can then use the same content. For example:
- an SSG could fetch all content at build time and render a complete site
- another SSG could build a site in a different way — for example, with premium content
- a mobile app could fetch content on demand to show the latest updates
Headless CMS solutions include Sanity.io and Contentful. These are powerful, but require editors to learn a new content management system.
The WordPress REST API
Almost 40% of all sites use WordPress (including SitePoint.com). Most content editors will have encountered the CMS and many will be using it daily.
WordPress has provided a REST API since version 4.7 was released in 2016. The API allows developers to access and update any data stored in the CMS. For example, to fetch the ten most recent posts, you can send a request to:
yoursite.com/wp-json/wp/v2/posts?orderby=date&order=desc
Note: this REST URL will only work if pretty permalinks such as Post name are set in the WordPress Settings. If the site uses default URLs, the REST endpoint will be <yoursite.com/?rest_route=wp/v2/posts?orderby=date&order=desc>.
This returns JSON content containing an array of large objects for every post:
[
  {
    "id": 33,
    "date": "2020-12-31T13:03:21",
    "date_gmt": "2020-12-31T13:03:21",
    "guid": {
      "rendered": "https://mysite/?p=33"
    },
    "modified": "2020-12-31T13:03:21",
    "modified_gmt": "2020-12-31T13:03:21",
    "slug": "my-post",
    "status": "publish",
    "type": "post",
    "link": "https://mysite/my-post/",
    "title": {
      "rendered": "First post"
    },
    "content": {
      "rendered": "<p>My first post. Nothing much to see here.</p>",
      "protected": false
    },
    "excerpt": {
      "rendered": "<p>My first post</p>",
      "protected": false
    },
    "author": 1,
    "featured_media": 0,
    "comment_status": "closed",
    "ping_status": "",
    "sticky": false,
    "template": "",
    "format": "standard",
    "meta": [],
    "categories": [1],
    "tags": []
   }
]
WordPress returns ten posts by default. The HTTP header x-wp-total returns the total number of posts and x-wp-totalpages returns the total number of pages.
Note: no WordPress authentication is required to read public data because … it’s public! Authentication is only necessary when you attempt to add or modify content.
It’s therefore possible to use WordPress as a headless CMS and import page data into a static site generator such as Eleventy. Your editors can continue to use the tool they know regardless of the processes you use for site publication.
WordPress Warnings
The sections below describe how to import WordPress posts into an Eleventy-generated site.
In an ideal world, your WordPress template and Eleventy theme would be similar so page previews render identically to the final site. This may be difficult: the WordPress REST API outputs HTML and that code can be significantly altered by plugins and themes. A carousel, shop product, or contact form could end up in your static site but fail to operate because it’s missing client-side assets or Ajax requests to server-side APIs.
My advice: the simpler your WordPress setup, the easier it will be to use it as a headless CMS. Unfortunately, those 57 essential plugins your client installed may pose a few challenges.
Install WordPress
The demonstration code below presumes you have WordPress running on your PC at http://localhost:8001/. You can install Apache, PHP, MySQL and WordPress manually, use an all-in-one installer such as XAMPP, or even access a live server.
Alternatively, you can use Docker to manage the installation and configuration. Create a new directory, such as wpheadless, containing a docker-compose.yml file:
version: '3'

services:

  mysql:
    image: mysql:5
    container_name: mysql
    environment:
      - MYSQL_DATABASE=wpdb
      - MYSQL_USER=wpuser
      - MYSQL_PASSWORD=wpsecret
      - MYSQL_ROOT_PASSWORD=mysecret
    volumes:
      - wpdata:/var/lib/mysql
    ports:
      - "3306:3306"
    networks:
      - wpnet
    restart: on-failure

  wordpress:
    image: wordpress
    container_name: wordpress
    depends_on:
      - mysql
    environment:
      - WORDPRESS_DB_HOST=mysql
      - WORDPRESS_DB_NAME=wpdb
      - WORDPRESS_DB_USER=wpuser
      - WORDPRESS_DB_PASSWORD=wpsecret
    volumes:
      - wpfiles:/var/www/html
      - ./wp-content:/var/www/html/wp-content
    ports:
      - "8001:80"
    networks:
      - wpnet
    restart: on-failure

volumes:
  wpdata:
  wpfiles:

networks:
  wpnet:
Run docker-compose up from your terminal to launch WordPress. This may take several minutes when first run since all dependencies must download and initialize.
A new wp-content subdirectory will be created on the host which contains installed themes and plugins. If you’re using Linux, macOS, or Windows WSL2, you may find this directory has been created by the root user. You can run sudo chmod 777 -R wp-content to grant read and write privileges to all users so both you and WordPress can manage the files.
Note: chmod 777 is not ideal. A slightly more secure option is sudo chown -R www-data:<yourgroup> wp-content followed by sudo chmod 774 -R wp-content. This grants write permissions to Apache and anyone in your group.
Navigate to http://localhost:8001/ in your browser and follow the WordPress installation process:
Modify your site’s settings as necessary, remembering to set pretty permalinks such as Post name in Settings > Permalinks. Then add or import a few posts so you have data to test in Eleventy.
Keep WordPress running but, once you’re ready to shut everything down, run docker-compose down from the project directory.
Install Eleventy
Eleventy is a popular Node.js static-site generator. The Getting Started with Eleventy tutorial describes a full setup, but the instructions below show the essential steps.
Ensure you have Node.js version 8.0 or above installed, then create a project directory and initialize the package.json file:
mkdir wp11ty
cd wp11ty
npm init
Install Eleventy and the node-fetch Fetch-compatible library as development dependencies:
npm install @11ty/eleventy node-fetch --save-dev
Then create a new .eleventy.js configuration file, which sets the source (/content) and build (/build) sub-directories:
// .eleventy.js configuration
module.exports = config => {

  return {

    dir: {
      input: 'content',
      output: `build`
    }

  };

};
Retrieving WordPress Post Data
Eleventy can pull data from anywhere. JavaScript files contained in the content’s _data directory are automatically executed and any data returned by the exported function is available in page templates.
Create a content/_data/posts.js file in the project directory. Start by defining the default WordPress post API endpoint and the node_fetch module:
// fetch WordPress posts
const
  wordpressAPI = 'http://localhost:8001/wp-json/wp/v2/posts?orderby=date&order=desc',
  fetch = require('node-fetch');
This is followed by a wpPostPages() function that determines how many REST calls must be made to retrieve all posts. It calls the WordPress API URL but appends &_fields=id to return post IDs only — the minimum data required.
The x-wp-totalpages header can then be inspected to return the number of pages:
// fetch number of WordPress post pages
async function wpPostPages() {

  try {

    const res = await fetch(`${ wordpressAPI }&_fields=id&page=1`);
    return res.headers.get('x-wp-totalpages') || 0;

  }
  catch(err) {
    console.log(`WordPress API call failed: ${err}`);
    return 0;
  }

}
A wpPosts() function retrieves a single set (page) of posts where each has its ID, slug, date, title, excerpt, and content returned. The string is parsed to JSON, then all empty and password-protected posts are removed (where content.protected is set to true).
Note: by default, WordPress draft and private posts which can only be viewed by content editors are not returned by the /wp-json/wp/v2/posts endpoint.
Post content is formatted to create dates and clean strings. In this example, fully qualified WordPress URLs have the http://localhost:8001 domain removed to ensure they point at the rendered site. You can add further modifications as required:
// fetch list of WordPress posts
async function wpPosts(page = 1) {

  try {

    const
      res = await fetch(`${ wordpressAPI }&_fields=id,slug,date,title,excerpt,content&page=${ page }`),
      json = await res.json();

    // return formatted data
    return json
      .filter(p => p.content.rendered && !p.content.protected)
      .map(p => {
        return {
          slug: p.slug,
          date: new Date(p.date),
          dateYMD: dateYMD(p.date),
          dateFriendly: dateFriendly(p.date),
          title: p.title.rendered,
          excerpt: wpStringClean(p.excerpt.rendered),
          content: wpStringClean(p.content.rendered)
        };
      });

  }
  catch (err) {
    console.log(`WordPress API call failed: ${err}`);
    return null;
  }

}


// pad date digits
function pad(v = '', len = 2, chr = '0') {
  return String(v).padStart(len, chr);
}


// format date as YYYY-MM-DD
function dateYMD(d) {

  d = new Date(d);
  return d.getFullYear() + '-' + pad(d.getMonth() + 1) + '-' + pad(d.getDate());

}

// format friendly date
function dateFriendly(d) {

  const toMonth = new Intl.DateTimeFormat('en', { month: 'long' });
  d = new Date(d);
  return d.getDate() + ' ' + toMonth.format(d) + ', ' + d.getFullYear();

}


// clean WordPress strings
function wpStringClean(str) {

  return str
    .replace(/http:\/\/localhost:8001/ig, '')
    .trim();

}
Finally, a single exported function returns an array of all formatted posts. It calls wpPostPages() to determine the number of pages, then runs wpPosts() concurrently for every page:
// process WordPress posts
module.exports = async function() {

  const posts = [];

  // get number of pages
  const wpPages = await wpPostPages();
  if (!wpPages) return posts;

  // fetch all pages of posts
  const wpList = [];
  for (let w = 1; w <= wpPages; w++) {
    wpList.push( wpPosts(w) );
  }

  const all = await Promise.all( wpList );
  return all.flat();

};
The returned array of post objects will look something like this:
[
  {
    slug: 'post-one',
    date: new Date('2021-01-04'),
    dateYMD: '2021-01-04',
    dateFriendly: '4 January 2021',
    title: 'My first post',
    excerpt: '<p>The first post on this site.</p>',
    content: '<p>This is the content of the first post on this site.</p>'
  }
]
Rendering All Posts in Eleventy
Eleventy’s pagination feature can render pages from generated data. Create a content/post/post.njk Nunjucks template file with the following code to retrieve the posts.js data (posts) and output each item (‘post’) in a directory named according to the post’s slug:
---
pagination:
  data: posts
  alias: post
  size: 1
permalink: "/{{ post.slug | slug }}/index.html"
---
<!DOCTYPE html>
<html lang="en">
<head>
<meta charset="UTF-8">
<title>{{ post.title }}</title>
<meta name="viewport" content="width=device-width,initial-scale=1" />
<style>
  body { font-size: 100%; font-family: sans-serif; }
</style>
</head>
<body>

<h1>{{ post.title }}</h1>

<p><time datetime="{{ post.dateYMD }}">{{ post.dateFriendly }}</time></p>

{{ post.content | safe }}

</body>
</html>
Run npx eleventy --serve from the terminal in the root project directory to generate all posts and launch a development server.
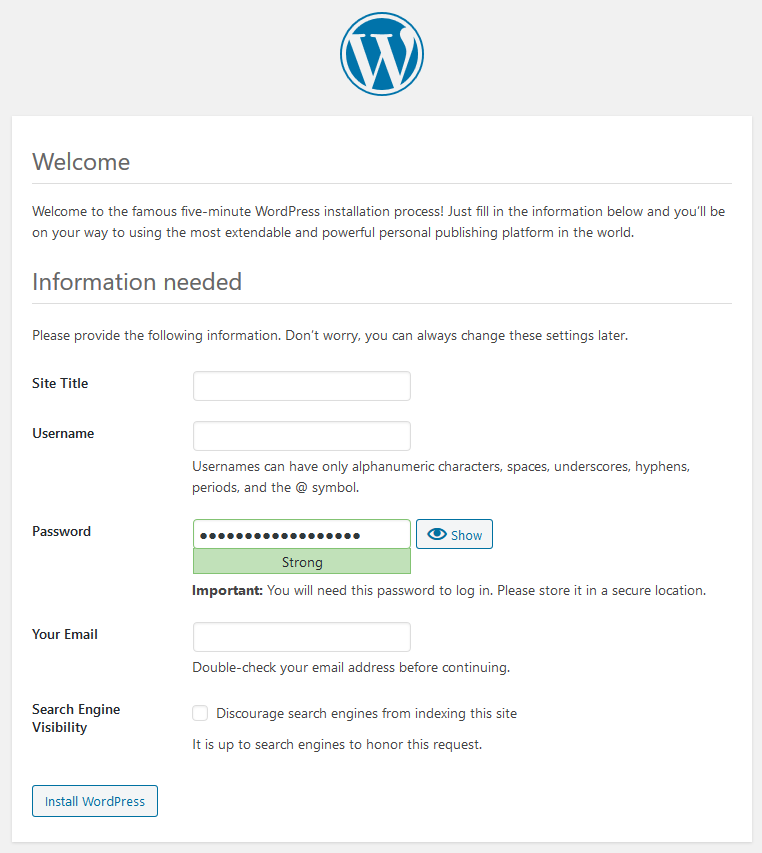
If a post with the slug post-one has been created in WordPress, you can access it in your new Eleventy site at http://localhost:8080/post-one/:
Creating Post Index Pages
To make navigation a little easier, a similar paginated page can be created at content/index.njk. This renders five items per page with “newer” and “older” post links:
---
title: WordPress articles
pagination:
data: posts
alias: pagedlist
size: 5
---
<!DOCTYPE html>
<html lang="en">
<head>
<meta charset="UTF-8">
<title>{{ post.title }}</title>
<meta name="viewport" content="width=device-width,initial-scale=1" />
<style>
body { font-size: 100%; font-family: sans-serif; }
ul, li {
margin: 0;
padding: 0;
}
ul {
list-style-type: none;
display: flex;
flex-wrap: wrap;
gap: 2em;
}
li {
flex: 1 1 15em;
}
li.next {
text-align: right;
}
a {
text-decoration: none;
}
a h2 {
text-decoration: underline;
}
</style>
</head>
<body>
<h1>
{% if title %}{{ title }}{% else %}{{ list }} list{% endif %}
{% if pagination.pages.length > 1 %}, page {{ pagination.pageNumber + 1 }} of {{ pagination.pages.length }}{% endif %}
</h1>
<ul class="posts">
{%- for post in pagedlist -%}
<li>
<a href="/{{ post.slug }}/">
<h2>{{ post.title }}</h2>
<p><time datetime="{{ post.dateYMD }}">{{ post.dateFriendly }}</time></p>
<p>{{ post.excerpt | safe }}
</a>
</li>
{%- endfor -%}
</ul>
<hr>
{% if pagination.href.previous or pagination.href.next %}
<ul class="pages">
{% if pagination.href.previous %}
<li><a href="{{ pagination.href.previous }}">« newer posts</a></li>
{% endif %}
{% if pagination.href.next %}
<li class="next"><a href="{{ pagination.href.next }}">older posts »</a></li>
{% endif %}
</ul>
{% endif %}
</body>
</html>
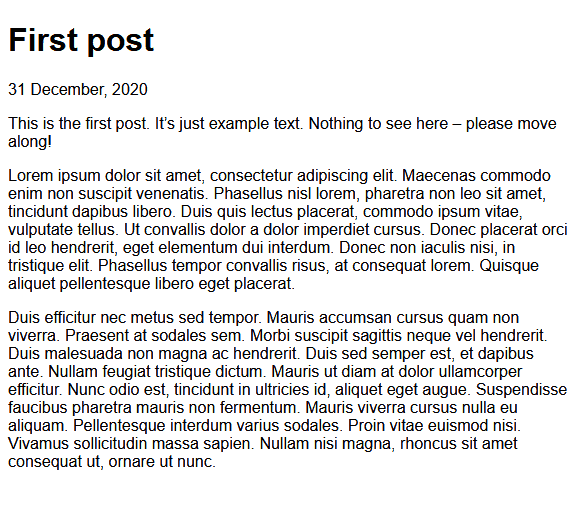
The npx eleventy --serve you executed above should still be active, but run it again if necessary. An index.html file is created in the build directory, which links to the first five posts. Further pages are contained in build/1/index.html, build/2/index.html etc.
Navigate to http://localhost:8080/ to view the index:
Press Ctrl | Cmd + C to exit the Eleventy server. Run npx eleventy on its own to build a full site ready for deployment.
Deployment Decisions
Your resulting Eleventy site contains static HTML and assets. It can be hosted on any web server without server-side runtimes, databases, or other dependencies.
Your WordPress site requires PHP and MySQL, but it can be hosted anywhere practical for content editors. A server on a private company network is the most secure option, but you may need to consider a public web server for remote workers. Either can be secured using IP address restrictions, additional authentication, etc.
Your Eleventy and WordPress sites can be hosted on different servers, perhaps accessed from distinct subdomains such as www.mysite.com and editor.mysite.com respectively. Neither would conflict with the other and it would be easier to manage traffic spikes.
However, you may prefer to keep both sites on the same server if:
- you have some static pages (services, about, contact, etc.) and some WordPress pages (shop, forums, etc.), or
- the static site accesses WordPress data, such as uploaded images or other REST APIs.
PHP only initiates WordPress rendering if the URL can’t be resolved in another way. For example, presume you have a WordPress post with the permalink /post/my-article. It will be served when a user accesses mysite.com/post/my-article unless a static file named /post/my-article/index.html has been generated by Eleventy in the server’s root directory.
Unfortunately, content editors would not be able to preview articles from WordPress, so you could consider conditional URL rewrites. This Apache .htaccess configuration loads all /post/ URLs from an appropriate /static/ directory unless the user’s IP address is 1.2.3.4:
RewriteEngine On
RewriteCond %{REMOTE_HOST} !^1.2.3.4
RewriteRule "^/post/(.*)" "/static/post/$1/index.html" [R]
For more complex sites, you could use Eleventy to render server configuration files based on the pages you’ve generated.
Finally, you may want to introduce a process which automatically triggers the Eleventy build and deployment process. You could consider:
- A build every N hours regardless of changes.
- Provide a big “DEPLOY NOW” button for content editors. This could be integrated into the WordPress administration panels.
- Use the WordPress REST API to frequently check the most recent post
modifieddate. A rebuild can be started when it’s later than the last build date.
Simpler Static Sites?
This example illustrates the basics of using WordPress as a headless CMS for static site generation. It’s reassuringly simple, although more complex content will require more complicated code.
Suggestions for further improvement:
- Try importing posts from an existing WordPress site which uses third-party themes and plugins.
- Modify the returned HTML to remove or adapt WordPress widgets.
- Import further data such as pages, categories, and tags (comments are also possible although less useful).
- Extract images or other media into the local file system.
- Consider how you could cache WordPress posts in a local file for faster rendering. It may be possible to examine the
_fields=modifieddate to ensure new and updated posts are imported.
WordPress is unlikely to be the best option for managing static-site content. However, if you’re already using WordPress and considering a move to a static-site generator, its REST API provides a possible migration path without fully abandoning the CMS.