Virtual Environments in Python Made Easy


Most Python newcomers don’t know how to set up a development environment that follows the latest standards used by professional programmers. This tutorial will teach you how to properly create a fully working Python development environment using industry-accepted best practices.
Virtual Environments
A virtual environment helps us to solve project dependency conflicts by creating isolated environments. These “isolated environments” contain all the goodies Python programmers might need to develop their projects.
Virtual environments include a fresh duplicate of Python binaries, and a standalone copy of the entire Python standard library. That’s why it can work by itself.
Using virtual environments give us the following advantages:
- we’re able to maintain our local machine packages intact
- we can share dependencies with others with a
requirements.txtfile - we can deploy a Python app in a dedicated server (PythonAnyWhere, Heroku, and so forth)
The Need for Virtual Environments
I use many libraries for my projects. Among them are three web application development frameworks, and there are other libraries I’d like to explore in future. This serves as the main argument that serious projects in Python depend on other packages written by other developers.
If you’re a Django developer, I’m confident you use Django rest framework to create powerful rest APIs, Django Debug Toolbar for gathering various debug information about the current request/response, Celery for taking care of real-time operations, and scheduling as well, and so on.
For example, I rely heavily on the requests package for some of my projects, and a Django web application I’m currently working on depends on version 2.3.0. According to the official documentation, at the time of writing the latest version of this package is version 3.2.
Let’s suppose I go ahead and install the latest version of the library on my Ubuntu machine because I need it for another project. Everything seems to work fine until I try to make use of my older project, which worked fine with 2.3.0. Suddenly, everything is broken.
What happened? Maybe the API of the latest version of Django has changed since version 2.3.0? The reason doesn’t matter at this point, as my older project is broken and no longer works.
A conflict between two projects has been created. They make use of the same library, but they require different versions of it.
Various packages solve this problem. Let’s see some that stand out.
Before Starting
In this tutorial, we’ll be using Python 3, so let’s start by checking your Python installation.
To do this, open up a terminal — cmd/PowerShell on Windows — and type the following command:
python --version

Python 3.9.5 # My result
Note: Most macOS and Linux systems have Python installed. You can check the Python installation guide if you’re using Windows.
If you didn’t get a result of the form Python 3.x there are two options:
- if this command returned a
Python 2.xversion, you’ll need to usepython3along with this tutorial - if you got an
Unknown commanderror, try to runpython3, and if you get another error, follow the Python installation guide
You can proof the existence of the python3 binary by checking its version:
python3 --version

Python 3.9.5
Note: if the command above worked, you’ll need to run python3 instead of python.
Now that you know which Python command runs on your machine, let’s get into virtual environments.
Built-in venv Module
Let’s use the built-in Python venv module to create your first virtual environment.
Note: to use this module you need Python 3.3 or greater installed in your system.
To create a Python virtual environment with venv, type the following command:
python -m venv virt1
Note: the -m flag means Python is running the built-in venv module as a script.
This will create a virtual environment with the name of virt1, but this is just an argument. You can create the virtual environment with any name you want.
Everything installed in the virt1 directory won’t affect the global packages or system-wide installations, thus avoiding dependency conflicts.
Activating Virtual Environments
It’s crucial to know that each time we want to use a created virtual environment, we need to activate it with the following command:
source virt1/bin/activate
This won’t work in every system, so you can check the table below to have a clear idea of which command to use:
| Platform | Shell | Command to activate virtual environment |
|---|---|---|
| POSIX | bash/zsh | $ source (venv-name)/bin/activate |
| fish | $ source (venv-name)/bin/activate.fish | |
| csh/tcsh | $ source (venv-name)/bin/activate.csh | |
| PowerShell Core | $ (venv-name)/bin/Activate.ps1 | |
| Windows | cmd.exe | C:> (venv-name)\Scripts\activate.bat |
| PowerShell | PS C:> (venv-name)\Scripts\Activate.ps1 |
Note: the $ sign on POSIX and the C:>, PS C:> signs on Windows aren’t part of the command.
As you may notice, I’m using a bash shell in a POSIX (macOS and Linux), which is why I’m running the command above.
After the environment is created
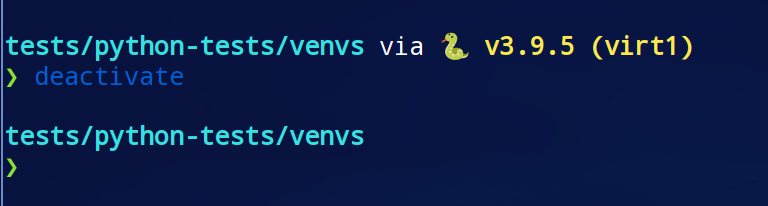
Once the virtual environment gets activated, the terminal prompt changes a bit.

The following command lets you deactivate the virtual environment:
deactivate
Note how your terminal prompt has changed again.
Now activate your virtual environment again and use the which command to check the Python binary that’s being used:
source virt1/bin/activate
which python
If everything worked well, you should get something similar to the following output:
/home/daniel/tests/python-tests/venvs/virt1/bin/python
If you deactivate and which again, you should get a different output:
deactivate
/usr/bin/python
This is because, when working inside a virtual environment, the binary copy placed inside that environment is being used. The same applies to packages.
Pip with virtual environments
Although this isn’t a pip guide it’s important to show off the workflow between pip and virtual environments.
pip — whose name stands for “Pip Installs Packages” — is a package manager used to install and manage Python packages.
It’s extremely useful when you want to distribute your project to others, as it allows other developers — and end-users — to install all the dependencies of your project at a glance.
For example, a fellow developer can activate a virtual environment and then run the following command to install the dependencies of the project:
pip install -r requirements.txt
Here, requirements.txt is the file that contains all the project dependencies — the specific versions of packages.
To generate the dependencies file of your project, you can run the command below:
pip freeze > requirements.txt
If you want to install a specific version of a package, you can run pip install followed by the package name, double equal sign (==), and its version:
pip install package==version
In other situations, we can also uninstall a package from our machine (or virtual environment):
pip uninstall some-package-name
Virtualenv
Virtualenv is an external package used to create virtual environments. In reality, the Python built-in venv is a subset of it, so virtualenv has more features than the first option we saw. You can learn more about virtualenv advantages over venv in the official documentation.
For now, let’s install virtualenv with pip (make sure you’ve deactivated the previous venv) making use of the command below:
pip install virtualenv
This tool works similar to venv, so let’s test it out by creating another virtual environment:
virtualenv virt2
Note: make sure you deactivate the other environment before running the above command.
As with venv, we must activate the virtual environment before using it:
source virt2/bin/activate
If I now install the newest version of requests, it will be installed only on the virtual environment venv2:
pip install requests
The above command produces the following output:
Collecting requests
 ...
Installing collected packages: urllib3, idna, chardet, certifi, requests
Successfully installed certifi-2021.5.30 chardet-4.0.0 idna-2.10 requests-2.25.1 urllib3-1.26.5
If I run the pip freeze command, which prints a list of all my installed packages, I’ll get this:
certifi==2021.5.30
chardet==4.0.0
idna==2.10
requests==2.25.1
urllib3==1.26.5
As you can see, the only packages I get are the latest version of requests — at the time of writing — and its dependencies.
Other Virtualenv features
We can use the -p flag while working with virtualenv to use a specific version of Python that’s globally installed on the machine.
For example, the following command can be used to create the virtual environment virt2 with Python3 in it, if you have Python3 installed on your machine:
virtualenv -p /usr/bin/python3 virt2
And to delete a virtual environment, you use the rm -r command as you do with any other directory you want to delete:
rm -r virt2
You can learn more about advanced usage of the virtualenv CLI interface in the official documentation.
Virtualenvwrapper
Virtualenvwrapper provides very useful commands that make working with virtual environments even easier, by organizing all of them in a simple place.
As with virtualenv, It can be installed easily with pip.
pip install virtualenvwrapper
This will create a shell file virtualenvwrapper.sh located at your ~/.local/bin/ directory. This folder is used to store package binaries which let you to use Python packages directly from your terminal.
Before using virtualenvwrapper, you’ll need to edit your shell configuration file. Since I’m using a bash shell, I’ll append the following content to the .bashrc file, located in my home directory:
cat <<EOT>> ~/.bashrc
# Virtualenwrapper settings
export VIRTUALENVWRAPPER_PYTHON=/usr/bin/python
export VIRTUALENVWRAPPER_VIRTUALENV=~/.local/bin/virtualenv
export WORKON_HOME=$HOME/.virtualenvs
export PROJECT_HOME=$HOME/Documents
source ~/.local/bin/virtualenvwrapper.sh
EOT
This will append — write at the end of the file — the above content to the .bashrc file. If the command above didn’t work, open the file and modify it manually.
The VIRTUALENVWRAPPER_PYTHON is pointing to the Python binary of your machine. You can check it with the following command (without any virtual environment activated):
which python

/usr/bin/python # My result
Make sure to modify the .bashrc file according to your Python binary path.
Note: if you’re using Windows, you can use virtualenvwrapper-win.
Then, we reload the bash shell with the changes we made to the .bashrc file by running the following command:
source ~/.bashrc
Now, the mkvirtualenv command can be used to easily make new environments placed by default inside this folder:
mkvirtualenv sitepoint
You can see the sitepoint virtual environment folder by entering to the WORKON_HOME path, which we defined above as $HOME/.virtualenvs:
ls ~/.virtualenvs

sitepoint # Virtual env folder
To get a list of all the virtual environments created by virtualenvwrapper, you can run the workon command without arguments:
workon

sitepoint # My result
We can easily activate the virtual environment with the help of the workon command:
workon sitepoint
The command to deactivate the virtual environment is the same as the one we used before:
deactivate
It’s very easy to switch between different virtual environments. For example, to workon another virtual environment:
workon another_virtualenv
To delete a virtual environment, the command rmvirtualenv should be used:
rmvirtualenv sitepoint
Conclusion
In this tutorial, you’ve learned about the essential workflow that every Python developer should master. Virtual environments are a crucial part of any collaborative Python project, and you can instantly improve your productivity by using them.
The tools are out there. Now it’s time to incorporate them into challenging personal projects. Do you use any other interesting approaches in your Python development workflow? Let us know in the Python forum!


