Wicked iOS Range Slider: Part Two

In part one of this mini series, we tackled the question of implementing a slider when you want to create a range of values, not just one. If you haven’t read part one, you’ll be feeling a little bit lost so I advise you go and check out iOS Range Slider: Part One.
Still with us? Good.
Remember our Range Slider? Today we’re finishing it off. We’re going to add to the code in stage one to allow our code to respond to changes in our slider’s values. We’ll also update the slider so that the blue bar only shows between the values.
Finally we’ll have a look at the size of the hit area for the sliders thumb images, and by that I mean the size of the part you’ve actually got to touch to move them, and make sure they comply with the Apple Human Interface Guidelines. Basically what that last bit means is that our fat fingers are able to actually grab the slider thumbs!
Finding the Value for X
First up we need to write a method that is the reverse of our xForValue method. This one needs to return a value when given a X point. We’ll call this one valueForX. See what I did there? Here’s the complete method.
-(float) valueForX:(float)x{
    return minimumValue + (x-_padding) / (self.frame.size.width-(_padding*2)) * (maximumValue - minimumValue);
}
In our new method we’re doing exactly the same calculation but in reverse. Besides adding the new method, you’ll also need to add this new method to the private method definitions up the top of your main file.
Now that we have this method, we’re going to update our selectedMinimumValue and selectedMaximumValue after we’ve positioned the thumbs. Inside the if statements in the continueTrackingWithTouch we should update the appropriate selected value.
// For min
selectedMinimumValue = [self valueForX:_minThumb.center.x];
NSLog(@"Lower value is now %f", selectedMinimumValue);

// For max
selectedMaximumValue = [self valueForX:_maxThumb.center.x];
NSLog(@"Upper value is now %f", selectedMaximumValue);
Save your files containing the new codes. Build and run the project, and when it loads you should now see that when you drag either of the selectors, the debugging log is showing the new value. Pretty sweet eh?
Firing the Updated Value Event
When you use the Range Slider you’ll be binding an action to the UIControlEventValueChanged event, so we need to tell our slider to fire that event when the value is changed. This is done inside the continueTrackingWithTouch method.
// Below the if statements
[self sendActionsForControlEvents:UIControlEventValueChanged];
Now any observers of the UIControlEventValueChanged event will be notified every time the values are changed. Perfect.
So Close I Can Taste It
Now it’s time for the polish. We’ve got a few things left, such as making the track blue only between the slider thumbs, not the whole way across. Then we’ll be checking the usability of the thumbs against Apple’s Human Interface Guidelines.
Updating the Visible Track
To update the blue part of the track, we’ll create a method called updateTrackHighlight that repositions the bounds for the _track UIImage which contains the bar-highlight.png image, which is the blue bit.
First define the method in the PrivateMethods interface at the top of RangeSlider.m.
-(void)updateTrackHighlight;
Next up we’ll define the method in full. The only thing this method will do is adjust the bounds of the _track UIImage. We don’t need to adjust the vertical bounds, just the horizontal points to that of the start and end thumbs.
-(void)updateTrackHighlight{
    _track.frame = CGRectMake(
        _minThumb.center.x,
        _track.center.y - (_track.frame.size.height/2),
        _maxThumb.center.x - _minThumb.center.x,
        _track.frame.size.height
    );
}
The rect for the new frame starts at the minThumb’s horizontal position, and extends for the width of the maxThumb’s position minus the minThumb’s position. So if minThumb was at 50 and maxThumb was at 140 then it would be a width of 140 – 50 = 90.
The vertical part of the frame is a Y position calculated from the center of the track, take away half the height, then the same height as the current frame.
Now if we add in a call to this new method in the two places where we make changes, the initWithFrame and continueTrackingWithTouch methods, then we have a slider which only displays blue for the track between the slider thumbs.
// The end of initWithFrame, inside the if statement
[self updateTrackHighlight];

// Inside continueTrackingWithThumb, above [self setNeedsDisplay];
[self updateTrackHighlight];

Correct Blue Track
Lastly, Let’s Check the Usability
Before we pat ourselves on the back, we need to do something to make sure that this works in real life, rather than just the simulator. Apple’s Human Interface Guidelines describe the minimum comfortable size for touchable UI elements as 44×44 points.
Unfortunately our thumbs aren’t quite big enough: they’re 25 points, which just isn’t good enough. As you can see here, the hit area of the thumbnails is the same size as the image.

Inspecting the Hit Area
Luckily it’s easy enough for us to update the frame of our images, without change the image or anything like that.
Where we define the _minThumb and _maxThumb UIImage’s in initWithFrame we’re going to adjust the size of the frame of the UIImage to match our Human Interface Guidelines. Luckily the size of our cell frame happens to be 44 points ;)
_minThumb.frame = CGRectMake(0,0, self.frame.size.height,self.frame.size.height);
Lastly we’ll make sure the UIImage doesn’t scale up the image to match the frame, as that just looks stupid. Following that code change, now you can see the touch area for the frame is far more finger appropriate.
// Just place the image in the middle, don't scale
_minThumb.contentMode = UIViewContentModeCenter;

Appropriate Hit Area
Observing Changes
Just to prove that our Range Slider’s action observer works, let’s add in a second cell to our table view that will display the range of our slider, and will be updated whenever the range slider’s values are changed. All this code will be in our RootViewController.
Step 1: Import RangeSlider.h in the RootViewController.h file, and define a method as so:
-(void)updateRangeLabel:(RangeSlider *)slider;
Step 2: Implement the method in RootViewController.m. This method will receive the RangeSlider as a variable slider. At this point all I’m doing is logging the current range, from X – Y.
-(void)updateRangeLabel:(RangeSlider *)slider{
    NSLog(@"Slider Range: %f - %f", slider.selectedMinimumValue, slider.selectedMaximumValue);
}
Step 3: Tell our slider to call the action when it changes! This links the change event that we call inside the slider’s continueTrackingWithTouch method to a method in our RootViewController. This goes inside cellForRowAtIndexPath, after we’ve alloc’ed our RangeSlider.
[slider addTarget:self action:@selector(updateRangeLabel:) forControlEvents:UIControlEventValueChanged];
Step 4: Run and watch the log update Slider Range: x.xxx – x.xxx as you slider the slider!
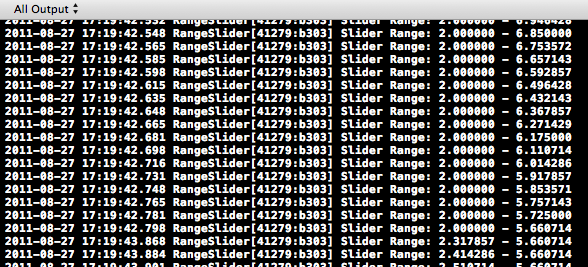
Logging the Slider Range Updates
Voila!
Congratulations, now you have a usable iOS Range Slider for your projects. As a courtesy we have created the GitHub iOS Range Slider repo and will post the code there to help you get this code into your projects. Let us know how you get on in the comments.


