ngrok Step-by-Step Guide: Easily Share Your Local Server
This tutorial demonstrates a way to share your localhost server with anyone, anywhere, using ngrok to create a secure tunnel to your local machine.
Demonstrating your application’s latest features to project managers or clients isn’t easy unless they’re sitting a few desks away. It may be possible to commit the changes and deploy to a public staging server, but that process can be impractical if you’re just seeking an opinion about a widget color or demonstrating the futility of their ridiculous suggestion!
Ideally, you need some way to share access to your localhost server. ngrok provides that solution. We’ll show you how to set it up for any purpose, and leave you with the best ngrok alternatives (just in case).
What is ngrok?
Your development machine may be connected to a secure network behind a firewall. To work around access restrictions, ngrok runs a small client process on your machine which creates a private connection tunnel to the cloud service. Your localhost development server is mapped to an ngrok.io sub-domain, which a remote user can then access. There’s no need to expose ports, set up forwarding, or make other network changes.
The ngrok client software is available for Windows, macOS, and Linux.
Is Local Tunneling Secure?
The connection tunnel established by ngrok is secure and can only transmit data to the localhost port you have open. It would be difficult to do any damage, but it’s only as secure as the application you’re testing.
In most cases, you’ll use ngrok to temporarily grant access to someone by issuing them with a randomly generated URL. It’s best to assume that anyone could access your app while the tunnel is open. You may want to disable that “delete all files” option while your tunnel is active!
What Does the Service Cost?
The basic ngrok service is free and permits up to four tunnels and 40 connections per minute. Commercial options start from $5 per month, providing further connections and custom domains.
Get the ngrok Download
To start, open ngrok.com in your browser and click Sign up to register. A Google or GitHub account is easiest, but you can choose standard registration with an email address and password. An email verification link will be sent to you.
After login, you’ll be directed to the ngrok dashboard where you can download the client for your operating system.
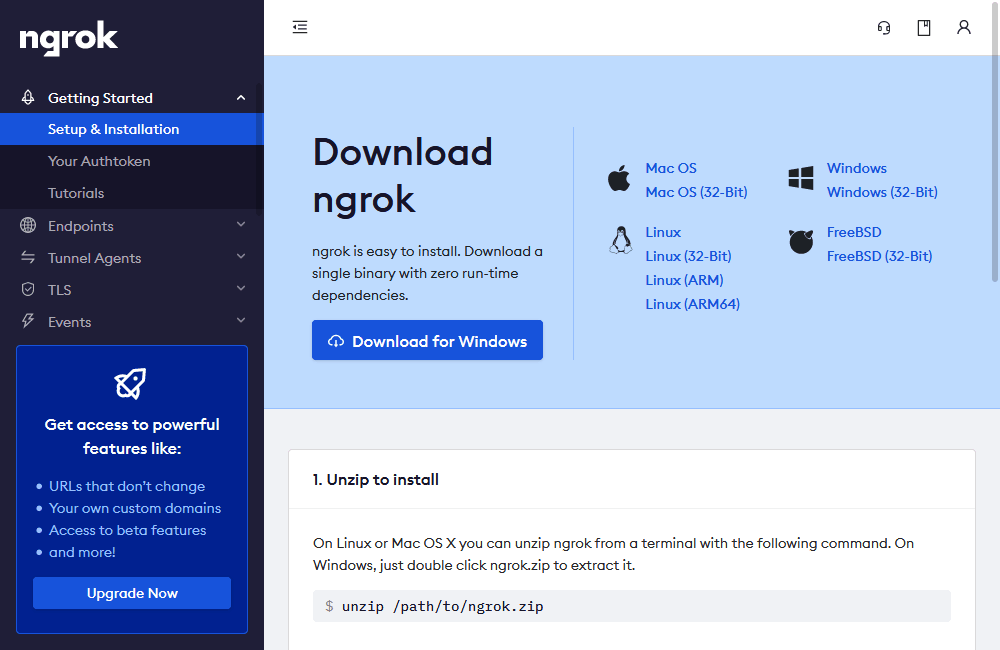
Download and extract the file, following any specific instructions for your OS. It’s then necessary to add your authentication token by running the command shown in the Connect your account section a little further down the page.
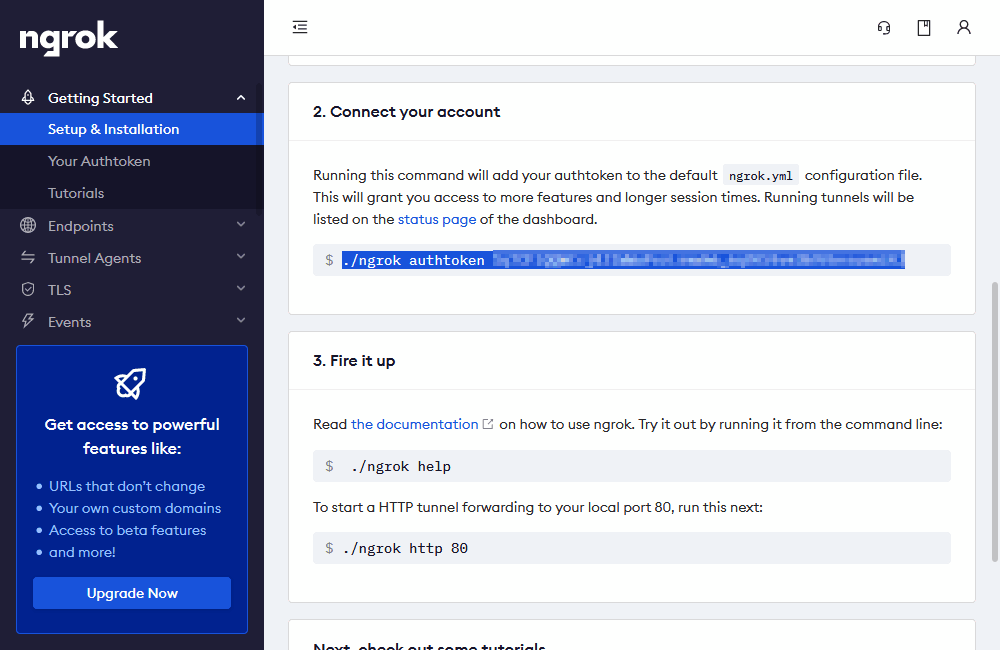
./ngrok authtoken <token>
Note: Windows users will enter ./ngrok.exe.
How to Use ngrok
Launch your web application using its normal start command, then note the port and whether it’s running on http or https. To start a new tunnel, run:
./ngrok <protocol> <port>
For example, if your site is served on http://localhost:8888, enter:
./ngrok http 8888
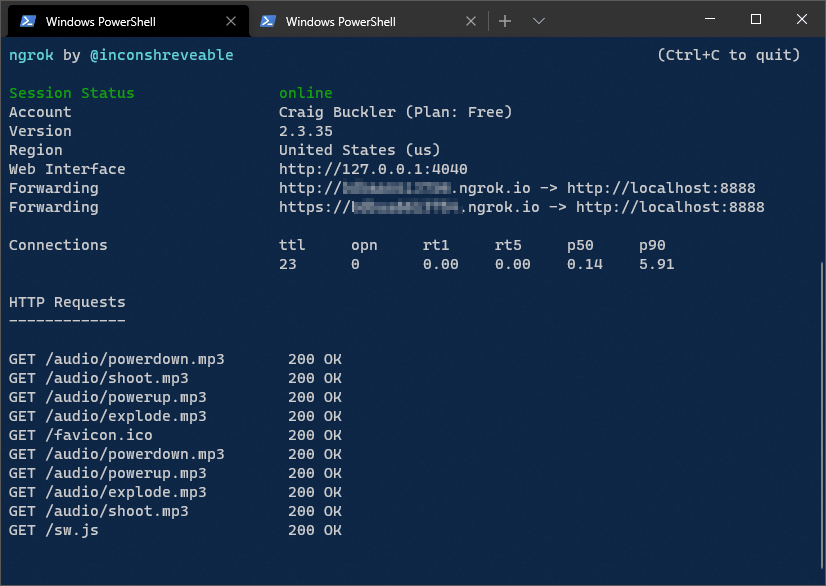
The terminal will clear and show the status with two Forwarding http and https addresses, such as http://123456789.ngrok.io/. You can pass either URL to another person so they can access your application from anywhere. The terminal shows a log of requests while ngrok is active.
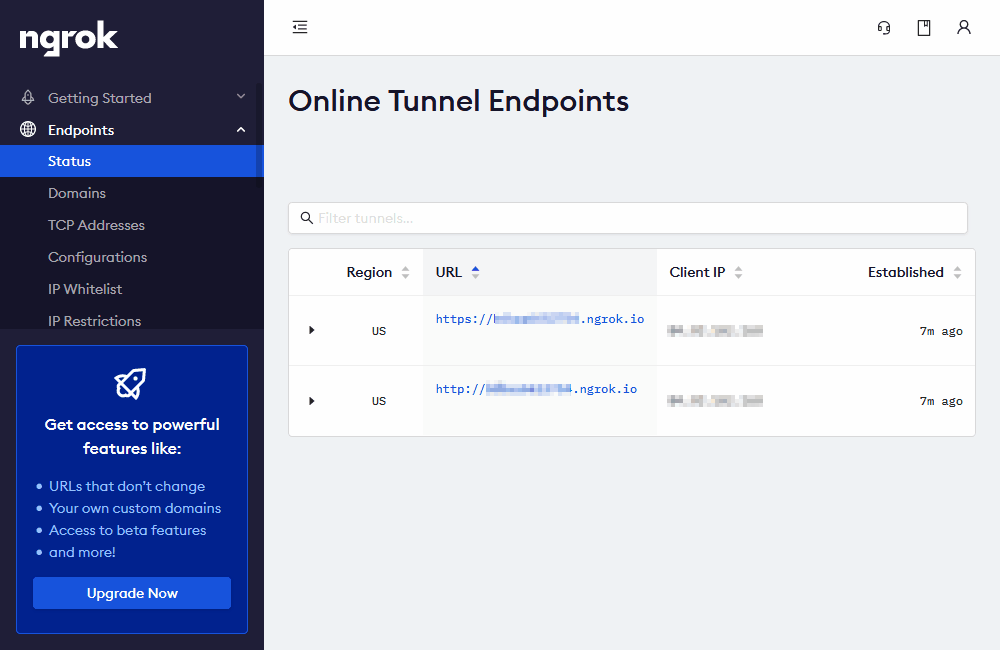
The ngrok status panel panel at dashboard.ngrok.com/endpoints/status also shows a list of currently active URLs and client IP addresses. (You may need to refresh the browser to update it.)
Once you’ve finished, quit ngrok by pressing Ctrl | Cmd + C in your terminal. Further help and options are available by entering:
./ngrok help
ngrok Alternatives
ngrok is possibly the easiest and most well-known localhost tunneling service, but alternative options include:
- LocalXpose: a commercial service with free options. Signup is required, but terminal-based and Graphical User Interface clients are available.
- localhost.run: a free service which works via SSH so no client or signup is necessary.
- localtunnel: an open-source Node.js client. No signup is necessary.
- JPRQ: an open-source Python client. No signup is necessary.
- sish: an open-source, Docker-based container client. No signup is required.
ngrok and similar secure tunnel services can revolutionize how you demonstrate web apps to other remote workers. It will help testing and reduce frustrating feedback delays.


