A Client-Server Dart App From Scratch: Getting Started

![]()
Dart is an ambitious new programming language from Google. Introductions into the language have been written all over the web, and regurgitating the content of others here makes no sense. There’s no better resource on getting started than their homepage anyway! In this article series, however, we’ll be building a server+client Dart app completely from scratch.
Server+client
“Wait, what?”, you may be wondering. Server AND client? Indeed – Dart can run on the server in the Dart VM, or in the browser when compiled to JS, or even directly as Dart in the Dartium browser (Chromium with built in Dart VM).
We’ll be constructing a lightweight API on the server, which will get consumed by the client version of Dart. We’ll use Polymer as the front end framework, styled by Foundation and we’ll go with MySQL as the database to store our app’s data.
Environment
For development, I’ll be using a vagrant VM with a Vagrantfile I configured to automatically download and install the Dart SDK and MySQL. It will also include a sample web app which queries the installed database (populated with some sample values) to prove it all works before we begin hacking.
My IDE will be PHPStorm with the Dart plugin, over the Eclipse-based Dart Editor – I like its features and performance much better (Eclipse will use 1GB+ of RAM even when idle, for no reason). Unfortunately, we cannot use the SDK installed in our VM as the main driver behind the IDE we use on our host machine too, so we need to compromise by installing the SDK on both host and guest. However, once installed in the way I’ll be describing next, your Dart environment will be ready-to-code on any OS at any time, and will perform exactly the same.
VaDart
I’ve built a Vagrant setup called VaDart. If you’re not familiar with Vagrant, I recommend reading Matthew Setter’s PuPHPet article, which covers it in very simple terms and offers a GUI for doing it (PHP-oriented, but still useful). If you’d like to skip directly to the step-by-step installation instructions, go to the next section. If you’re interested in explanations on what VaDart actually does, keep reading.
VaDart is based on Ubuntu Precise, 64bit. My install-dart-sdk script should work on CentOS-based Linux distros, too, but I haven’t tested this yet and the script is likely to evolve as I get more familiar with what needs to be done and get some pull requests from more capable hands. I’ve modeled part of VaDart after what I learned by reverse engineering Vaprobash and PuPHPet.
VaDart automatically installs the latest stable Dart SDK. If you’d like to use the Dev channel, go into /shell/install-dart-sdk.sh and uncomment the Dev line, while commenting the Stable line. Everything else is automatic – just make sure you run vagrant destroy, and then vagrant up, to re-provision it all from scratch.
VaDart will also install MySQL, with the user/password combination “root”, “root” (change at will in /shell/install-mysql.sh), and will also expose the database to the host, so you can connect to it and test on it when developing even on the host machine. This has the added advantage of you not having to pollute your host machine with needless installations.
Besides installing the required software, VaDart will also clone some sample applications: pure server-only app based on a mixture of this and this, server and client web app powered by Foundation (simply displays the Foundation index page), and server app reading data from MySQL and displaying it in the browser. The sample data will be in an SQL script in the app’s repo.
The sample apps will each go into their respective folders under the sample_apps parent folder: sample01, sample02, sample03 in /vagrant, aka the root of VaDart. Unfortunately, due to a well known problem with symlinks and pub install (the Dart package manager) using them to link up packages in Dart projects but being unable to do so through networked drives, we need to be innovative. Since our apps are stored in the vagrant root folder to be accessible by the IDE on our host machine, the pub install procedure won’t work in the VM (any app without external packages will, but pub install itself won’t).
If, however, we move the source of the apps to a folder internal to the VM – say, for example, the home folder of the vagrant user – everything would be fine. This duplicates our source, though, and we need a way to keep the host material in sync with guest material. This is why VaDart comes with a synchronization script you can configure. See under shell/dartsync.sh. This script is automatically run every minute (via cron), but you can also run it manually by SSH-ing into the VM and just executing “dartsync”, an alias I’ve set up for this purpose. There is currently no easy way to track the changes in an NTFS or network drive on Linux, so cron+manual will have to do. My hope is that this procedure will improve over time – if anyone has any idea on how to make it sync on every file change (keep in mind we’re dealing with a “network” drive), let me know.
Step by Step
- Clone/download the Vagrant setup I’ve prepared here. I called it VaDart because it’s easier to write than “Vagrant setup”.
- Make sure you have at least Vagrant 1.4.1 and VirtualBox 4.3.2 installed (these are the versions I use, and can guarantee VaDart works on).
- Enter the folder of the cloned VaDart and execute the command “vagrant up” in your terminal or command line, regardless of operating system.
DartSDK, MySQL, and three sample apps should now be installed.
To run either of the sample apps, vagrant ssh into the VM, cd into the folder that contains the apps (default /home/vagrant/dartapps), then into the desired app’s folder, and run sudo pub install followed by sudo dart bin/server.dart. If the dartapp folder doesn’t exist yet, you were too fast and the cron hasn’t had time to trigger yet – just run dartsync. Visiting the IP 192.168.56.101:8080 from the host machine should produce the app’s valid output, identical to the one if you run the app from the host machine with your IDE, and visit localhost:8080 in the browser.
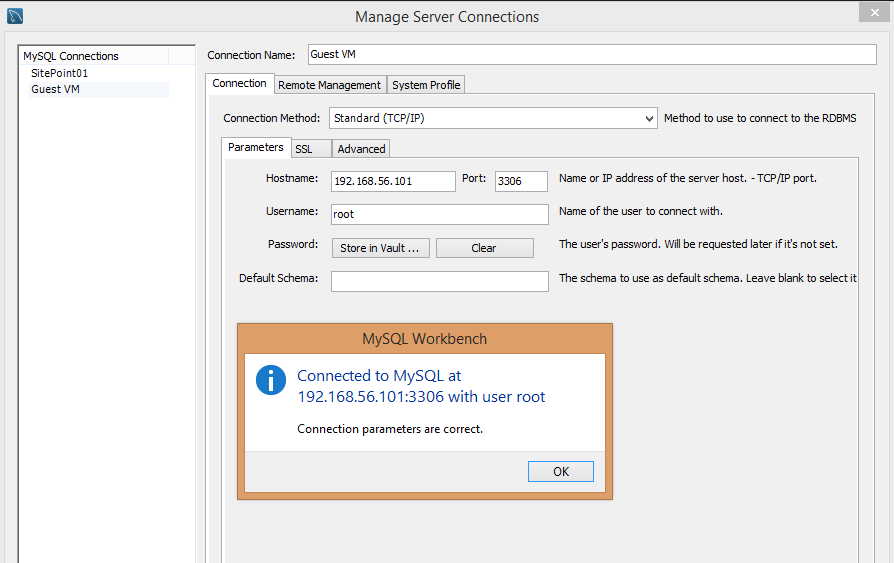
The database is host-exposed, so you can connect to it from the host machine (for using MySQL Workbench or your IDE and setting a data source) through the VM’s IP on port 3306, the MySQL default. Here’s an example of setting it up with MySQL Workbench:
To set up the SDK on your host machine, follow the instructions on DartLang.org. Once done, enter your IDE of choice and follow further instructions, if any. The Dart Editor should be configured to use the SDK by default. PHPStorm will need some help:
- Install the Dart plugin (browse the plugin repository from the Configuration screen in the IDE)
-
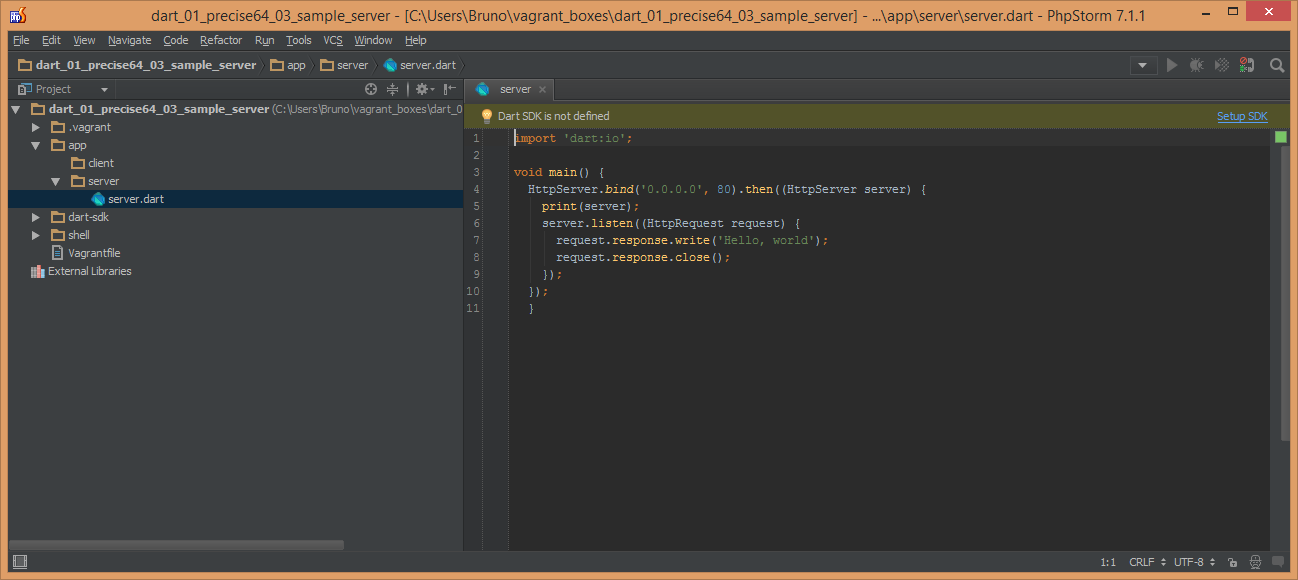
Open the directory of the app, now exposed in your guest VM’s folder, and you should get a warning about the SDK not being configured:
-
Click the warning and, on the window that opens, browse to the SDK’s location (wherever you unzipped the folder downloaded from Dart’s homepage):
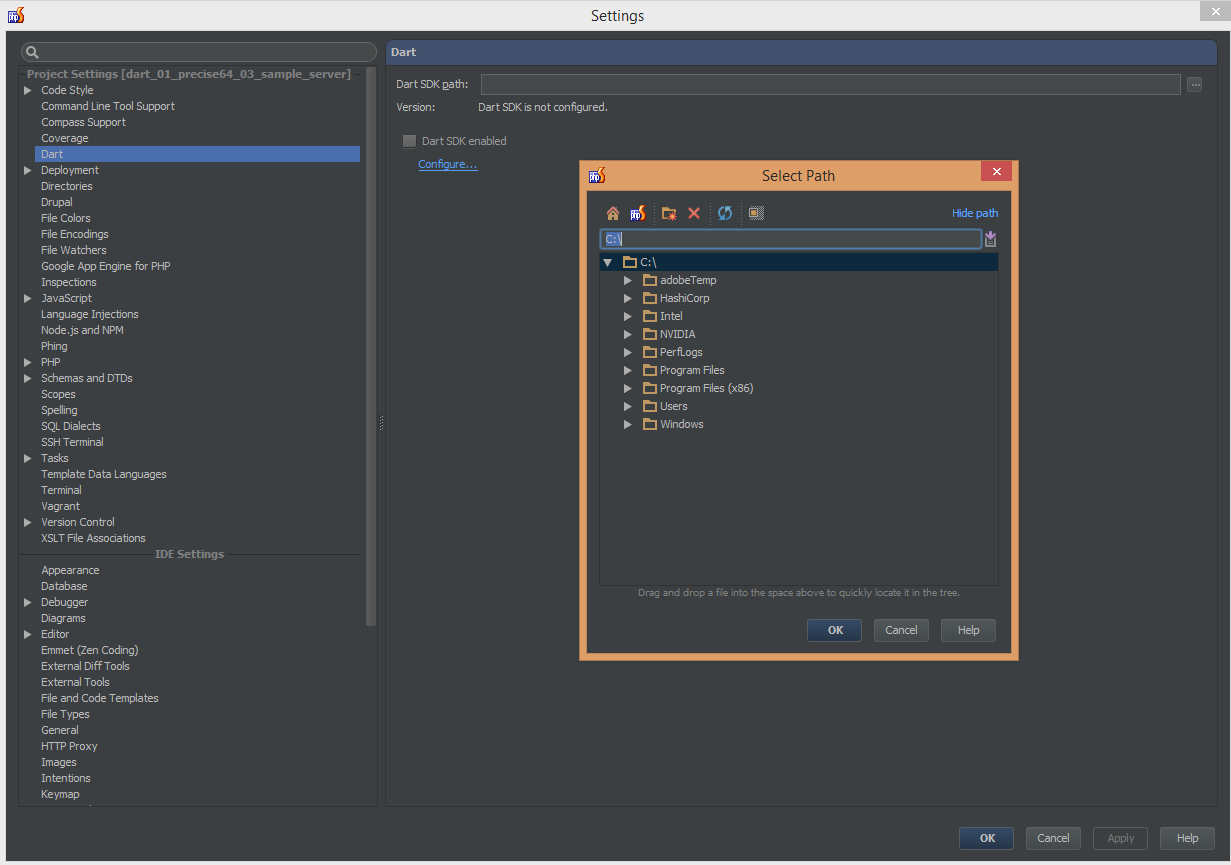
-
After selecting the SDK, click apply and see Version change. You’ll know it succeeded if the “Dart SDK Enabled” option gets ticked, and the version number changes:

I use Windows as my main OS, because it’s super easy to do Linux development in Vagrant VMs, while still keeping the stability, multimedia capabilities, and driver support that Windows have over *nix desktop environments. The procedure, however, is identical in every OS – PHPStorm (and its parent WebStorm) are Java-based multi-platform IDEs that behave exactly the same no matter the OS you’re on.
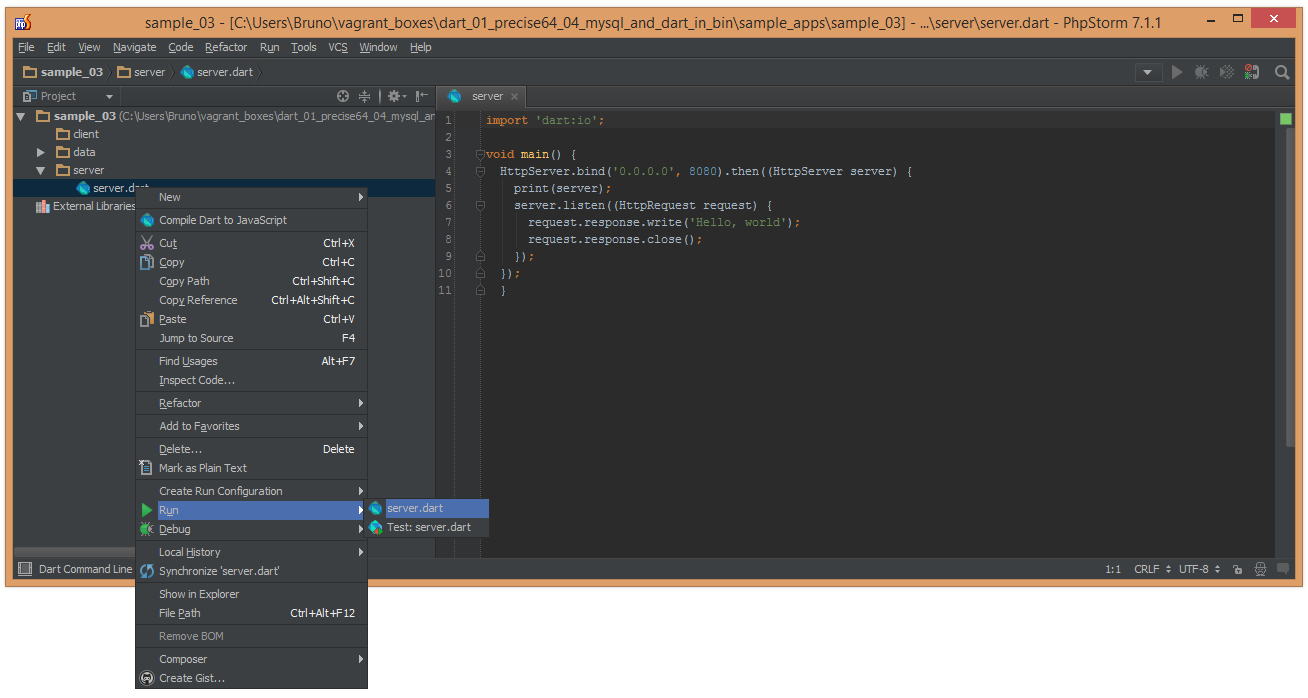
After finishing this configuration, right-click the server.dart file and select Run as in the image below.
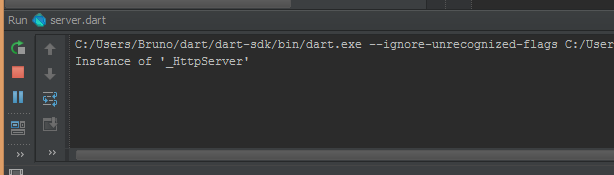
You should get console output similar to this one, signaling everything went fine (image is from running Sample01):
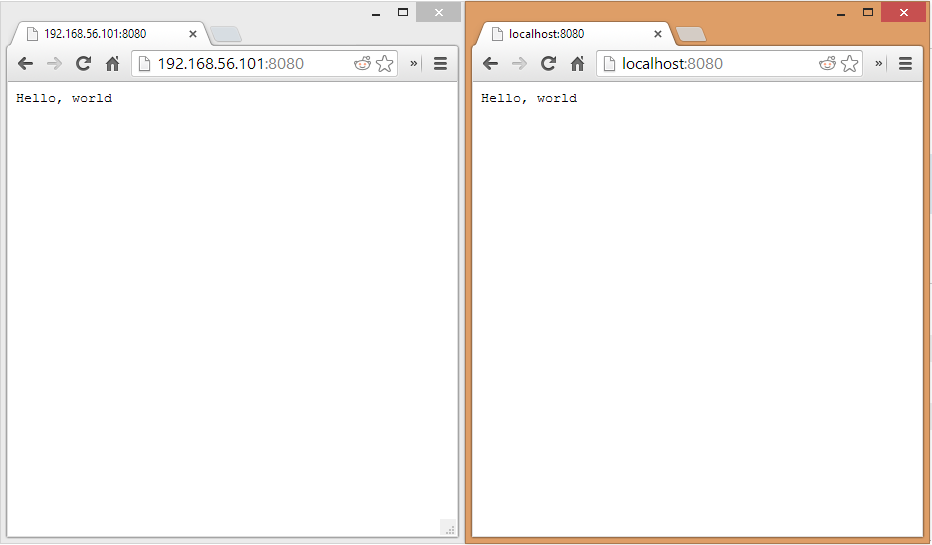
You should now be able to visit http://localhost:8080 in your browser, and get the exact same results as when running from the VM, even running them at the same time:
You now have a fully functional Dart server+client development environment, dual-wielded on host machine and guest VM. Now let’s see how powerful this combination makes us.
Conclusion
In this tutorial, we set up our environment properly, made sure we have the latest SDK, and talked some Dart basics. In a future tutorial, we’ll describe and plan our application.
If you’d like to be kept up to date with Dart news and developments, feel free to join the Dartisans Google+ community and hook up with some fellow Dart lovers there, or follow me on Twitter or Google+ – I’ll be posting a lot more about Dart from now on.