Build a Peer-to-Peer File Sharing Component in React & PeerJS

This article was peer reviewed by Dan Prince and Bruno Mota. Thanks to all of SitePoint’s peer reviewers for making SitePoint content the best it can be!
In this tutorial we’re going to build a file sharing app with PeerJS and React. I’ll be assuming that you’re a complete beginner when it comes to React so I’ll be providing as much detail as possible.
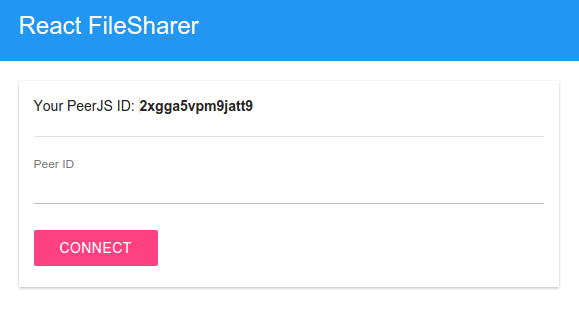
For you to have an idea of what we’re going to build, here are a couple of screenshots of what the app will look like. First, when the component is ready for use:
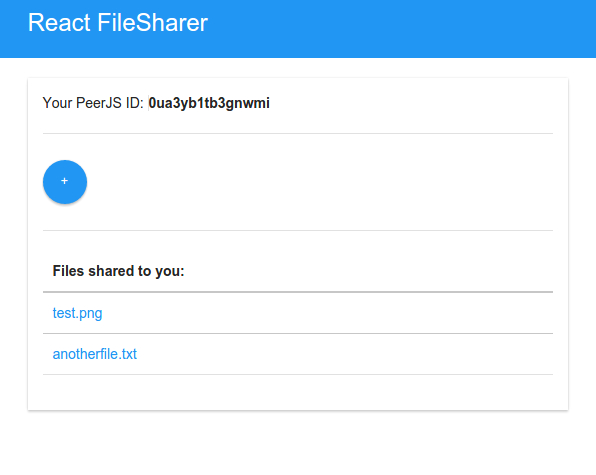
And here’s what it looks like when the current user is already connected to a peer and the peer has shared some files with the user:
The source code for this tutorial is available on GitHub.
The Tech Stack
As mentioned earlier, the file sharing app is going to use PeerJS and React. The PeerJS library allows us to connect two or more devices via WebRTC, providing a developer-friendly API. If you don’t know what WebRTC is, it is basically a protocol that allows real-time communications on the web. On the other hand, React is a component-based view library. If you’re familiar with Web Components, it’s similar in the way that it gives you the ability to create custom standalone UI elements. If you want to dive deeper into this, I recommend reading ReactJS For Stupid People.
Installing the Dependencies
Before we start building the app, we first need to install the following dependencies using npm:
npm install --save react react-dom browserify babelify babel-preset-react babel-preset-es2015 randomstring peerjs
Here’s a brief description of what each one does:
- react – the React library.
- react-dom – this allows us to render React components into the DOM. React doesn’t directly interact with the DOM, but instead uses a virtual DOM. ReactDOM is responsible for rendering the component tree into the browser. If you want to dive in more into this, I recommend reading ReactJS|Learning Virtual DOM and React Diff Algorithm.
- browserify – allows us to use
requirestatements in our code to require dependencies. This is responsible for bringing all the files together (bundling) so it can be used in the browser. - babelify – the Babel transformer for Browserify. This is responsible for compiling the bundled es6 code to es5.
- babel-preset-react – the Babel preset for all react plugins. It’s used for transforming JSX into JavaScript code.
- babel-preset-es2015 – the Babel preset that translates ES6 code to ES5.
- randomstring – generates random string. We’ll use this for generating the keys needed for the file list.
- peerjs – the PeerJS library. Responsible for making connections and sharing files between peers.
Building the App
Now we’re ready to build the app. First let’s take a look at the directory structure:
-js
-node_modules
-src
    -main.js
    -components
        -filesharer.jsx
index.html
- js – where the JavaScript files that will be bundled by Browserify are stored.
- src – where the React components are stored. Inside, we have the
main.jsfile in which we import React and the components used by the app. In this case we only havefilesharer.jsxwhich contains the main meat of the app. - index.html – the main file of the app.
Index Page
Let’s start with the index.html file. This contains the default structure of the app. Inside the <head> we have the link to the main stylesheet and the PeerJS library. Inside the <body> we have the title bar of the app and the main <div> where we’ll append the React component that we create. Just before the closing <body> tag is the main JavaScript file of the app.
<!DOCTYPE html>
<html lang="en">
<head>
    <meta charset="UTF-8">
    <title>React File Sharer</title>

    <link href="http://cdn.muicss.com/mui-0.4.6/css/mui.min.css" rel="stylesheet" type="text/css" />
</head>
<body>

    <div class="mui-appbar mui--appbar-line-height">
        <div class="mui-container">
          <span class="mui--text-headline">
            React FileSharer
          </span>
        </div>
    </div>
    <br />
    <div class="mui-container">
        <div id="main" class="mui-panel"></div>
    </div>

    <script src="js/main.js"></script>
</body>
</html>
Main JavaScript File
The src/main.js file is where we render the main component into the DOM.
First, we require the React framework, ReactDOM, and the Filesharer component.
var React = require('react');
var ReactDOM = require('react-dom');
var Filesharer = require('./components/filesharer.jsx');
Then we declare an options object. This is used to specify options for the Filesharer component. In this case we’re passing in the peerjs_key. This is the API key that you get from the PeerJS website so that you can use their Peer Cloud Service to set up peer-to-peer connections. In the case of our app, it serves as the middleman between the two peers (devices) that are sharing files.
var options = {
    peerjs_key: 'your peerjs key'
}
Next we define the main component. We do that by calling the createClass method of the React object. This accepts an object as its argument. By default, React expects a render function to be defined inside the object. What this function does is to return the UI of the component. In this case we’re simply returning the Filesharer component which we imported earlier. We’re also passing in the options object as a value for the opts attribute. In React these attributes are called props and they become available for use inside the component, kind of like passing in arguments to a function. Later on, inside the Filesharer component, you can access the options by saying this.props.opts followed by any property you wish to access.
var Main = React.createClass({
  render: function () {
    return <Filesharer opts={options} />;
  }
});
Get the reference of the main div from the DOM and then render the main component using ReactDOM’s render method. If you’re familiar with jQuery, this is basically similar to the append method. So what we’re doing is appending the main component into the main div.
var main = document.getElementById('main');

ReactDOM.render(<Main/>, main);
Filesharer Component
The Filesharer component (src/components/filesharer.jsx), as I mentioned earlier, contains the main meat of the app. The main purpose of components is to have standalone code that can be used anywhere. Other developers can just import it (like we did inside the main component), pass in some options, render it and then add some CSS.
Breaking it down, we first import the React framework, randomstring library, and the PeerJS client.
var React = require('react');
var randomstring = require('randomstring');
var Peer = require('peerjs');
We expose the component to the outside world:
module.exports = React.createClass({
    ...
});
Earlier in our main JavaScript file we passed in an optional prop to customize the labels that will be shown in the file sharer component. To ensure that the correct property name (opts) and data type (React.PropTypes.object) are passed to the component, we use propTypes to specify what we’re expecting.
propTypes: {
    opts: React.PropTypes.object
},
Inside the object passed to the createClass method, we have the getInitialState method which is what React uses for returning the default state of the component. Here we return an object containing the following:
peer– the PeerJS object which is used to connect to the server. This allows us to obtain a unique ID that can be used by others to connect to us.my_id– the unique ID assigned by the server to the device.peer_id– the ID of the peer you’re connecting to.initialized– a boolean value that’s used for determining whether we have already connected to the server or not.files– an array for storing the files that have been shared to us.
getInitialState: function(){
    return {
        peer: new Peer({key: this.props.opts.peerjs_key}),
        my_id: '',
        peer_id: '',
        initialized: false,
        files: []
    }
}
Note that the PeerJS initialization code that we’ve used above is only for testing purposes, which means that it will only work when you’re sharing files between two browsers open in your computer, or when you’re sharing files on the same network. If you actually want to build a production app later on, you’d have to use the PeerServer instead of the Peer Cloud Service. This is because the Peer Cloud Service has limits on how many concurrent connections your app can have. You also have to specify a config property in which you add the ICE server configuration. Basically what this does is allows your app to cope with NATs and Firewalls or other devices which exists between the peers. If you want to learn more you can read this article on WebRTC on HTML5Rocks. I’ve already added some ICE server config below. But in case it doesn’t work, you can either pick from here or create your own.
peer = new Peer({
  host: 'yourwebsite.com', port: 3000, path: '/peerjs',
  debug: 3,
  config: {'iceServers': [
    { url: 'stun:stun1.l.google.com:19302' },
    { url: 'turn:numb.viagenie.ca', credential: 'muazkh', username: 'webrtc@live.com' }
  ]}
})
Getting back on track, next we have the componentWillMount method, which is executed right before the component is mounted into the DOM. So this is the perfect place for executing code that we want to run right before anything else.
componentWillMount: function() {
    ...
});
In this case we use it for listening for the open event triggered by the peer object. When this event is triggered, it means that we are already connected to the peer server. The unique ID assigned by the peer server is passed along as an argument so we use it to update the state. Once we have the ID we also have to update initialized to true. This reveals the element in the component which shows the text field for connecting to a peer. In React, the state is used for storing data that is available throughout the whole component. Calling the setState method updates the property that you specified, if it already exists, otherwise it simply adds a new one. Also note that updating the state causes the whole component to re-render.
this.state.peer.on('open', (id) => {
    console.log('My peer ID is: ' + id);
    this.setState({
        my_id: id,
        initialized: true
    });
});
Next we listen for the connection event. This is triggered whenever another person tries to connect to us. In this app, that only happens when they click on the connect button. When this event is triggered, we update the state to set the current connection. This represents the connection between the current user and the user on the other end. We use it to listen for the open event and the data event. Note that here we’ve passed in a callback function as the second argument of the setState method. This is because we’re using the conn object in the state to listen for the open and data events. So we want it to be already available once we do it. The setState method is asynchronous, so if we listen for the events right after we’ve called it, the conn object might still not be available in the state, which is why we need the callback function.
this.state.peer.on('connection', (connection) => {
    console.log('someone connected');
    console.log(connection);

    this.setState({
        conn: connection
    }, () => {

        this.state.conn.on('open', () => {
            this.setState({
                connected: true
            });
        });

        this.state.conn.on('data', this.onReceiveData);

    });


});
The open event is triggered when the connection to the peer is successfully established by the peer server. When this happens, we set connected in the state to true. This will show the file input to the user.
The data event is triggered whenever the user on the other side (which I will call the “peer” from now on) sends a file to the current user. When this happens we call the onReceiveData method, which we’ll define later. For now, know that this function is responsible for processing the files that we received from a peer.
You also need to add componentWillUnmount() which is executed right before the component is unmounted from the DOM. This is where we clean up any event listeners that were added when the component was mounted. For this component, we can do that by calling the destroy method on the peer object. This closes the connection to the server and terminates all existing connections. This way we won’t have any other event listeners getting fired if this component is used somewhere else in the current page.
componentWillUnmount: function(){

    this.state.peer.destroy();

},
The connect method is executed when the current user tries to connect to a peer. We connect to a peer by calling the connect method in the peer object and passing it the peer_id, which we also get from the state. Later on you’ll see how we assign a value to the peer_id. For now, know that the peer_id is the value input by the user in the text field for entering the peer ID. The value returned by the connect function is then stored in the state. Then we do the same thing that we did earlier: listen for the open and data event on the current connection. Note that this time, this is for the user who is trying to connect to a peer. The other one earlier was for the user who is being connected to. We need to cover both cases so the file sharing will be two-way.
connect: function(){

    var peer_id = this.state.peer_id;

    var connection = this.state.peer.connect(peer_id);

    this.setState({
        conn: connection
    }, () => {
        this.state.conn.on('open', () => {
            this.setState({
                connected: true
            });
        });

        this.state.conn.on('data', this.onReceiveData);

    });

},
The sendFile method is executed whenever a file is selected using the file input. But, instead of using this.files to get the file data, we use event.target.files. By default, this in React refers to the component itself so we can’t use that. Next we extract the first file from the array, and create a blob by passing the files and an object containing the type of the file as an argument to the Blob object. Finally we send it to our peer along with the file name and type by calling the send method on the current peer connection.
sendFile: function(event){
    console.log(event.target.files);
    var file = event.target.files[0];
    var blob = new Blob(event.target.files, {type: file.type});

    this.state.conn.send({
        file: blob,
        filename: file.name,
        filetype: file.type
    });

},
The onReceiveData method is responsible for processing the data received by PeerJS. This is what catches whatever is sent by the sendFile method. So the data argument that’s passed to it is basically the object that we passed to the conn.send method earlier.
onReceiveData: function(data){
    ...
});
Inside the function we create a blob from the data that we received… Wait, what? But we already converted the file into a blob and sent it using PeerJS, so why the need to create a blob again? I hear you. The answer is that when we send the blob it doesn’t actually stay as a blob. If you’re familiar with the JSON.stringify method for converting objects into strings, it basically works the same way. So the blob that we passed to the send method gets converted into a format that can be easily sent through the network. When we receive it, it’s no longer the same blob which we sent. That’s why we need to create a new blob again from it. But this time we have to place it inside an array since that’s what the Blob object expects. Once we have the blob, we then use the URL.createObjectURL function to convert it into an object URL. Then we call the addFile function to add the file into the list of files received.
console.log('Received', data);

var blob = new Blob([data.file], {type: data.filetype});
var url = URL.createObjectURL(blob);

this.addFile({
    'name': data.filename,
    'url': url
});
Here’s the addFile function. All it does is get whatever files are currently in the state, adds the new file to them and updates the state. The file_id is used as the value for the key attribute required by React when you’re making lists.
addFile: function (file) {

    var file_name = file.name;
    var file_url = file.url;

    var files = this.state.files;
    var file_id = randomstring.generate(5);

    files.push({
        id: file_id,
        url: file_url,
        name: file_name
    });

    this.setState({
        files: files
    });
},
The handleTextChange method updates the state whenever the value of the text field for entering the peer ID changes. This is how the state is kept up to date with the current value of the peer ID text field.
handleTextChange: function(event){

    this.setState({
      peer_id: event.target.value
    });

},
The render method renders the UI of the component. By default, it renders a loading text because the component first needs to acquire a unique peer ID. Once it has a peer ID, the state is updated which then triggers the component to re-render, but this time with the result inside the this.state.initialized condition. Inside that we have another condition which checks if the current user is already connected to a peer (this.state.connected). If they are then we call the renderConnected method, if not then renderNotConnected().
render: function() {
    var result;

    if(this.state.initialized){
        result = (
            <div>
                <div>
                    <span>{this.props.opts.my_id_label || 'Your PeerJS ID:'} </span>
                    <strong className="mui--divider-left">{this.state.my_id}</strong>
                </div>
                {this.state.connected ? this.renderConnected() : this.renderNotConnected()}
            </div>
        );
    } else {
        result = <div>Loading...</div>;
    }

    return result;
},
Also note that above we’re using props to customize the label of the files. So if my_id_label is added as a property in the options object earlier, it would use the value assigned to that instead of the value at the right side of the double pipe (||) symbol.
Here’s the renderNotConnected method. All it does is show the peer ID of the current user, a text field for entering the ID of another user, and a button for connecting to another user. When the value of the text field changes, the onChange function is triggered. This calls the handleTextChange which we have defined earlier. This updates the text that’s currently in the text field, as well as the value of the peer_id in the state. The button executes the connect function when clicked, which initiates the connection between the peers.
renderNotConnected: function () {
    return (
        <div>
            <hr />
            <div className="mui-textfield">
                <input type="text" className="mui-textfield" onChange={this.handleTextChange} />
                <label>{this.props.opts.peer_id_label || 'Peer ID'}</label>
            </div>
            <button className="mui-btn mui-btn--accent" onClick={this.connect}>
                {this.props.opts.connect_label || 'connect'}
            </button>
        </div>
    );
},
On the other hand, the renderConnected function shows the file input and the list of files that were shared to the current user. Whenever the user clicks on the file input, it opens the file selection box. Once the user has selected a file, it fires off the onChange event listener which in turn calls the sendFile method which sends the file to the peer. Below it, we call either the renderListFiles method or the renderNoFiles depending on whether there are files currently in the state.
renderConnected: function () {
    return (
        <div>
            <hr />
            <div>
                <input type="file" name="file" id="file" className="mui--hide" onChange={this.sendFile} />
                <label htmlFor="file" className="mui-btn mui-btn--small mui-btn--primary mui-btn--fab">+</label>
            </div>
            <div>
                <hr />
                {this.state.files.length ? this.renderListFiles() : this.renderNoFiles()}
            </div>
        </div>
    );
},
The renderListFiles method, as the name suggests, is responsible for listing out all the files that are currently in the state. This loops through all the files using the map function. For each iteration, we call the renderFile function which returns the link for each file.
renderListFiles: function(){

    return (
        <div id="file_list">
            <table className="mui-table mui-table--bordered">
                <thead>
                  <tr>
                    <th>{this.props.opts.file_list_label || 'Files shared to you: '}</th>
                  </tr>
                </thead>
                <tbody>
                    {this.state.files.map(this.renderFile, this)}
                </tbody>
            </table>
        </div>
    );

},
Here’s the renderFile function which returns a table row containing the link to a file.
renderFile: function (file) {
    return (
        <tr key={file.id}>
            <td>
                <a href={file.url} download={file.name}>{file.name}</a>
            </td>
        </tr>
    );
}
Finally, we have the function that’s responsible for rendering the UI when there are no files yet.
renderNoFiles: function () {
    return (
        <span id="no_files_message">
            {this.props.opts.no_files_label || 'No files shared to you yet'}
        </span>
    );
},
Bringing Everything Together
We use the browserify command to bundle the code inside the src directory. Here’s the full command that you have to execute while inside the root directory of the project:
browserify -t [ babelify --presets [ es2015 react ] ] src/main.js -o js/main.js
Breaking it down, first we specify the -t option. This allows us to use a transform module. Here we’re using Babelify which uses the react preset and es2015 preset. So what happens is that first Browserify looks at the file that we specified (src/main.js), parses it and calls on Babelify to do its work. Babelify uses the es2015 preset to translates all the ES6 code to ES5 code. While the React preset transforms all the JSX code to plain JavaScript. Once Browserify has gone through all the files, it brings them together so it can run in the browser.
Points for Consideration
If you’re planning to use what you’ve learned in this tutorial in your own projects. Be sure to consider the following:
- Break down the
Filesharercomponent into smaller ones. You might have noticed that there’s a bunch of code inside theFilesharercomponent. Usually this isn’t the way you go about things in React. What you’d want to do is to break the project down into smaller components as possible and then import those smaller components. Using theFilesharercomponent as an example, we might have aTextInputcomponent for entering the peer’s ID, a List component for listing the files that we’re received and aFileInputcomponent for uploading files. The idea is to have each component fulfill only a single role. - Check if WebRTC and File API are available in the browser.
- Handle errors.
- Use Gulp for bundling the code when you make changes to the files and live reload to automatically reload the browser once it’s done.
Conclusion
That’s it! In this tutorial you’ve learned how to work with PeerJS and React in order to create a file sharing app. You’ve also learned how to use Browserify, Babelify and the Babel-React-preset to transform JSX code into JavaScript code that can run in browsers.